Configuring hosts with tags
Tags in Managed Nebula can be created on-the-fly when creating hosts or explicitly via the Tags page, and are used to identify hosts by their various facets (e.g. region:us-west-1, os:windows, or owner:quality-assurance) as well as to assign config to hosts. This guide will walk you through configuring hosts by tags.
As you roll Managed Nebula out to your hosts, you may discover that some hosts benefit from a bit of extra configuration. For example, you may notice that nodes which run Docker will, by default, advertise their local Docker networking IPs to the Lighthouse - IPs which will never be routable from another node - leading to inefficient handshakes and in some cases, failures to communicate altogether. Or, you may want to ensure that nodes in a specific datacenter (DC) only ever speak over their local private network. For these use cases and more, tags are a great way to apply this config to your hosts in a reusable manner.
Tag basics
Creating tags
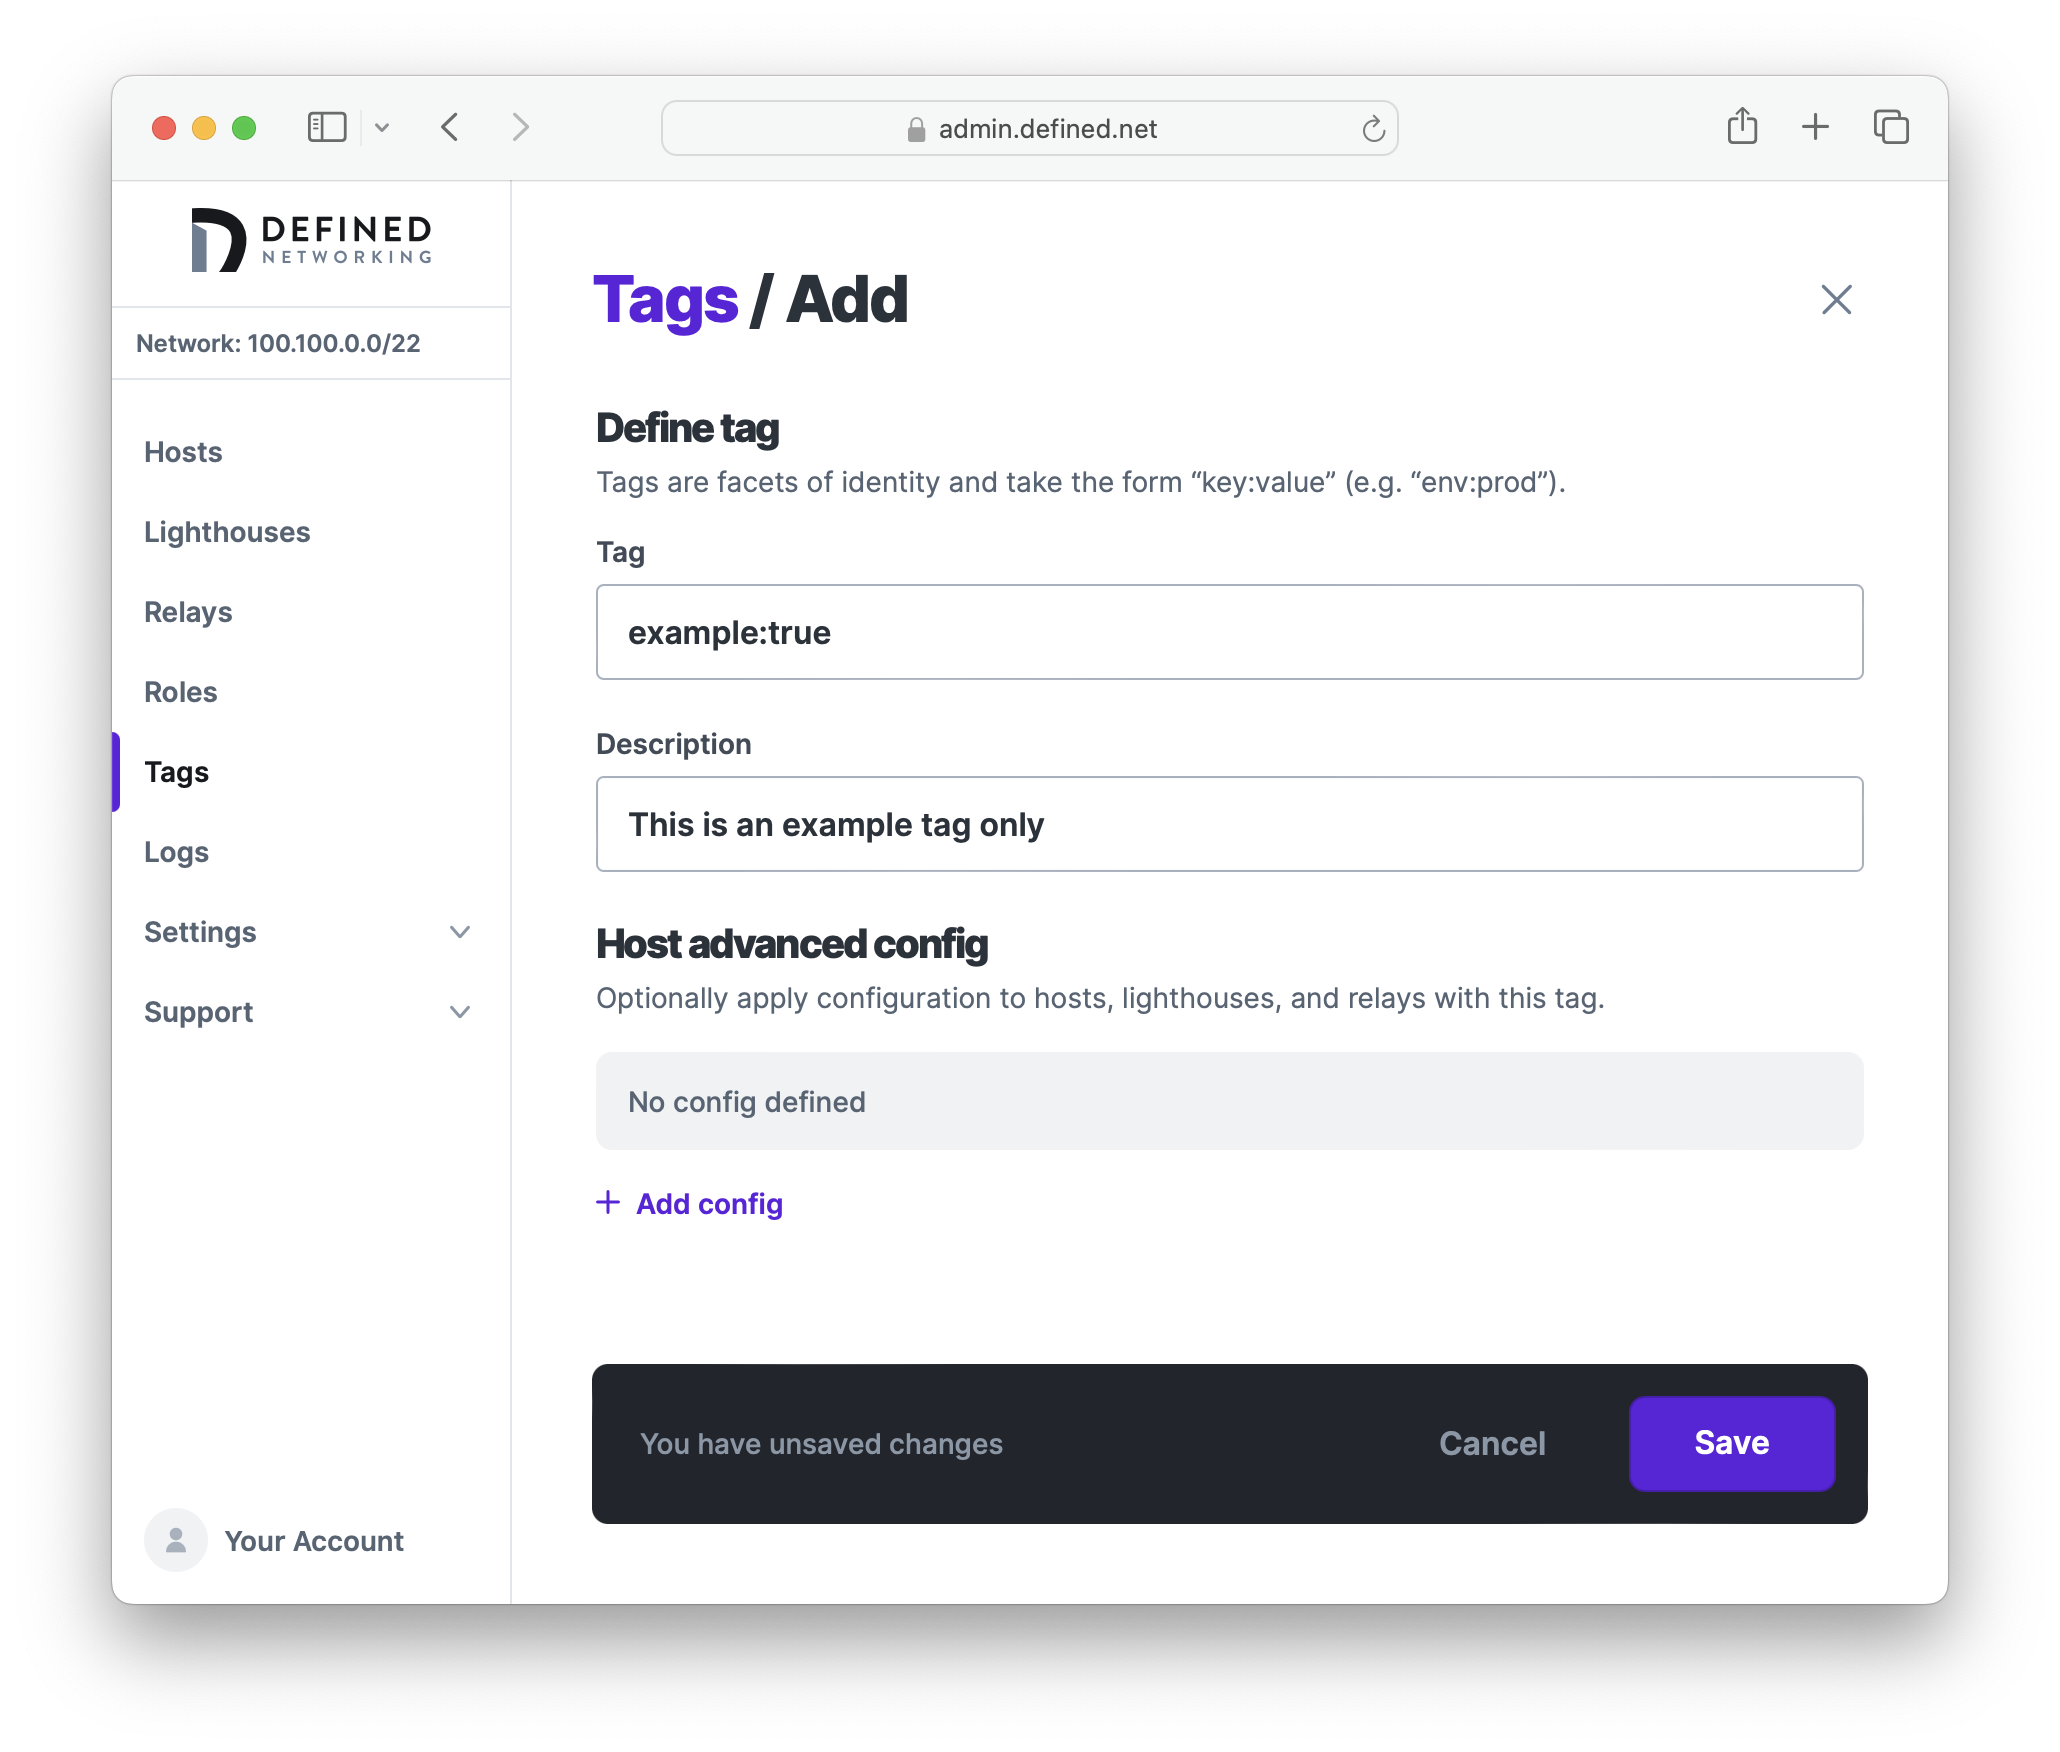
To manually create a tag, visit the Tags page of the Defined Networking admin panel. Let's create an example tag called example:true by clicking on the Add button on the top right of the page.
Tags always consist of a key and value, separated by a colon. You can optionally give the tag a description in order to clarify the tag's purpose - we recommend including a description that will help others on your team understand when to apply the tag to new hosts.

Using Host advanced config, you can specify config which will be applied to hosts that have the tag assigned. Let's set the Logging > Level option to Debug now.
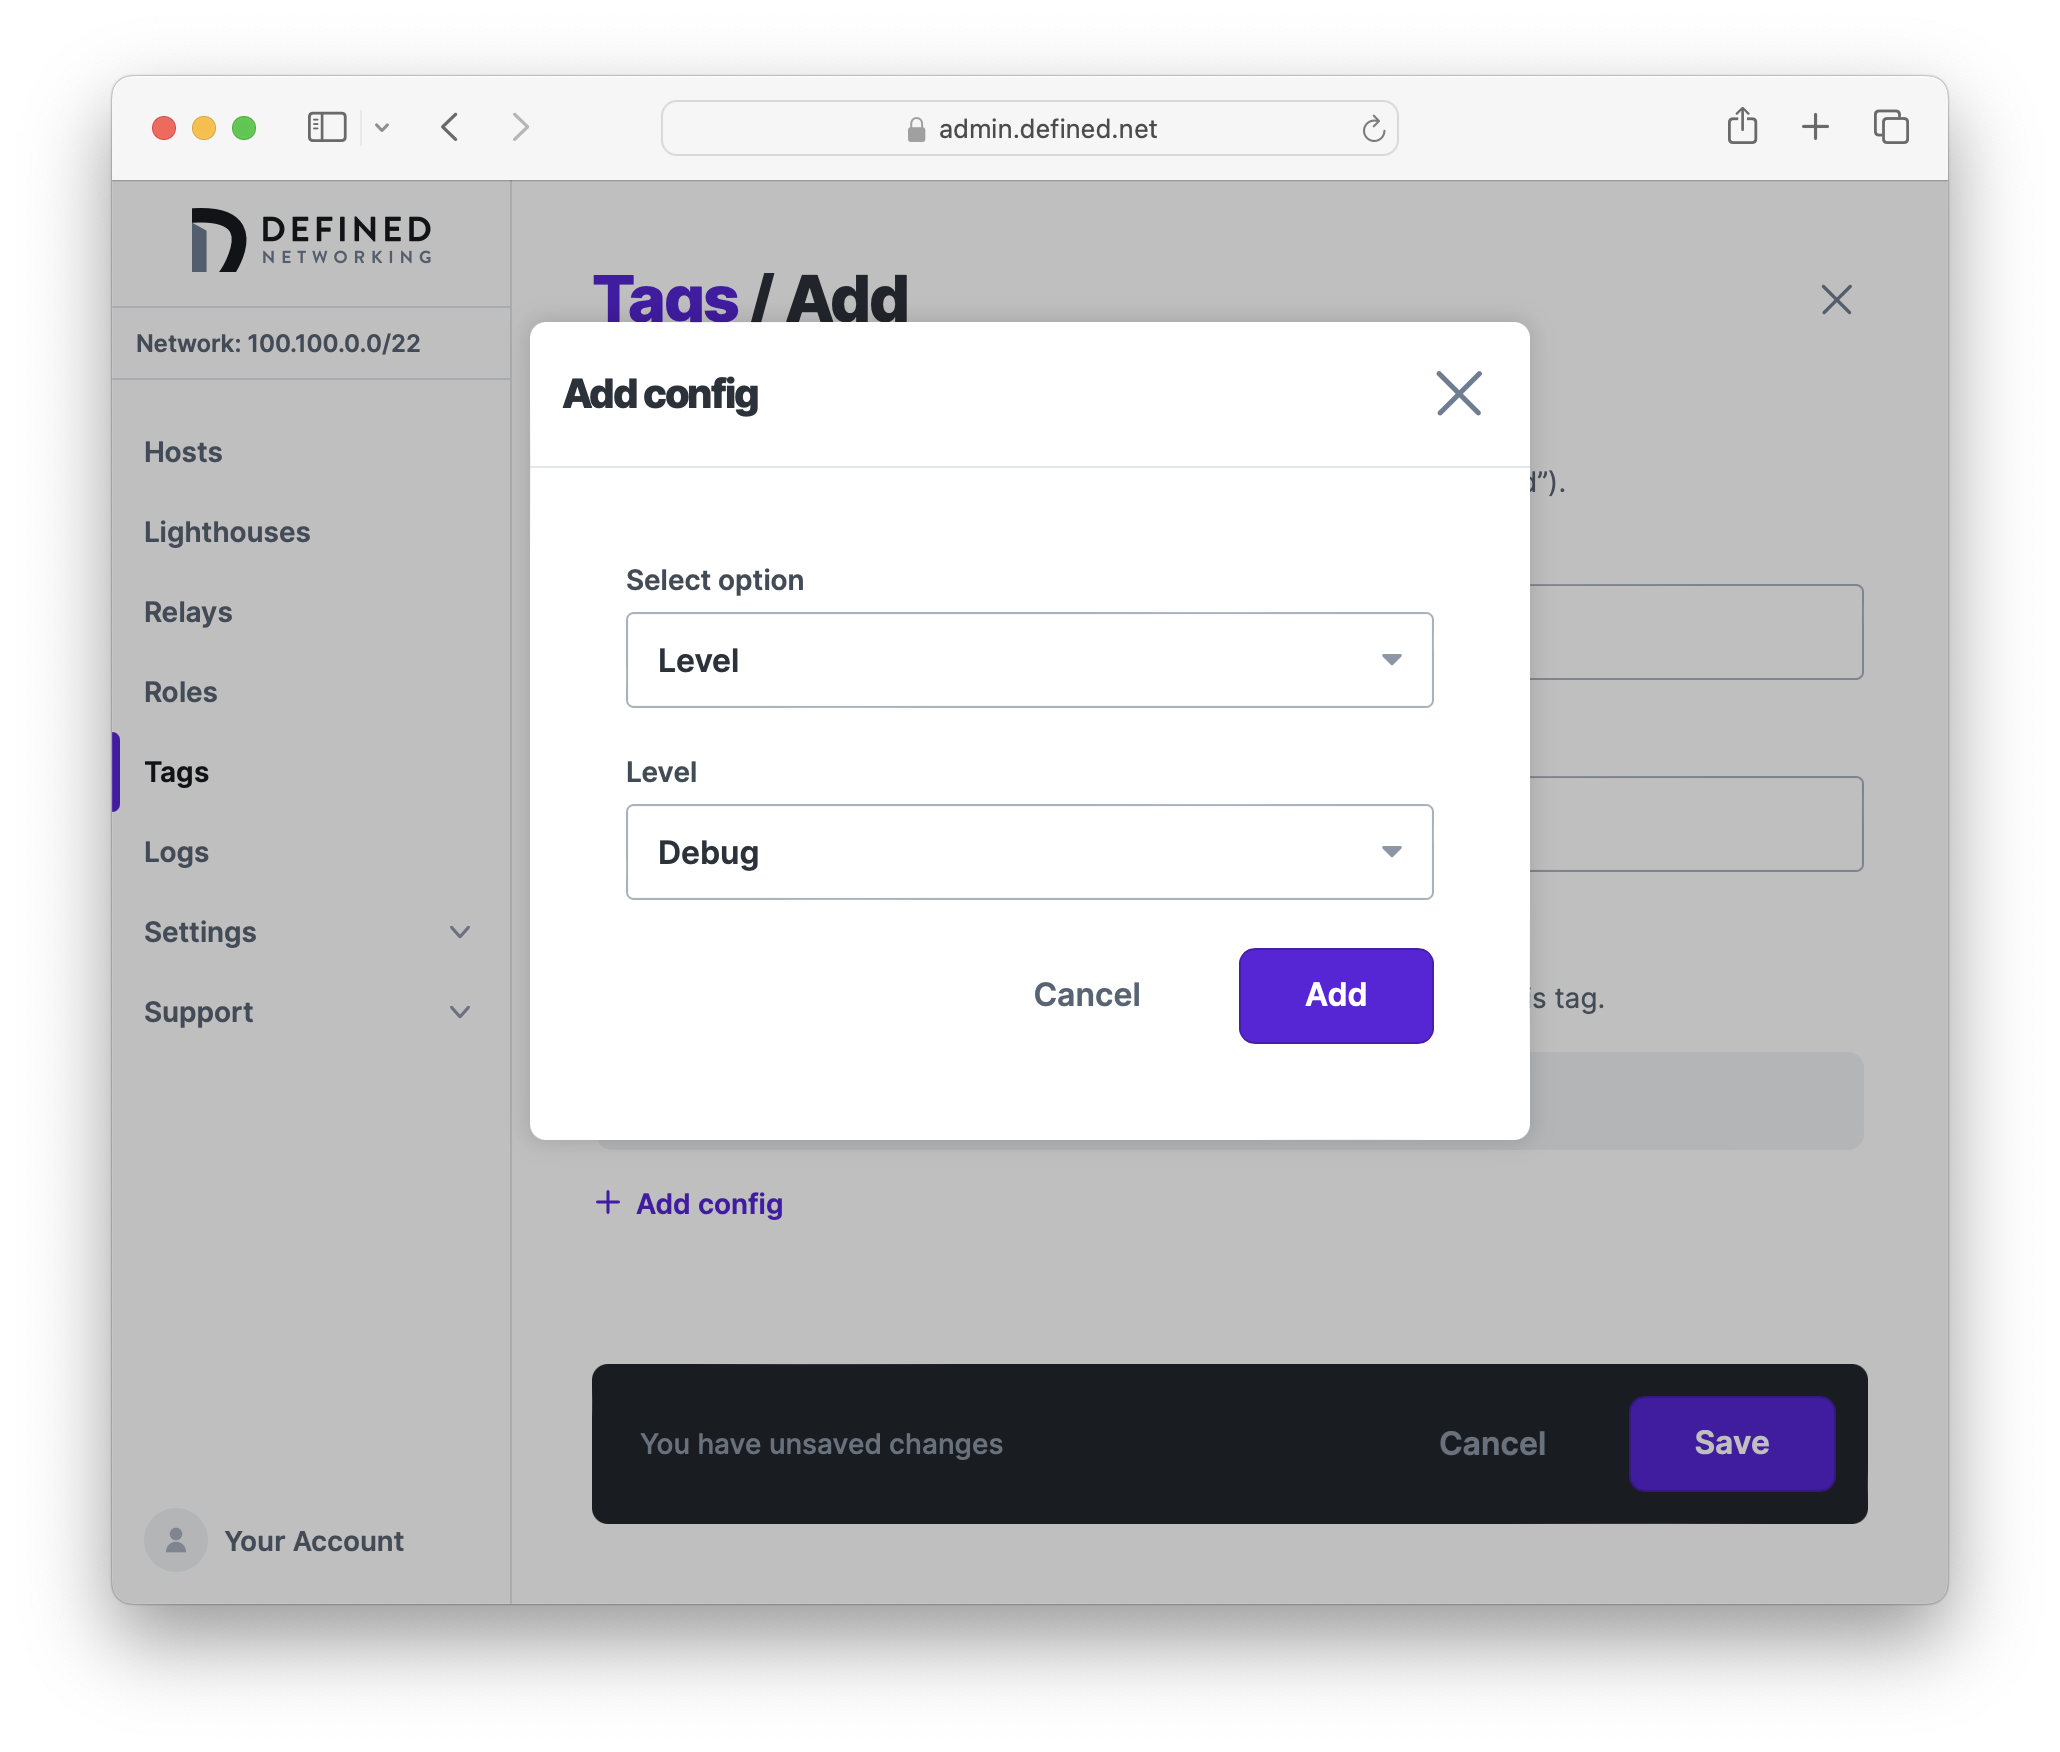
When you're all finished, click "Save" to create the tag.
Assigning tags
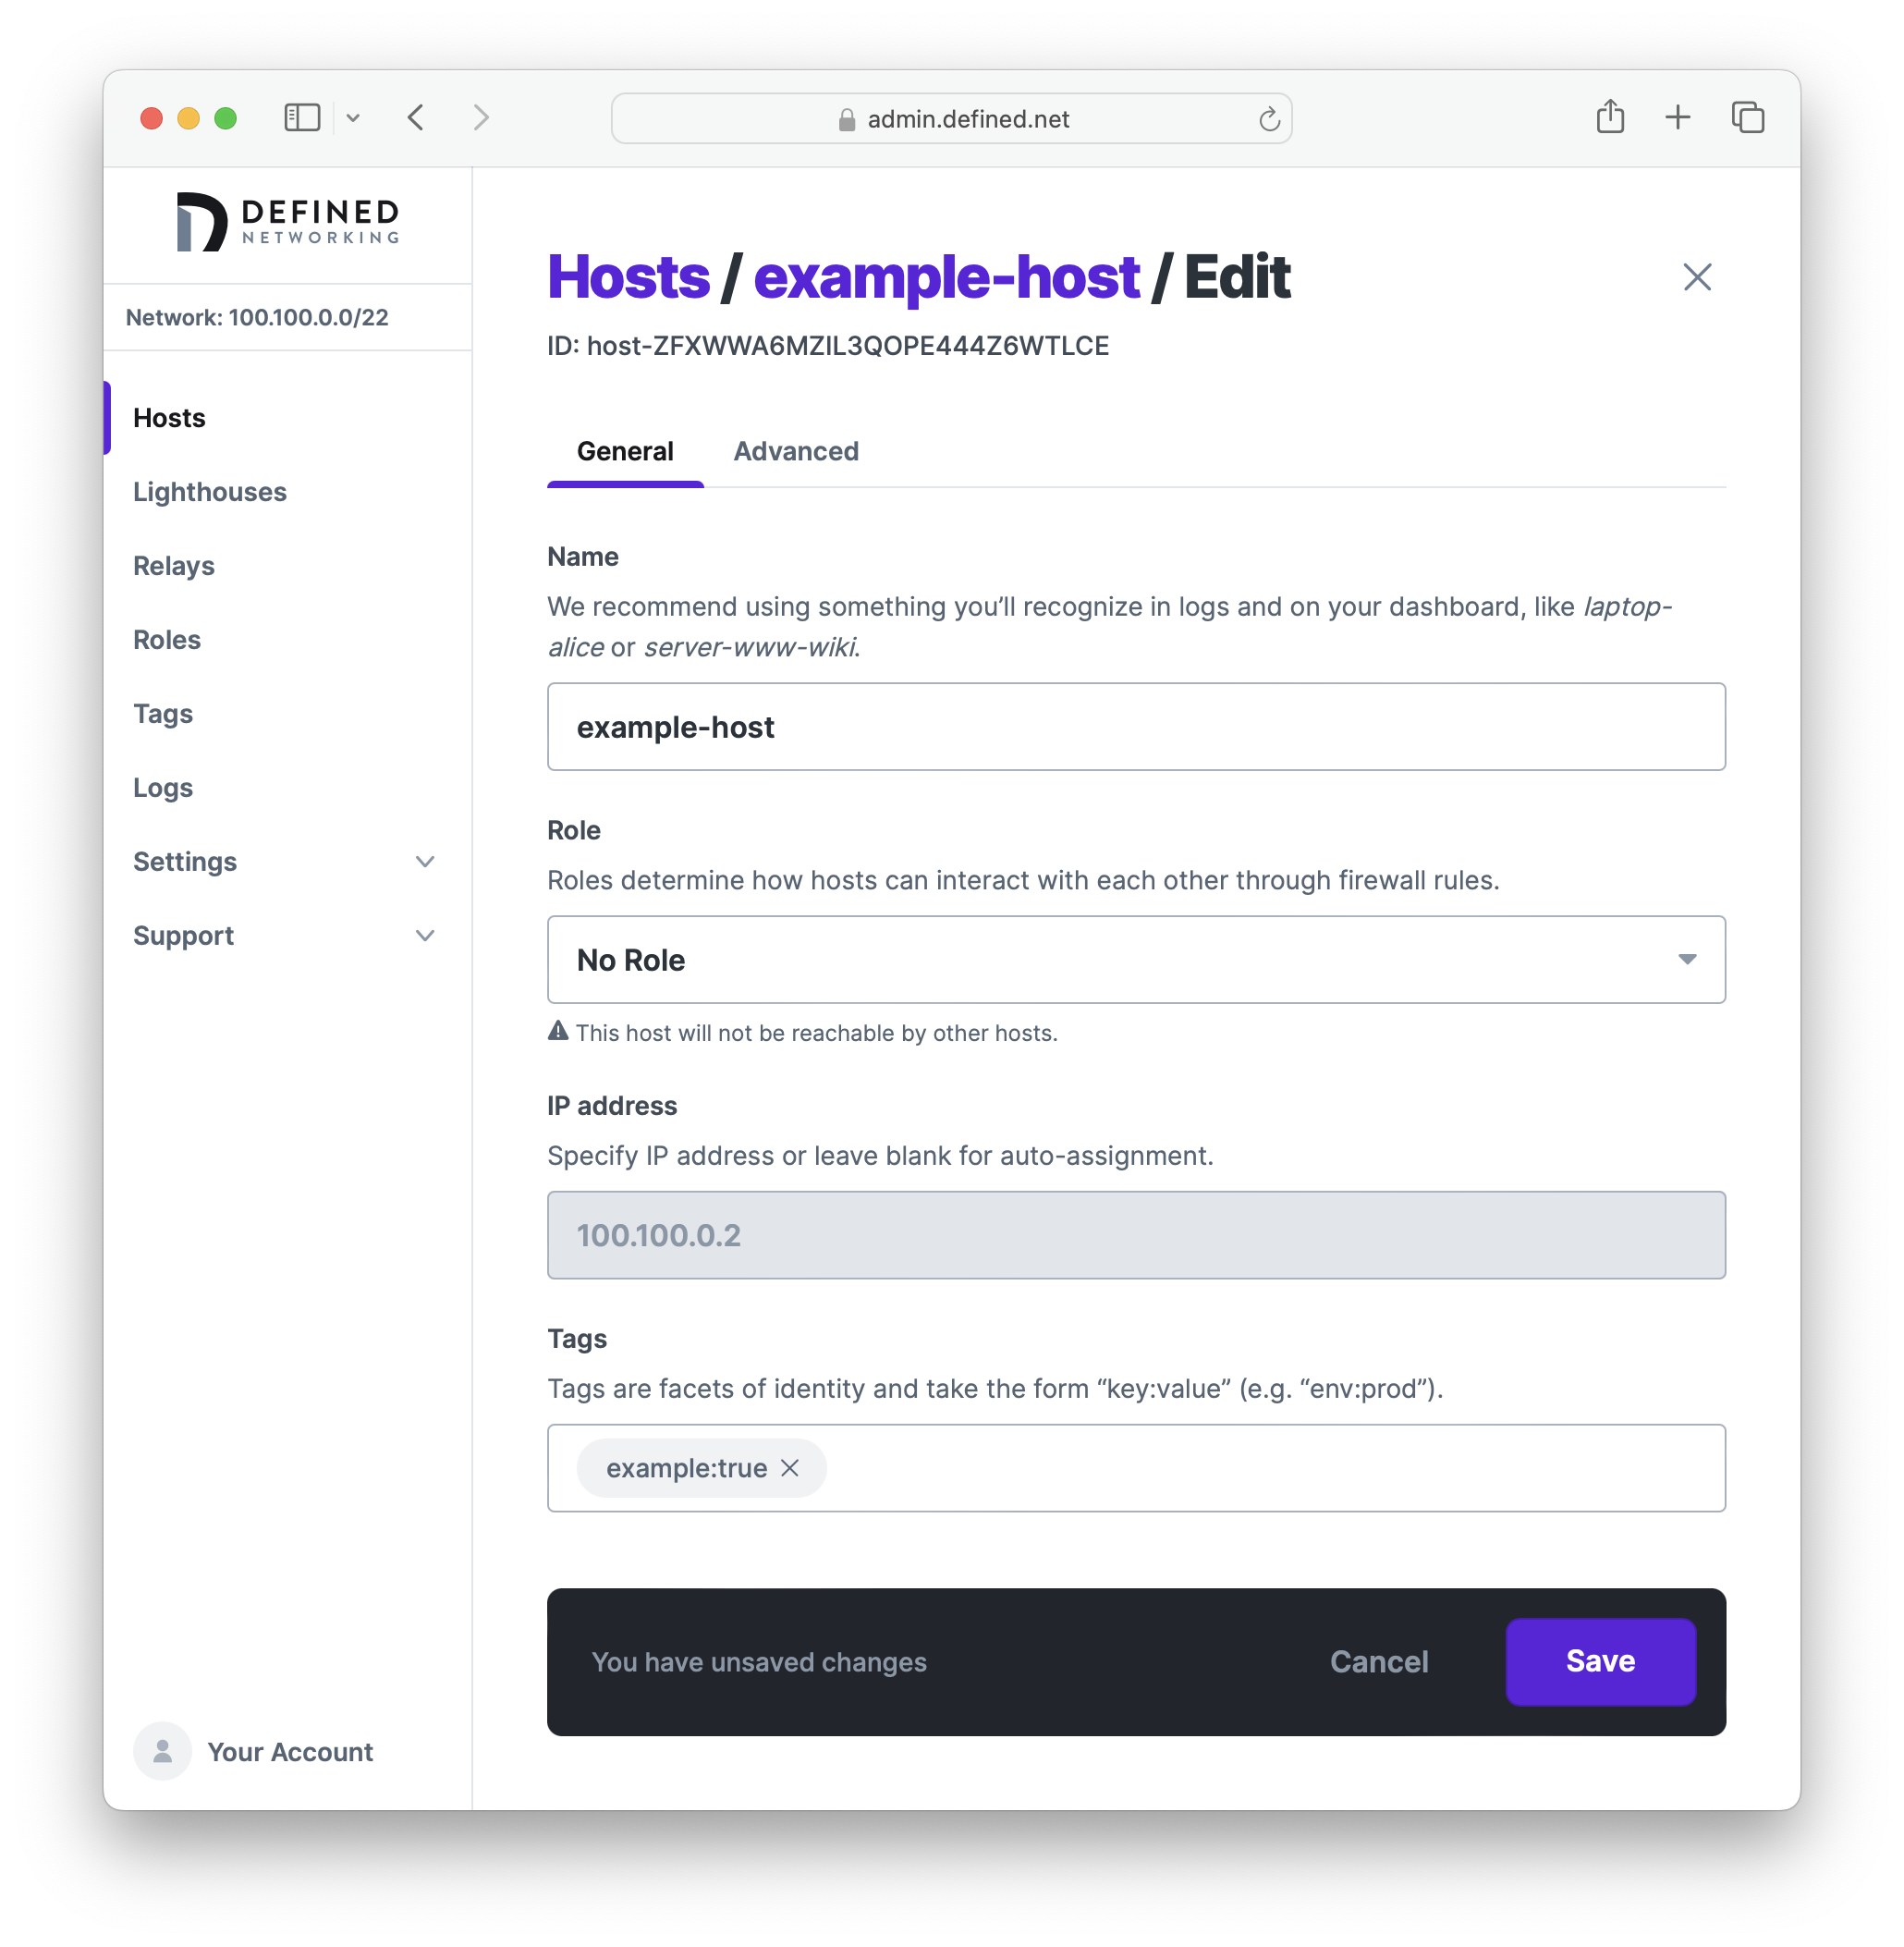
Now that we have a tag carrying configuration, we can assign it to both existing and new hosts. To assign the tag to an existing host, find the target host in your Hosts list, click the three dots on the far right of its row, and choose Edit. Find the Tags field in the form and add example:true.
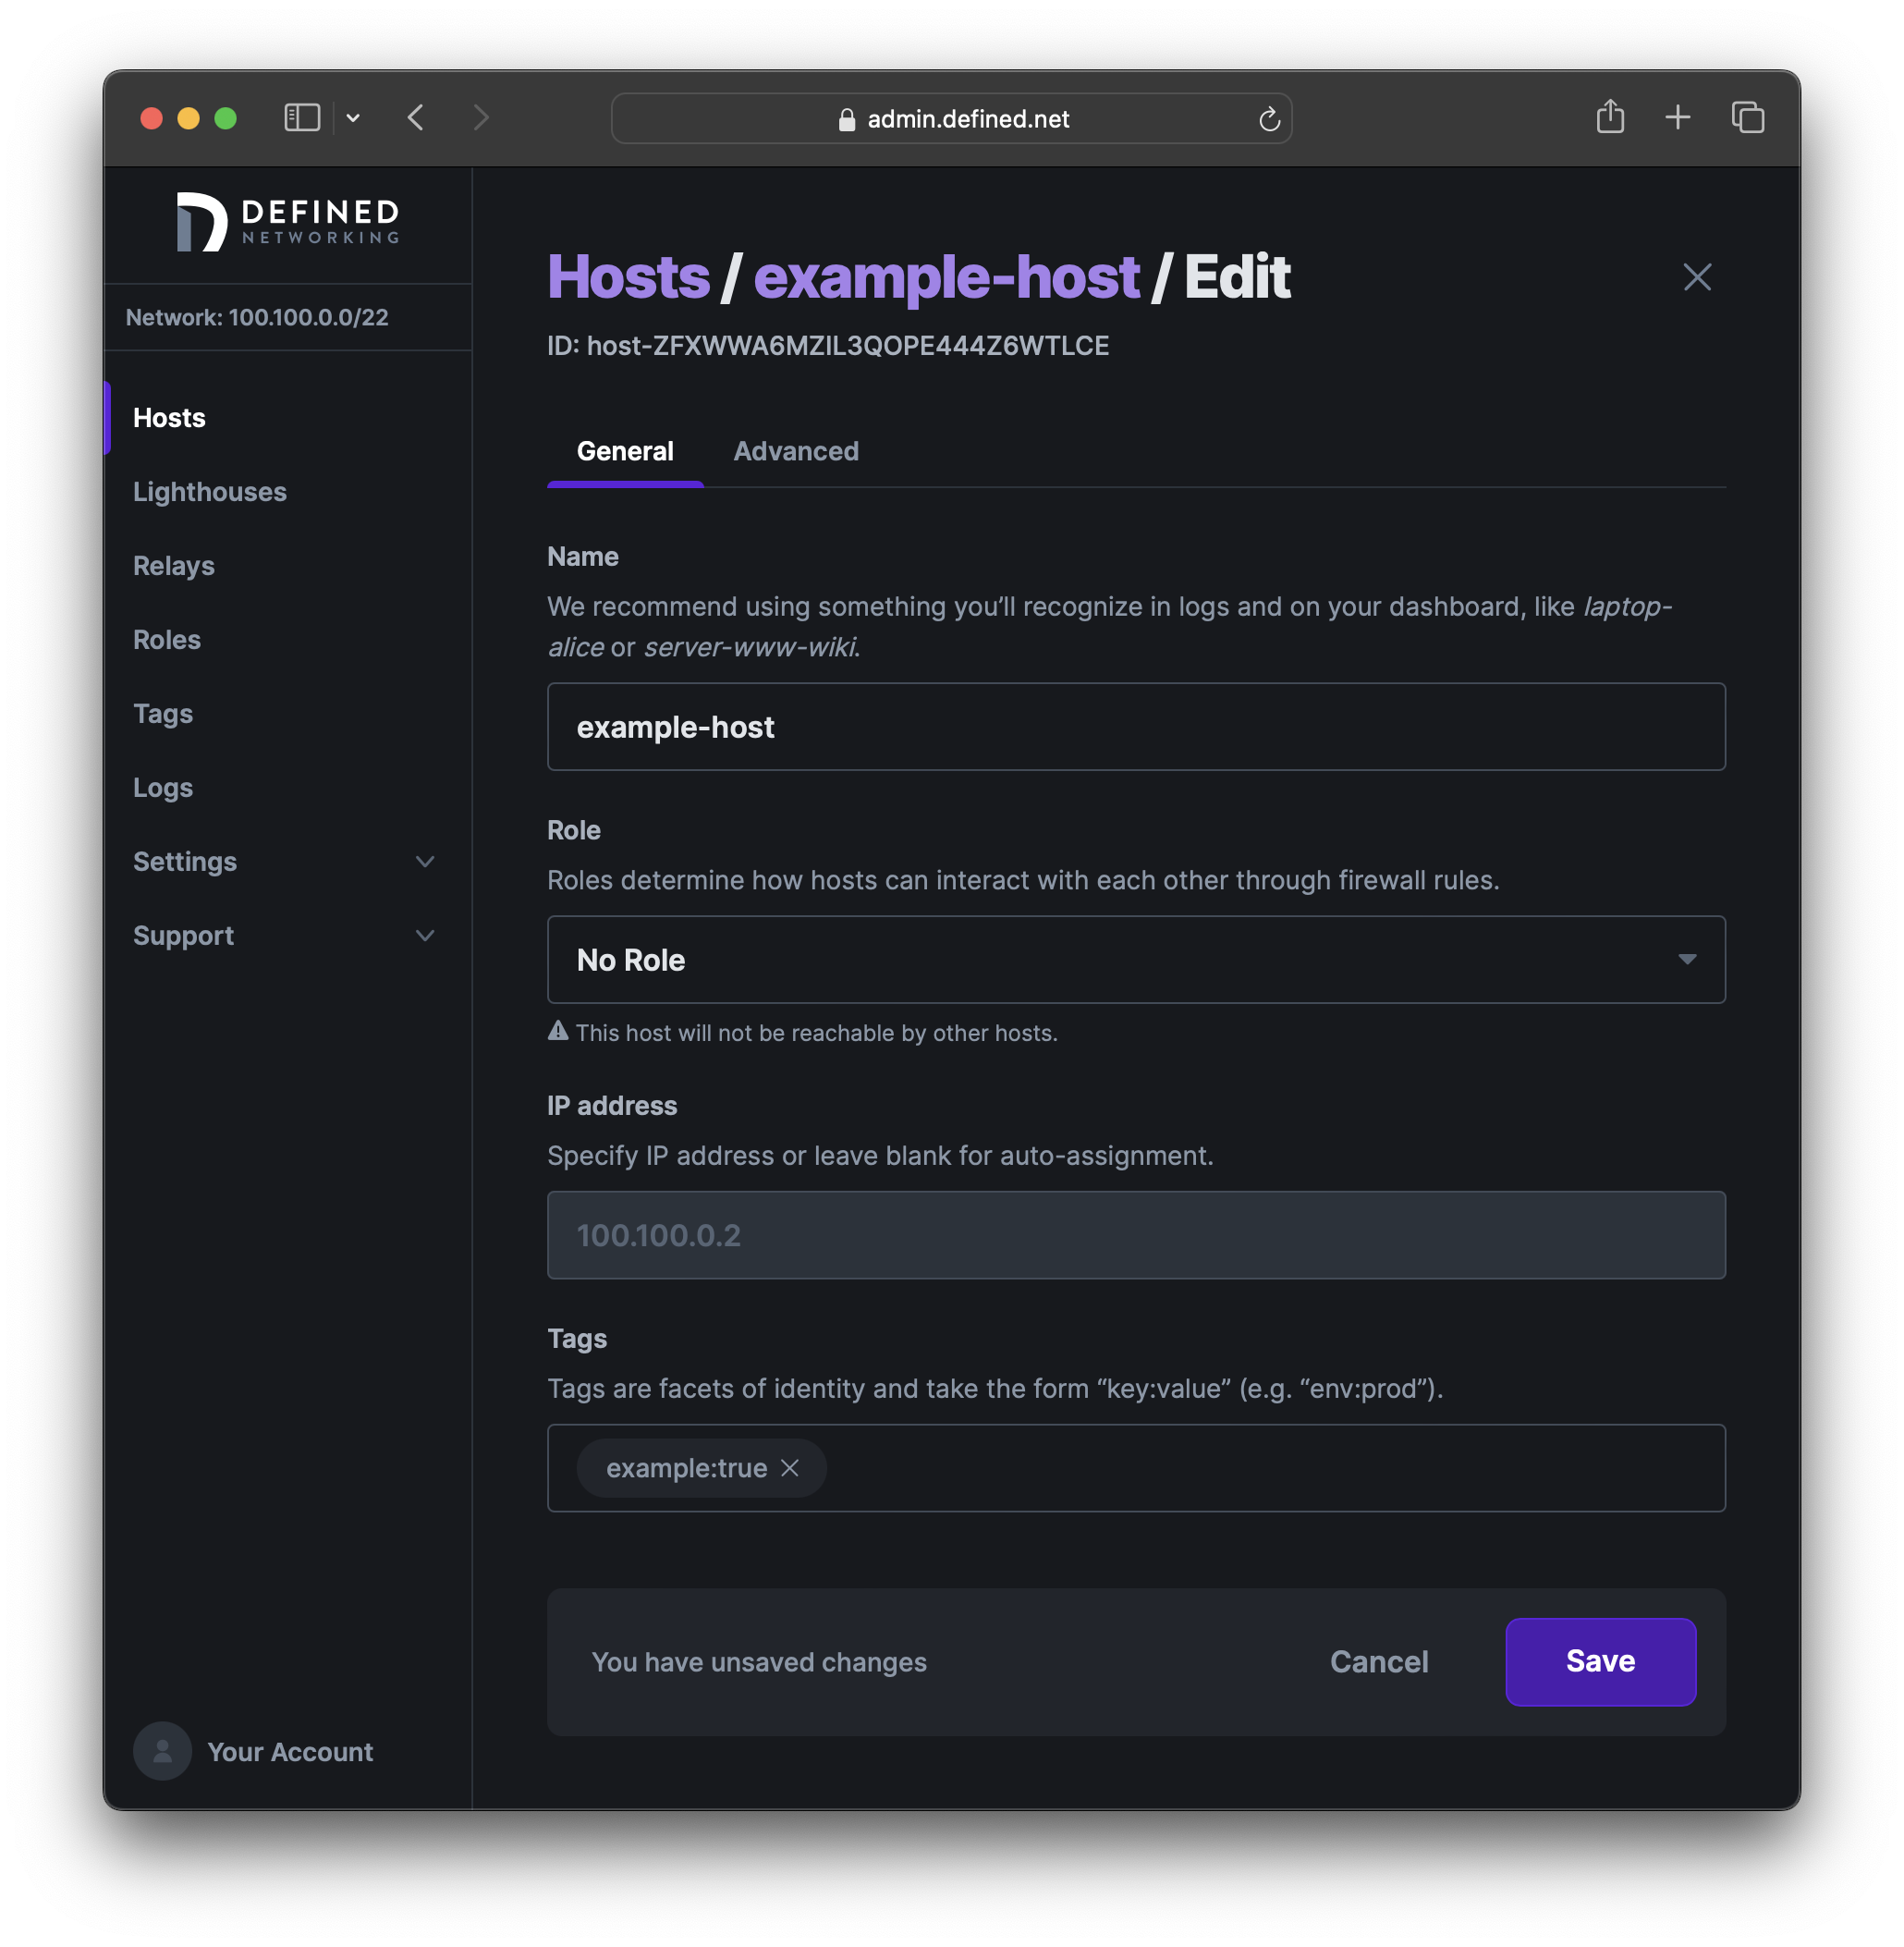
Once the host is saved, it will automatically fetch a new configuration from the server. You may view the DNClient logs on the host to verify that it is now in debug mode.
For new hosts, simply specify the tag at host creation time through the form in the admin panel or in the JSON payload of the create host API request.
Tag precedence
Config specified on hosts always take precedence over tags. However, since hosts can be assigned many tags, you may find yourself in a situation where a host is assigned two tags with conflicting config values. In this case, the tag priority is used to determine which value will prevail.
As a rather contrived example, let's assume you have two tags assigned to a single host: debug:true and debug:false. The former sets the "Logging > Level" to "debug" while the latter sets the same option to "info." So, which value will actually be set?
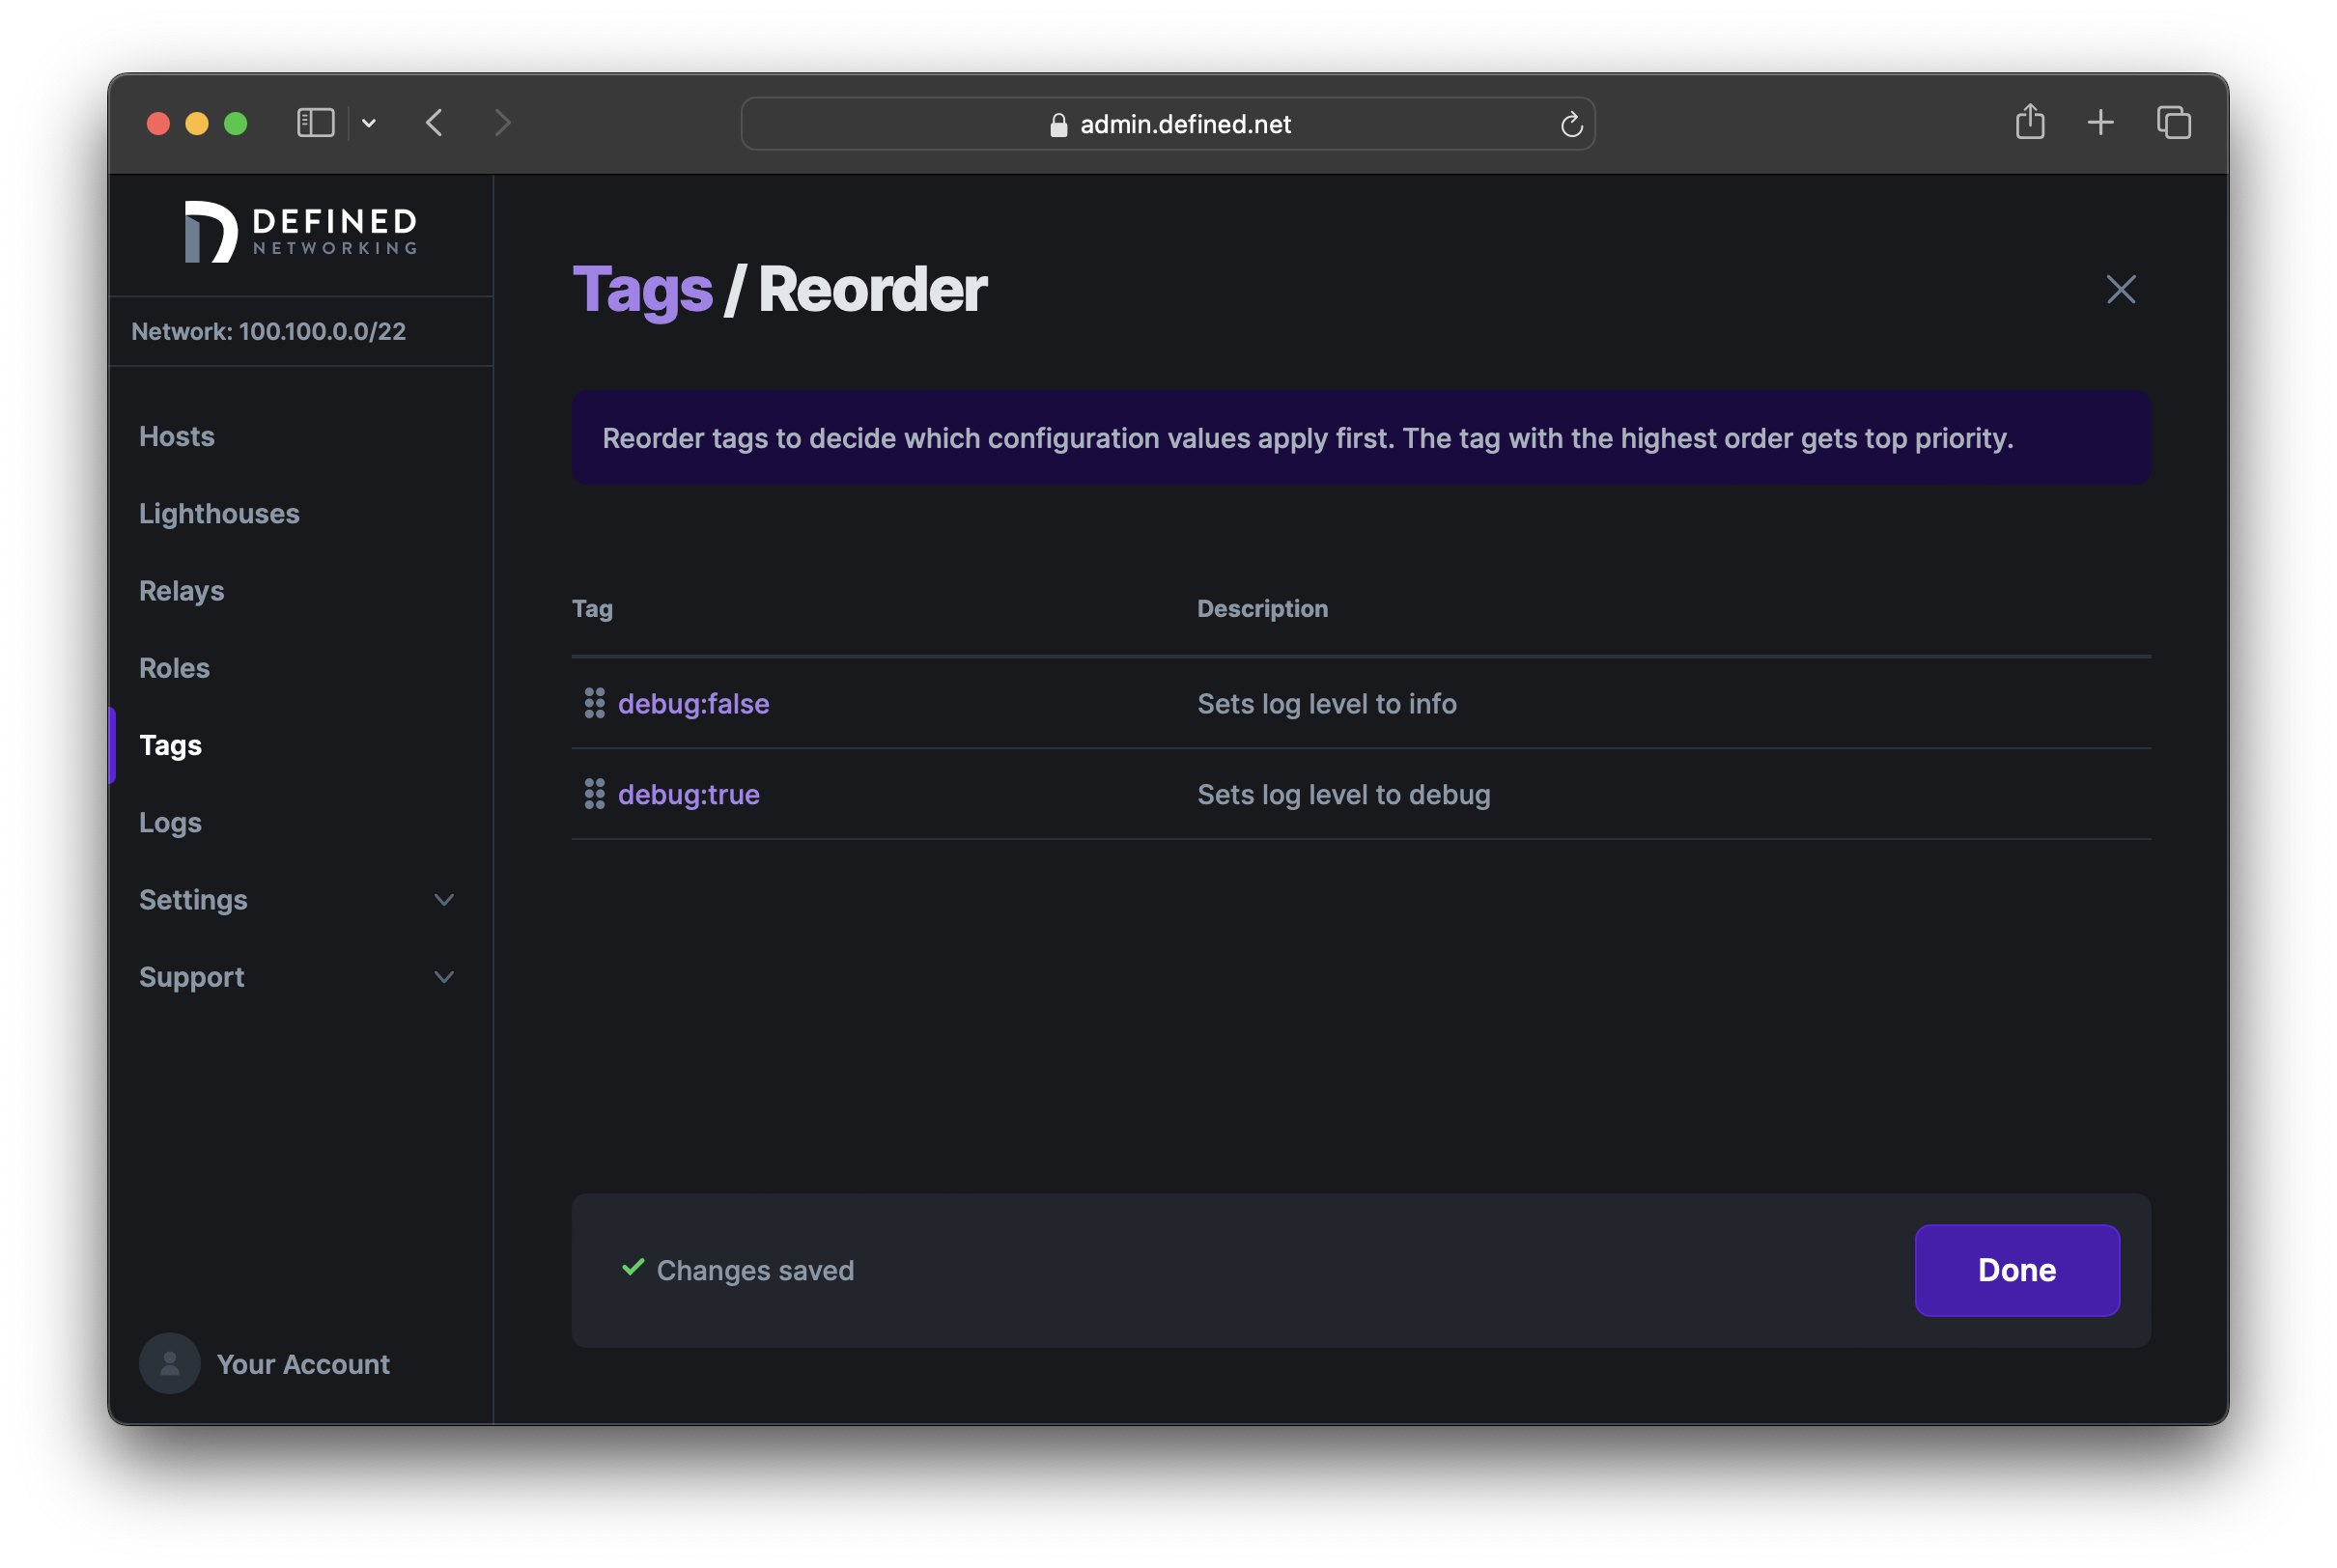
We can check which tag a higher precedence by clicking the "Reorder" button at the top right of the Tags page. Since debug:true is listed before debug:false, its config has a higher precedence and so a host assigned both tags will be set to "debug" log level.
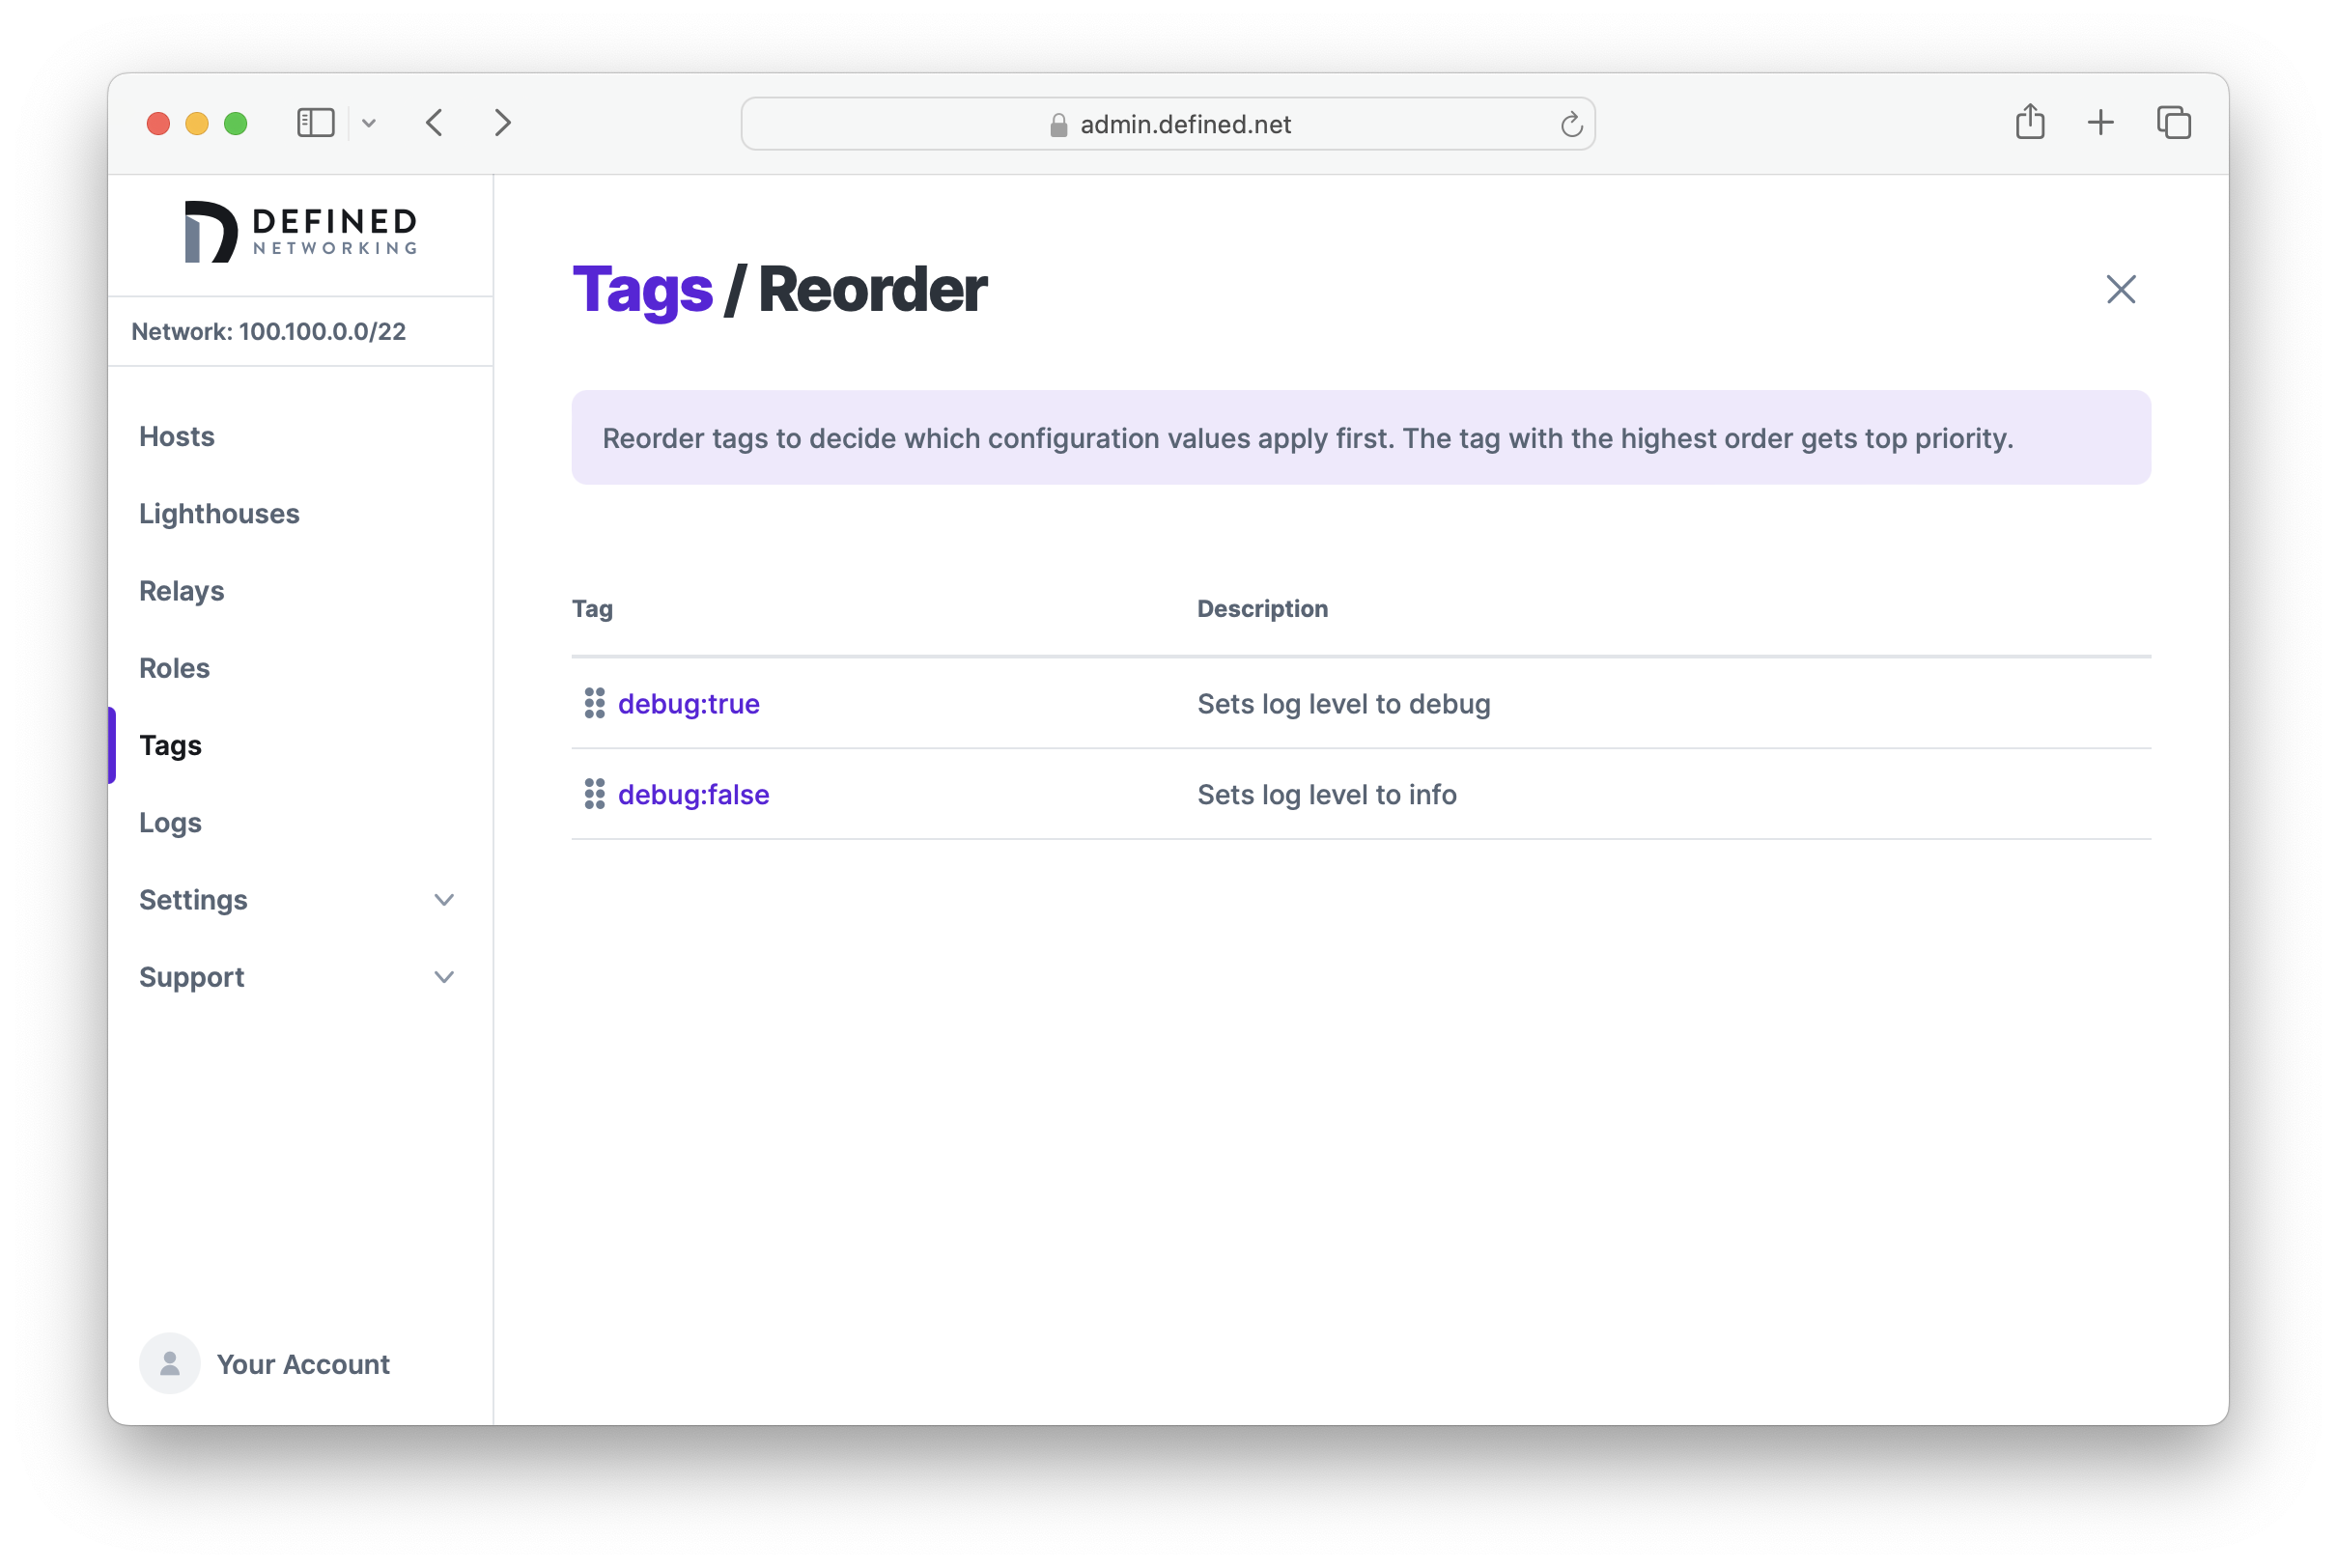
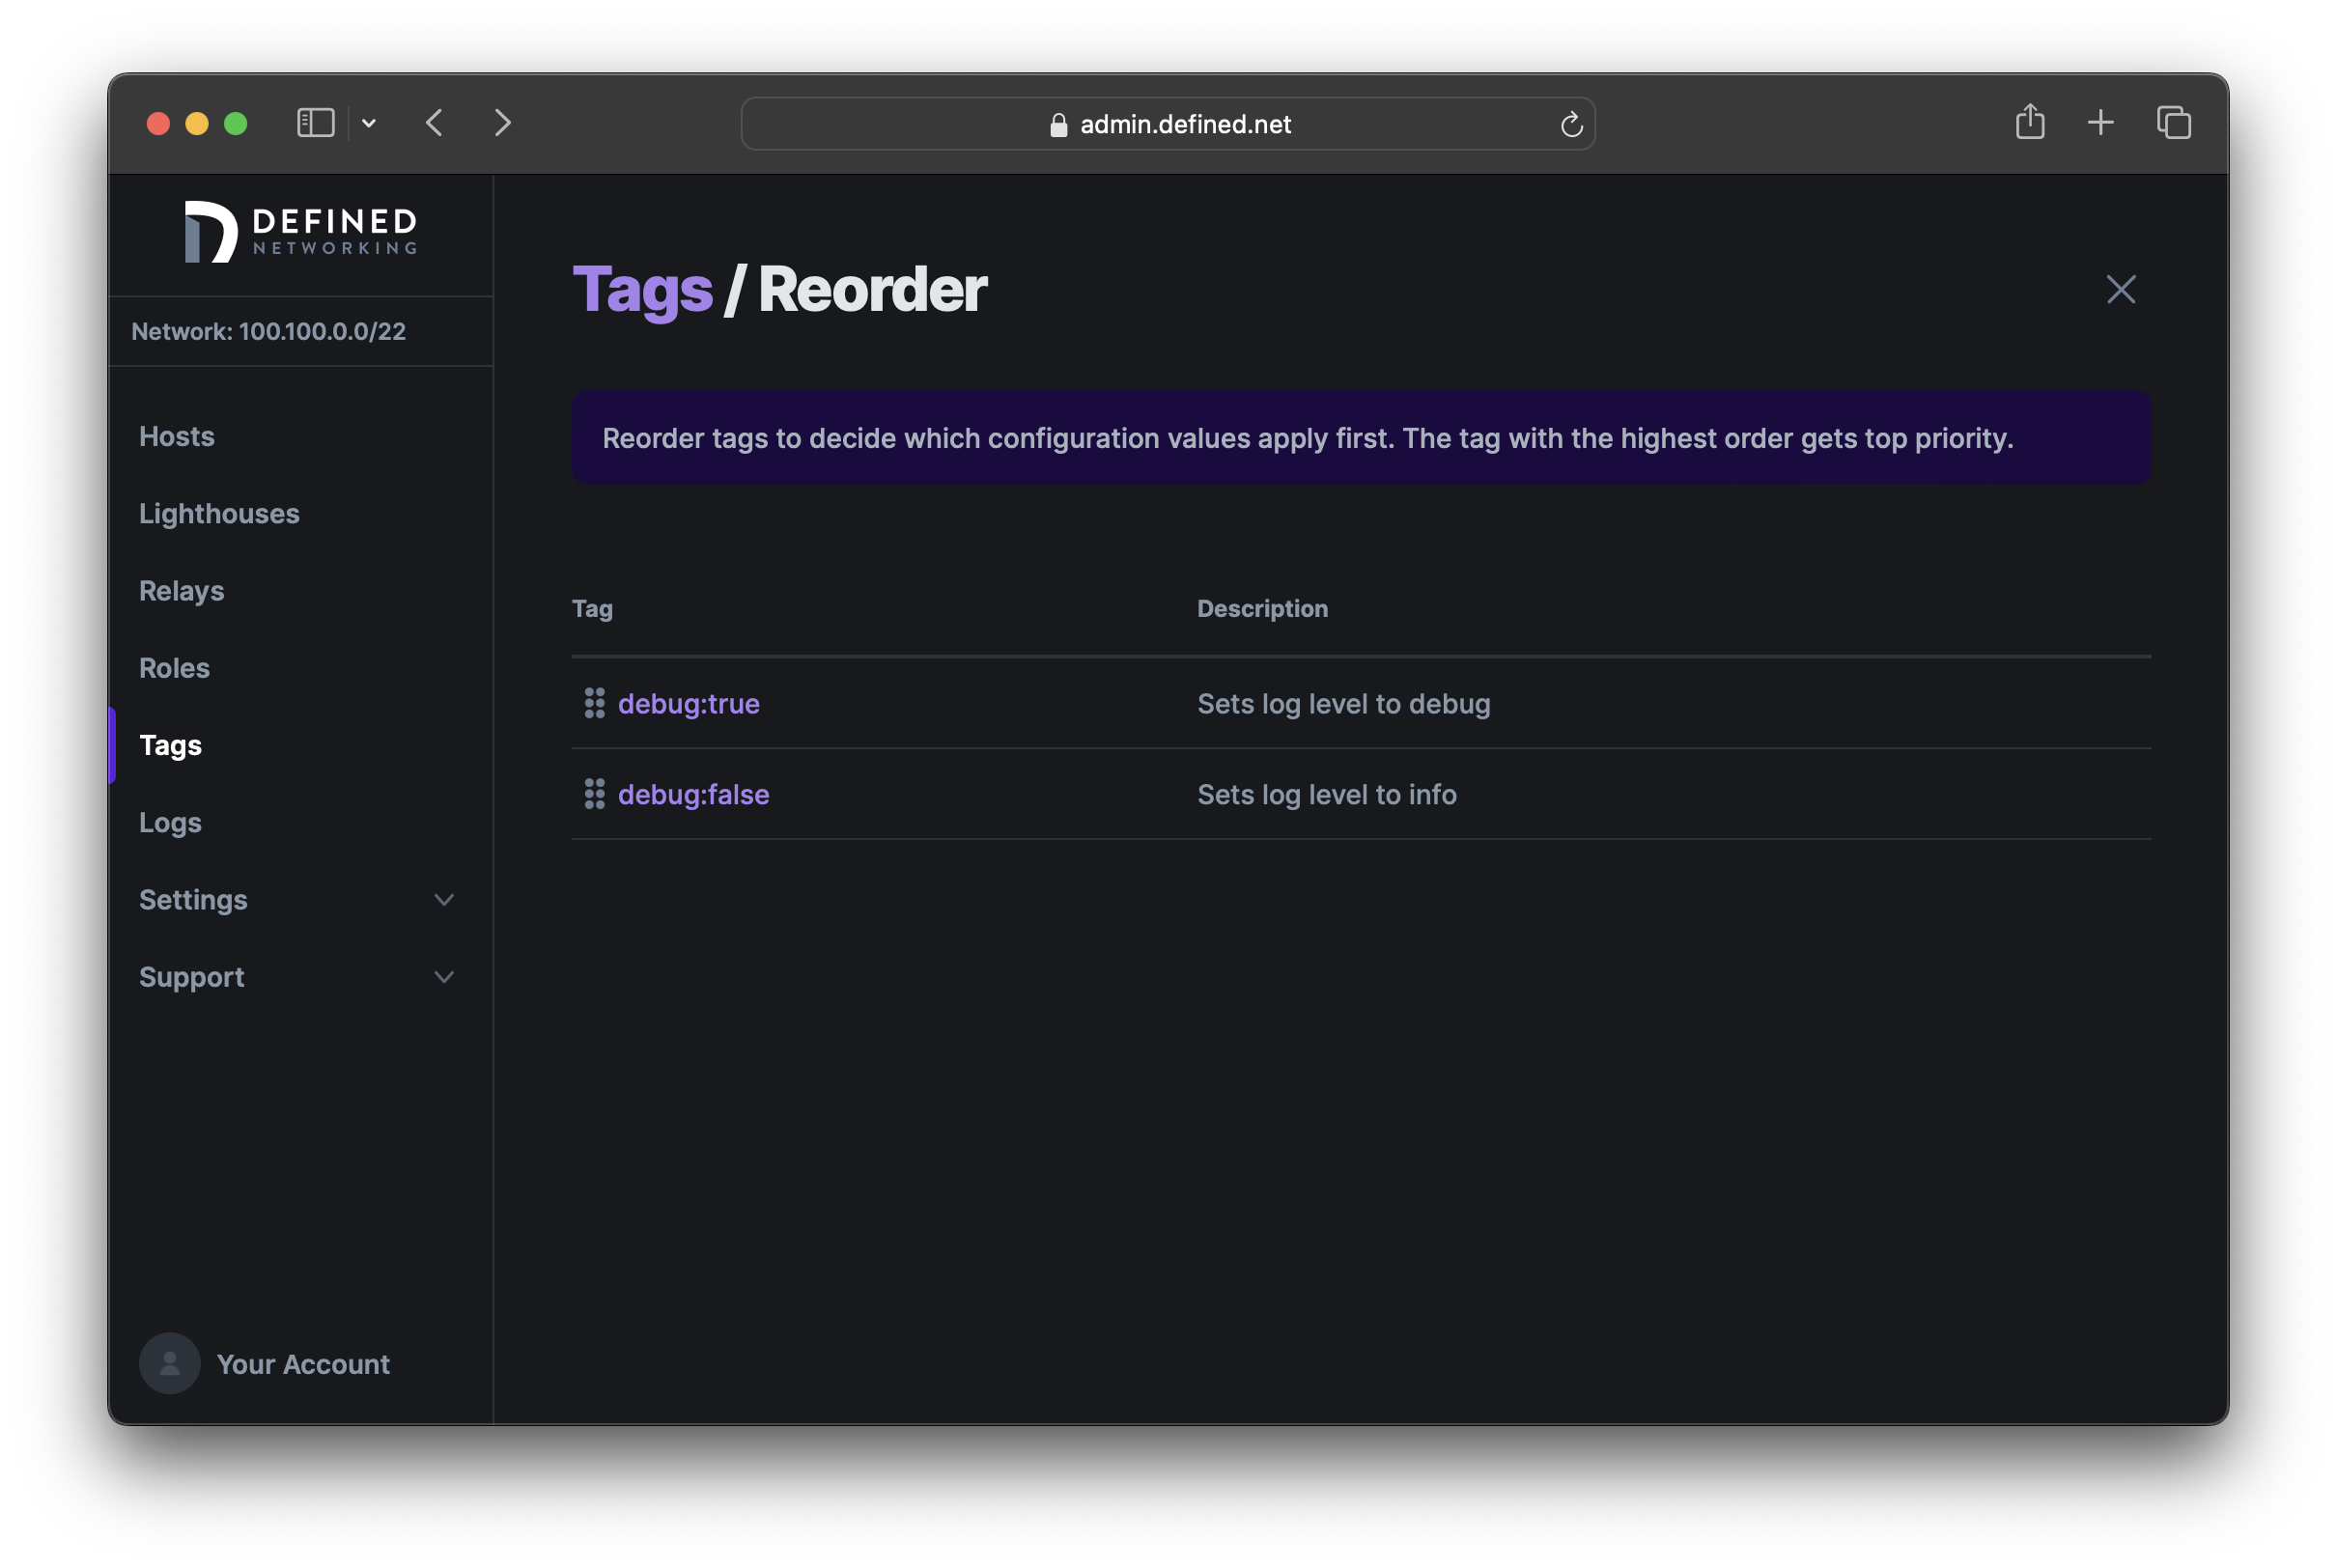
Let's reorder the tags now so that debug:false has a higher precedence.
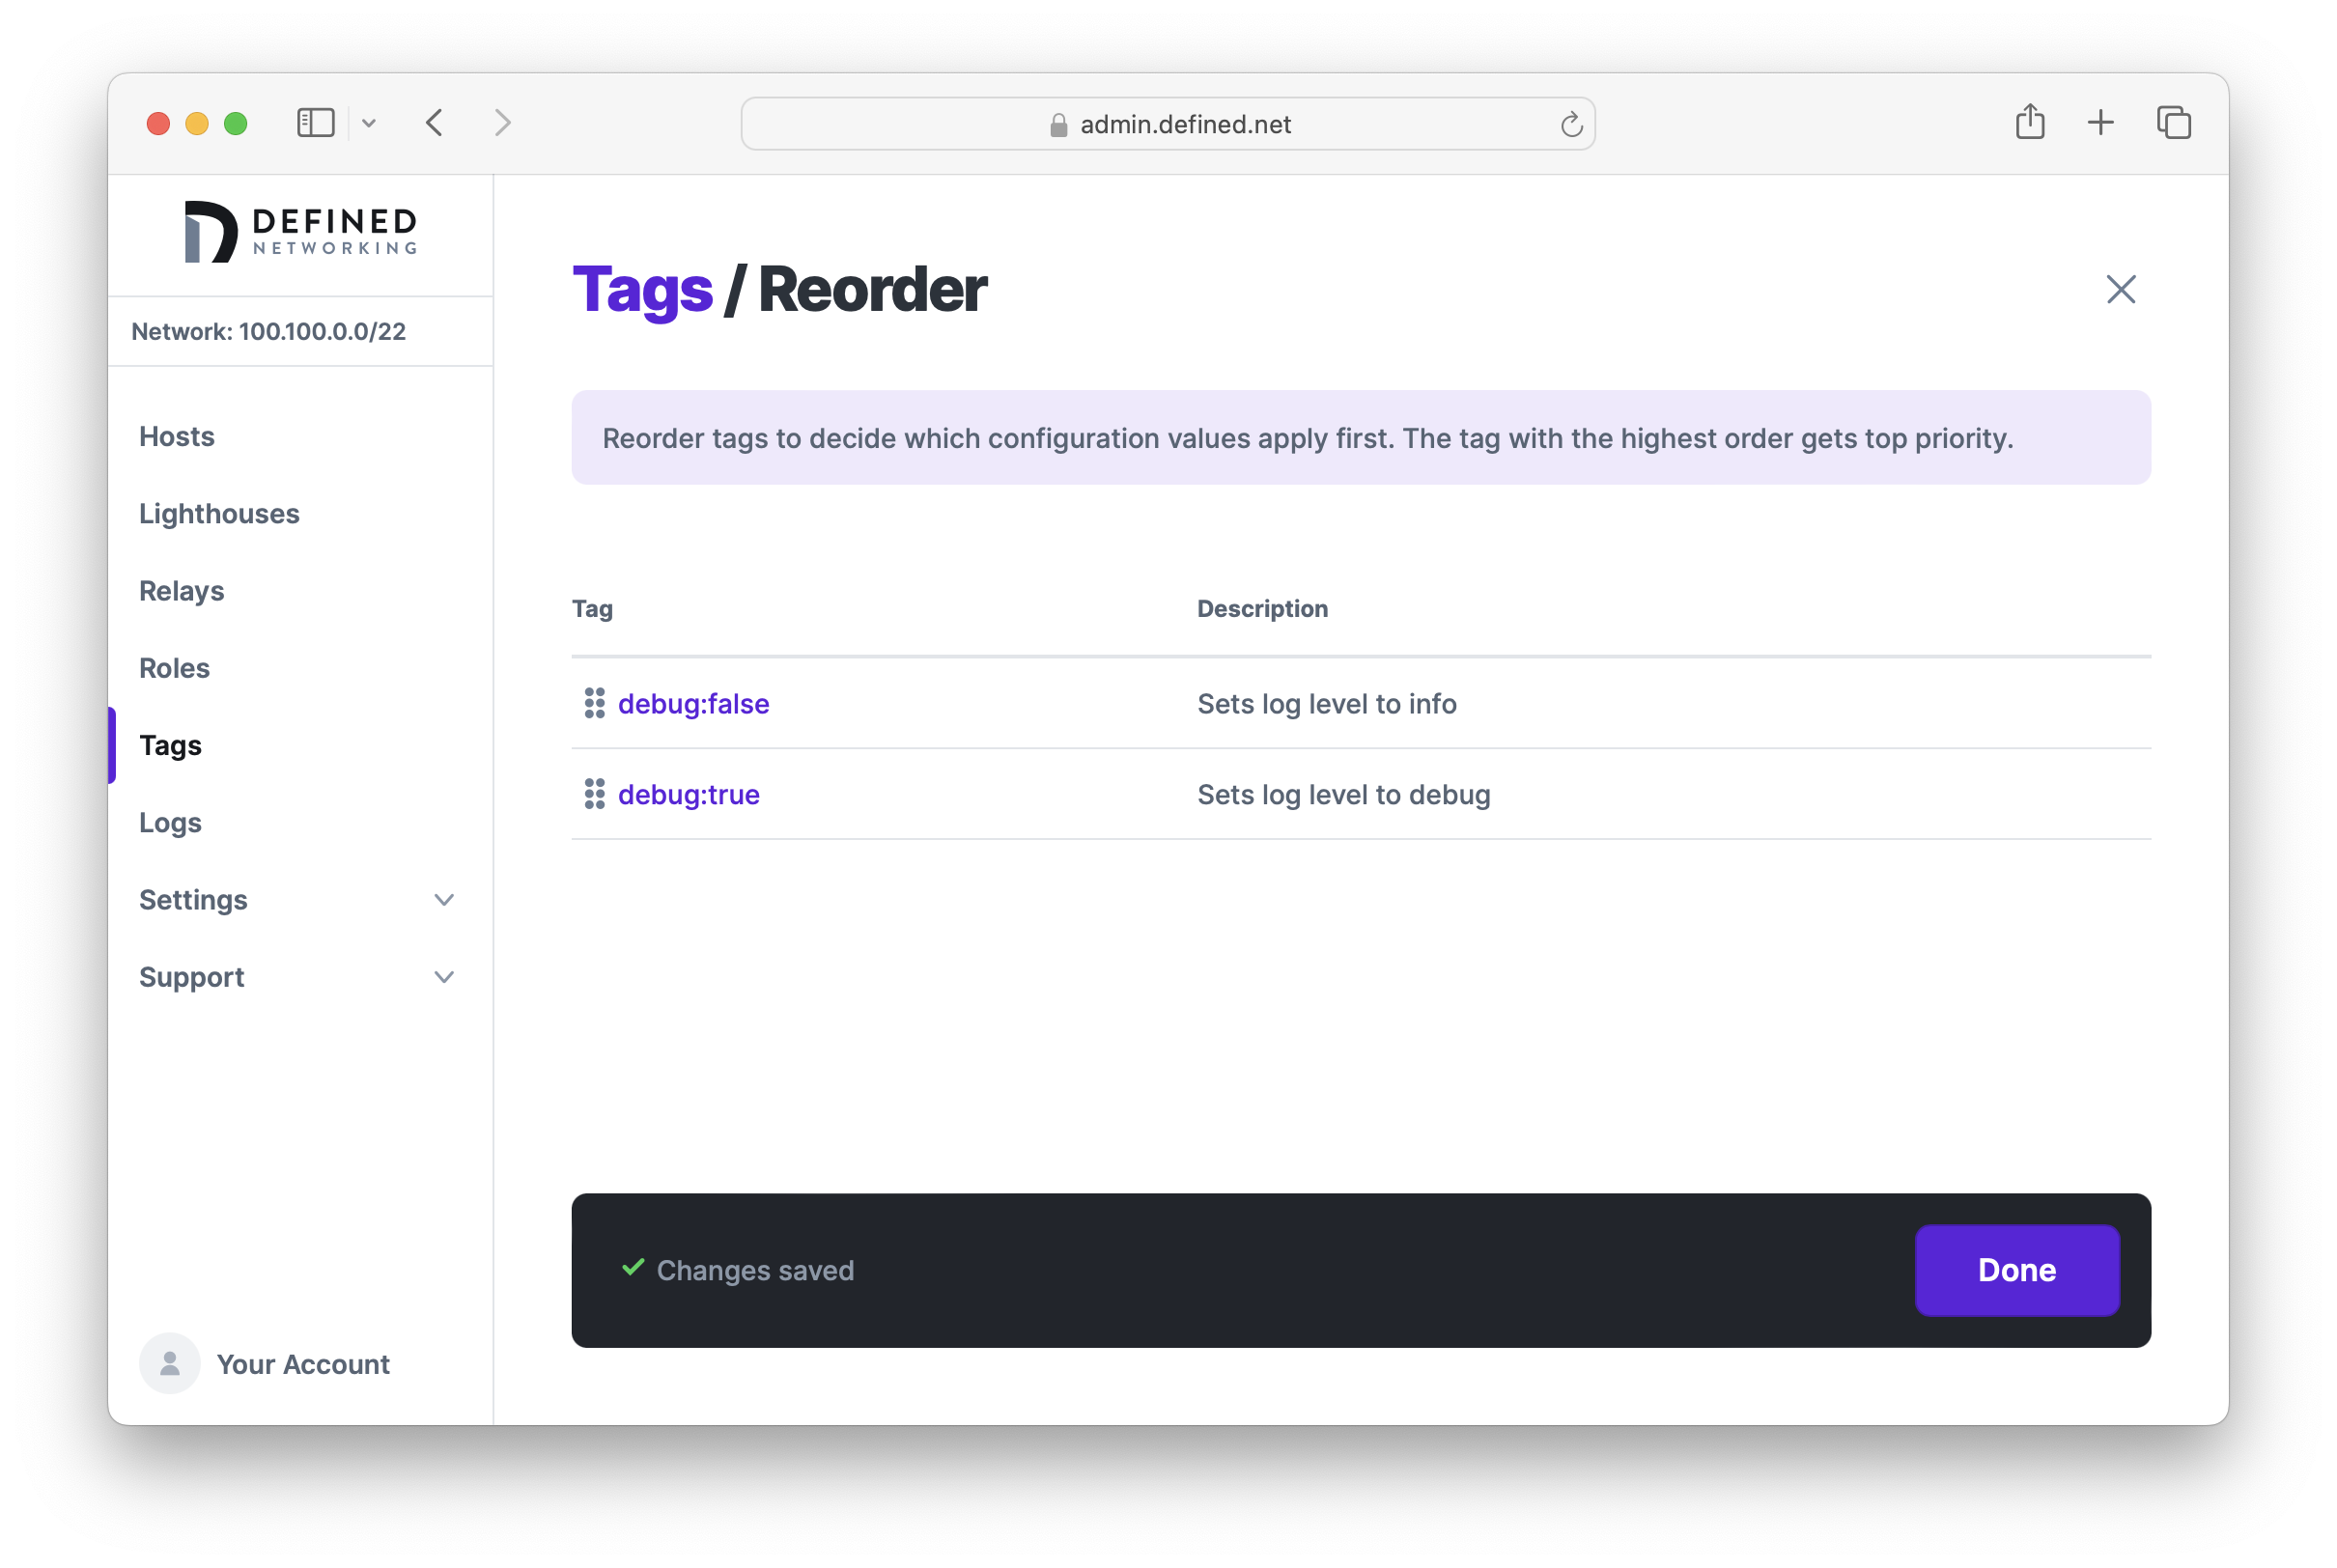
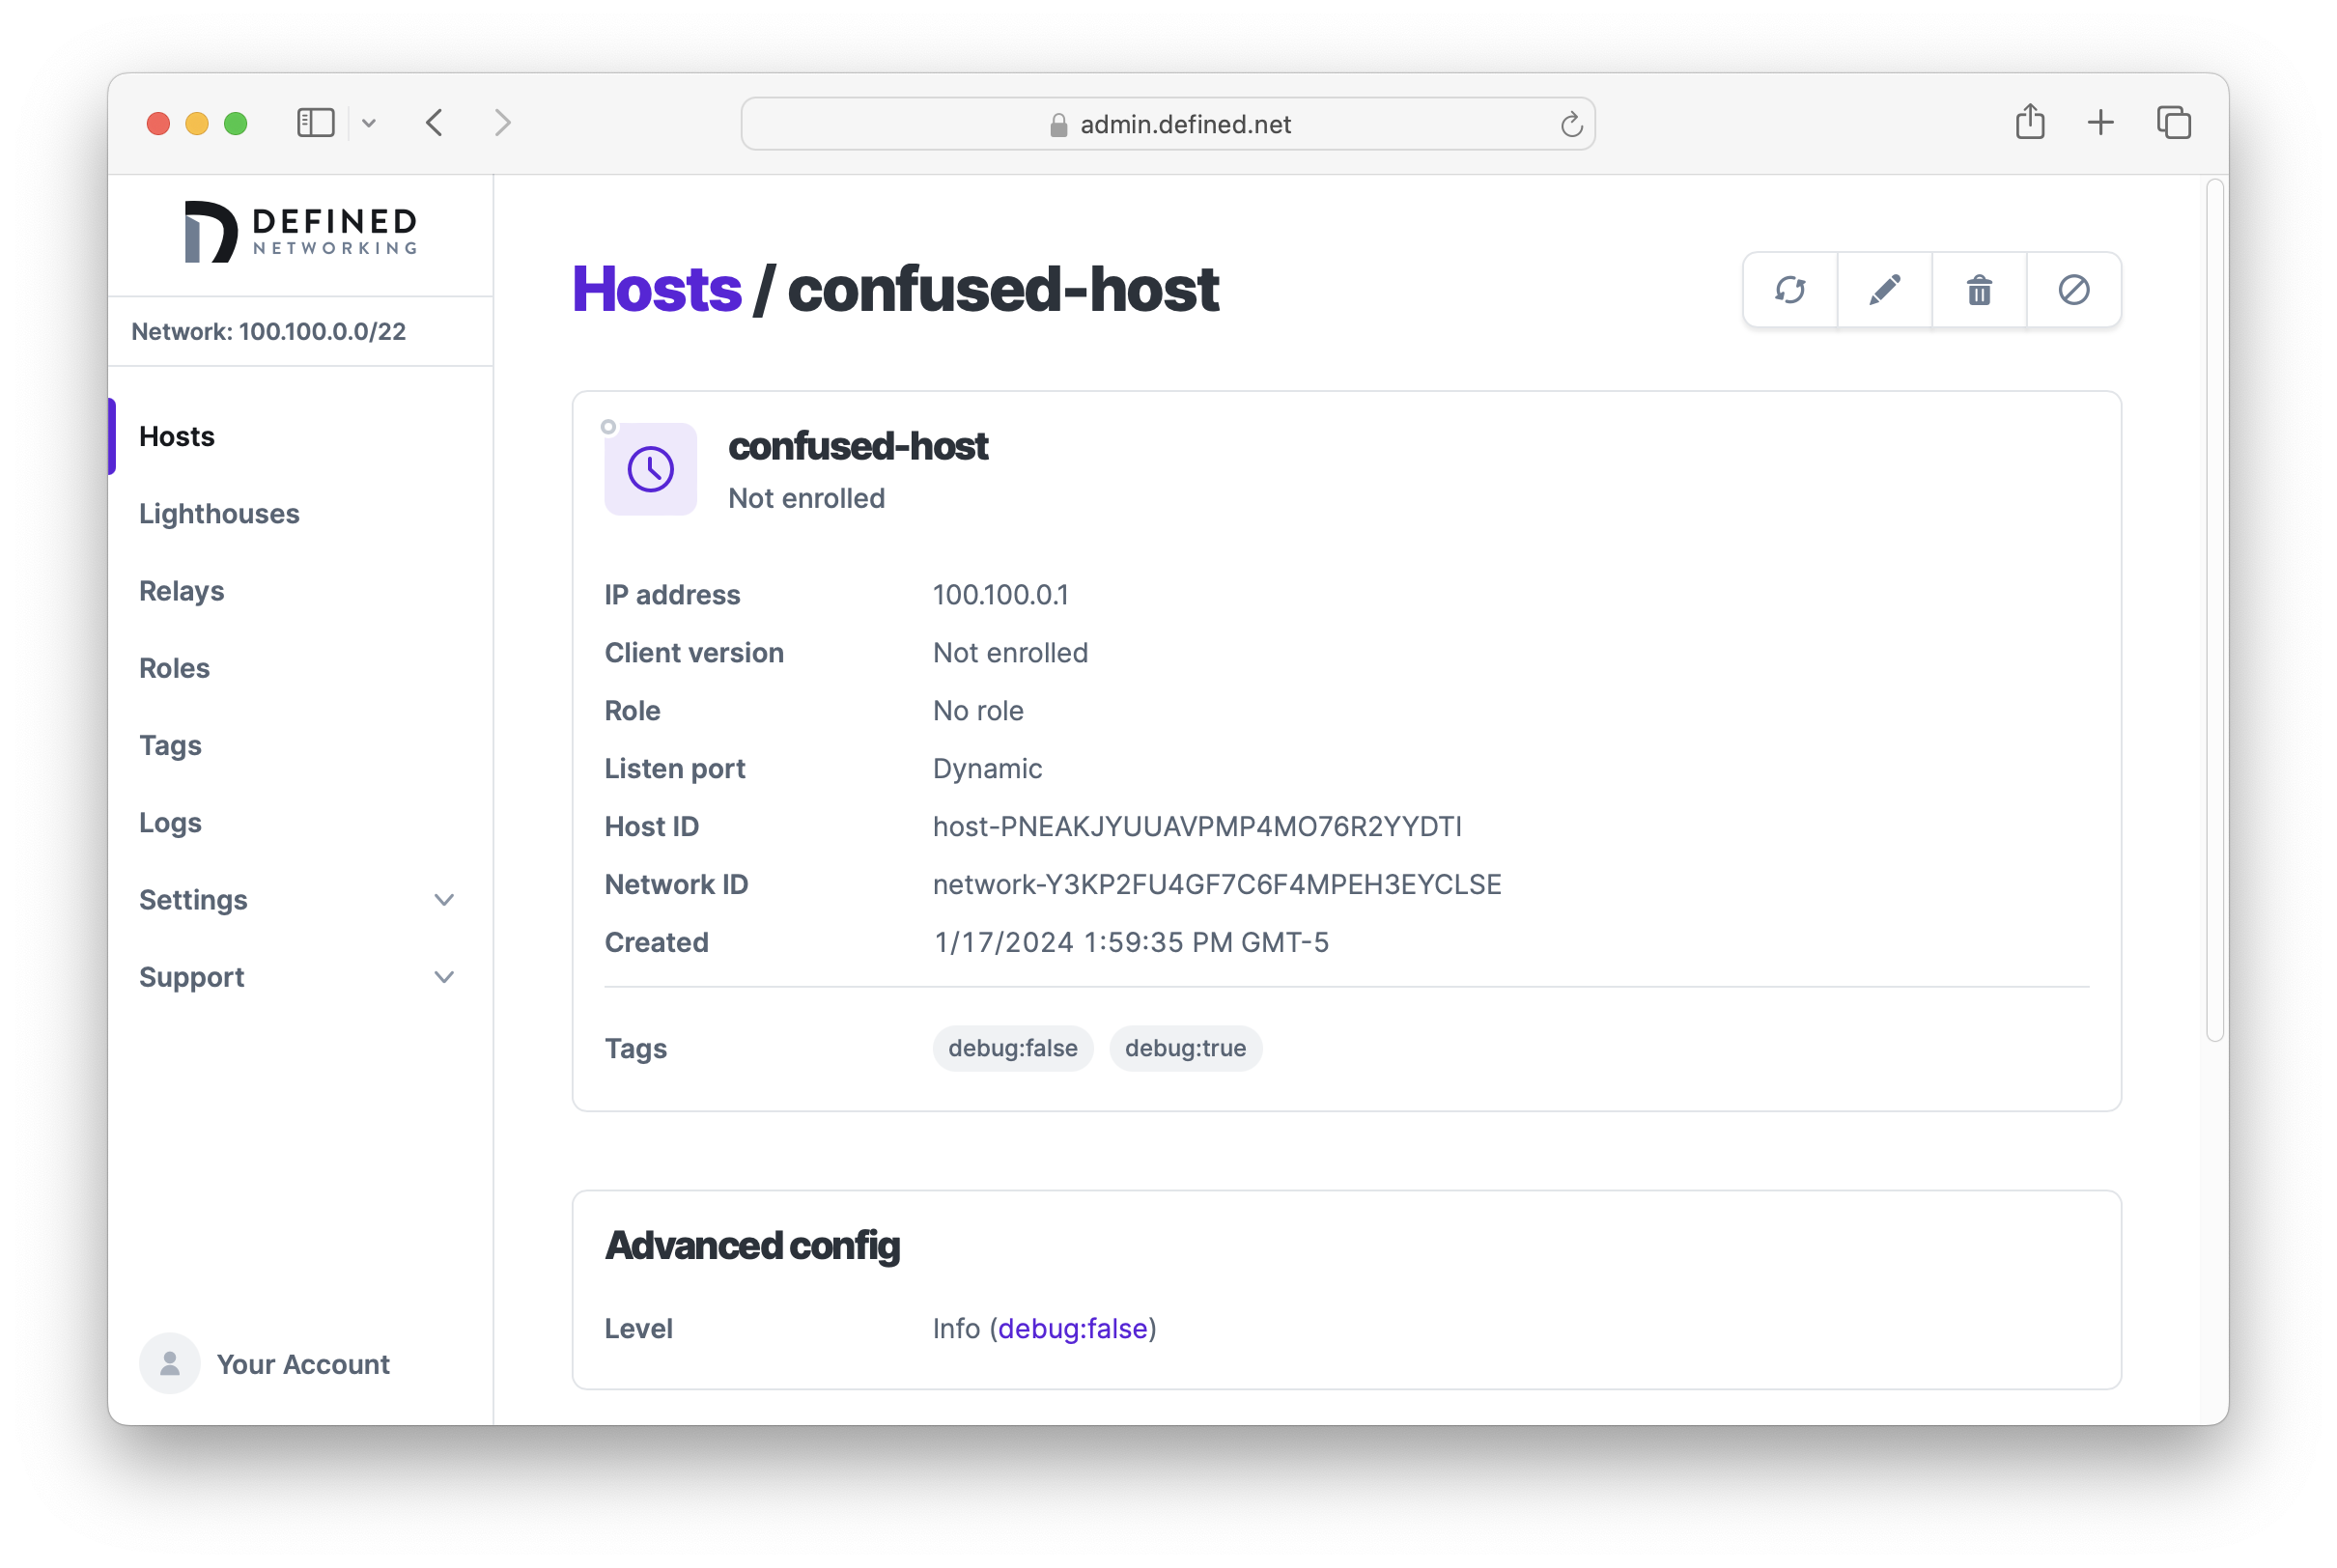
If we want to be sure that a host has been configured with the options we expect, we can navigate to its detail page and find the "Advanced config" section. Here we can see that the host is using the value set by the debug:false tag.
Examples
Now that we have a general understanding of how to use tags, let's look at some specific examples.
Docker networking
When using Docker, it's common to create internal networks allowing containers to communicate with each other.
For example, let's create a new bridge network, a container for it, and check our IP addresses:
# docker network create my-network
c977d98f4e53734de4d97176fc0d6aaf1567942d2cefdf789265fb17556a1b9a

# docker create --network my-network nginx:latest
79495846b6fb36229d45d443ea322064722316514c8c606ab0a0ff0f5c8e6509

# ip --brief addr
lo               UNKNOWN        127.0.0.1/8 ::1/128
docker0          DOWN           172.17.0.1/16 fe80::42:feff:fe03:e78f/64
br-c977d98f4e53  UP             172.19.0.1/16 fe80::42:36ff:fede:9d4d/64
veth91adfec@if7  UP             fe80::dc9b:79ff:feab:19c0/64
eth0@if30        UP             192.168.56.92/24 metric 100 fe80::216:3eff:fe45:54a9/64
Here we can see the default docker0 bridge device, br-c977d98f4e53 corresponding to the bridge network we created, and veth91adfec corresponding to the host we created. As the count of Docker networks and containers increases, so do the number of IP addresses registered to this machine.
While none of these IP addresses are routable from another host, Nebula doesn't know that, and so they are reported to the Lighthouse at the regular interval. This will eventually become a problem because the Lighthouse will only track 20 IPs per host. If you have 20 or more Docker IP addresses, the address assigned to eth0@if30 may not make the cut, and the Lighthouse would have 0 routable IP addresses for the node.
To overcome this, we can block these interfaces using the lighthouse.local_allow_list option. Let's create a tag called docker:host and define three rules to disallow interfaces with the prefixes docker, br- or veth. Because this option takes regular expressions, we'll use docker.*, br-.* and veth.* as our deny rules. When all rules are set to "deny," the default will be to "allow" when interfaces don't match any of these patterns.
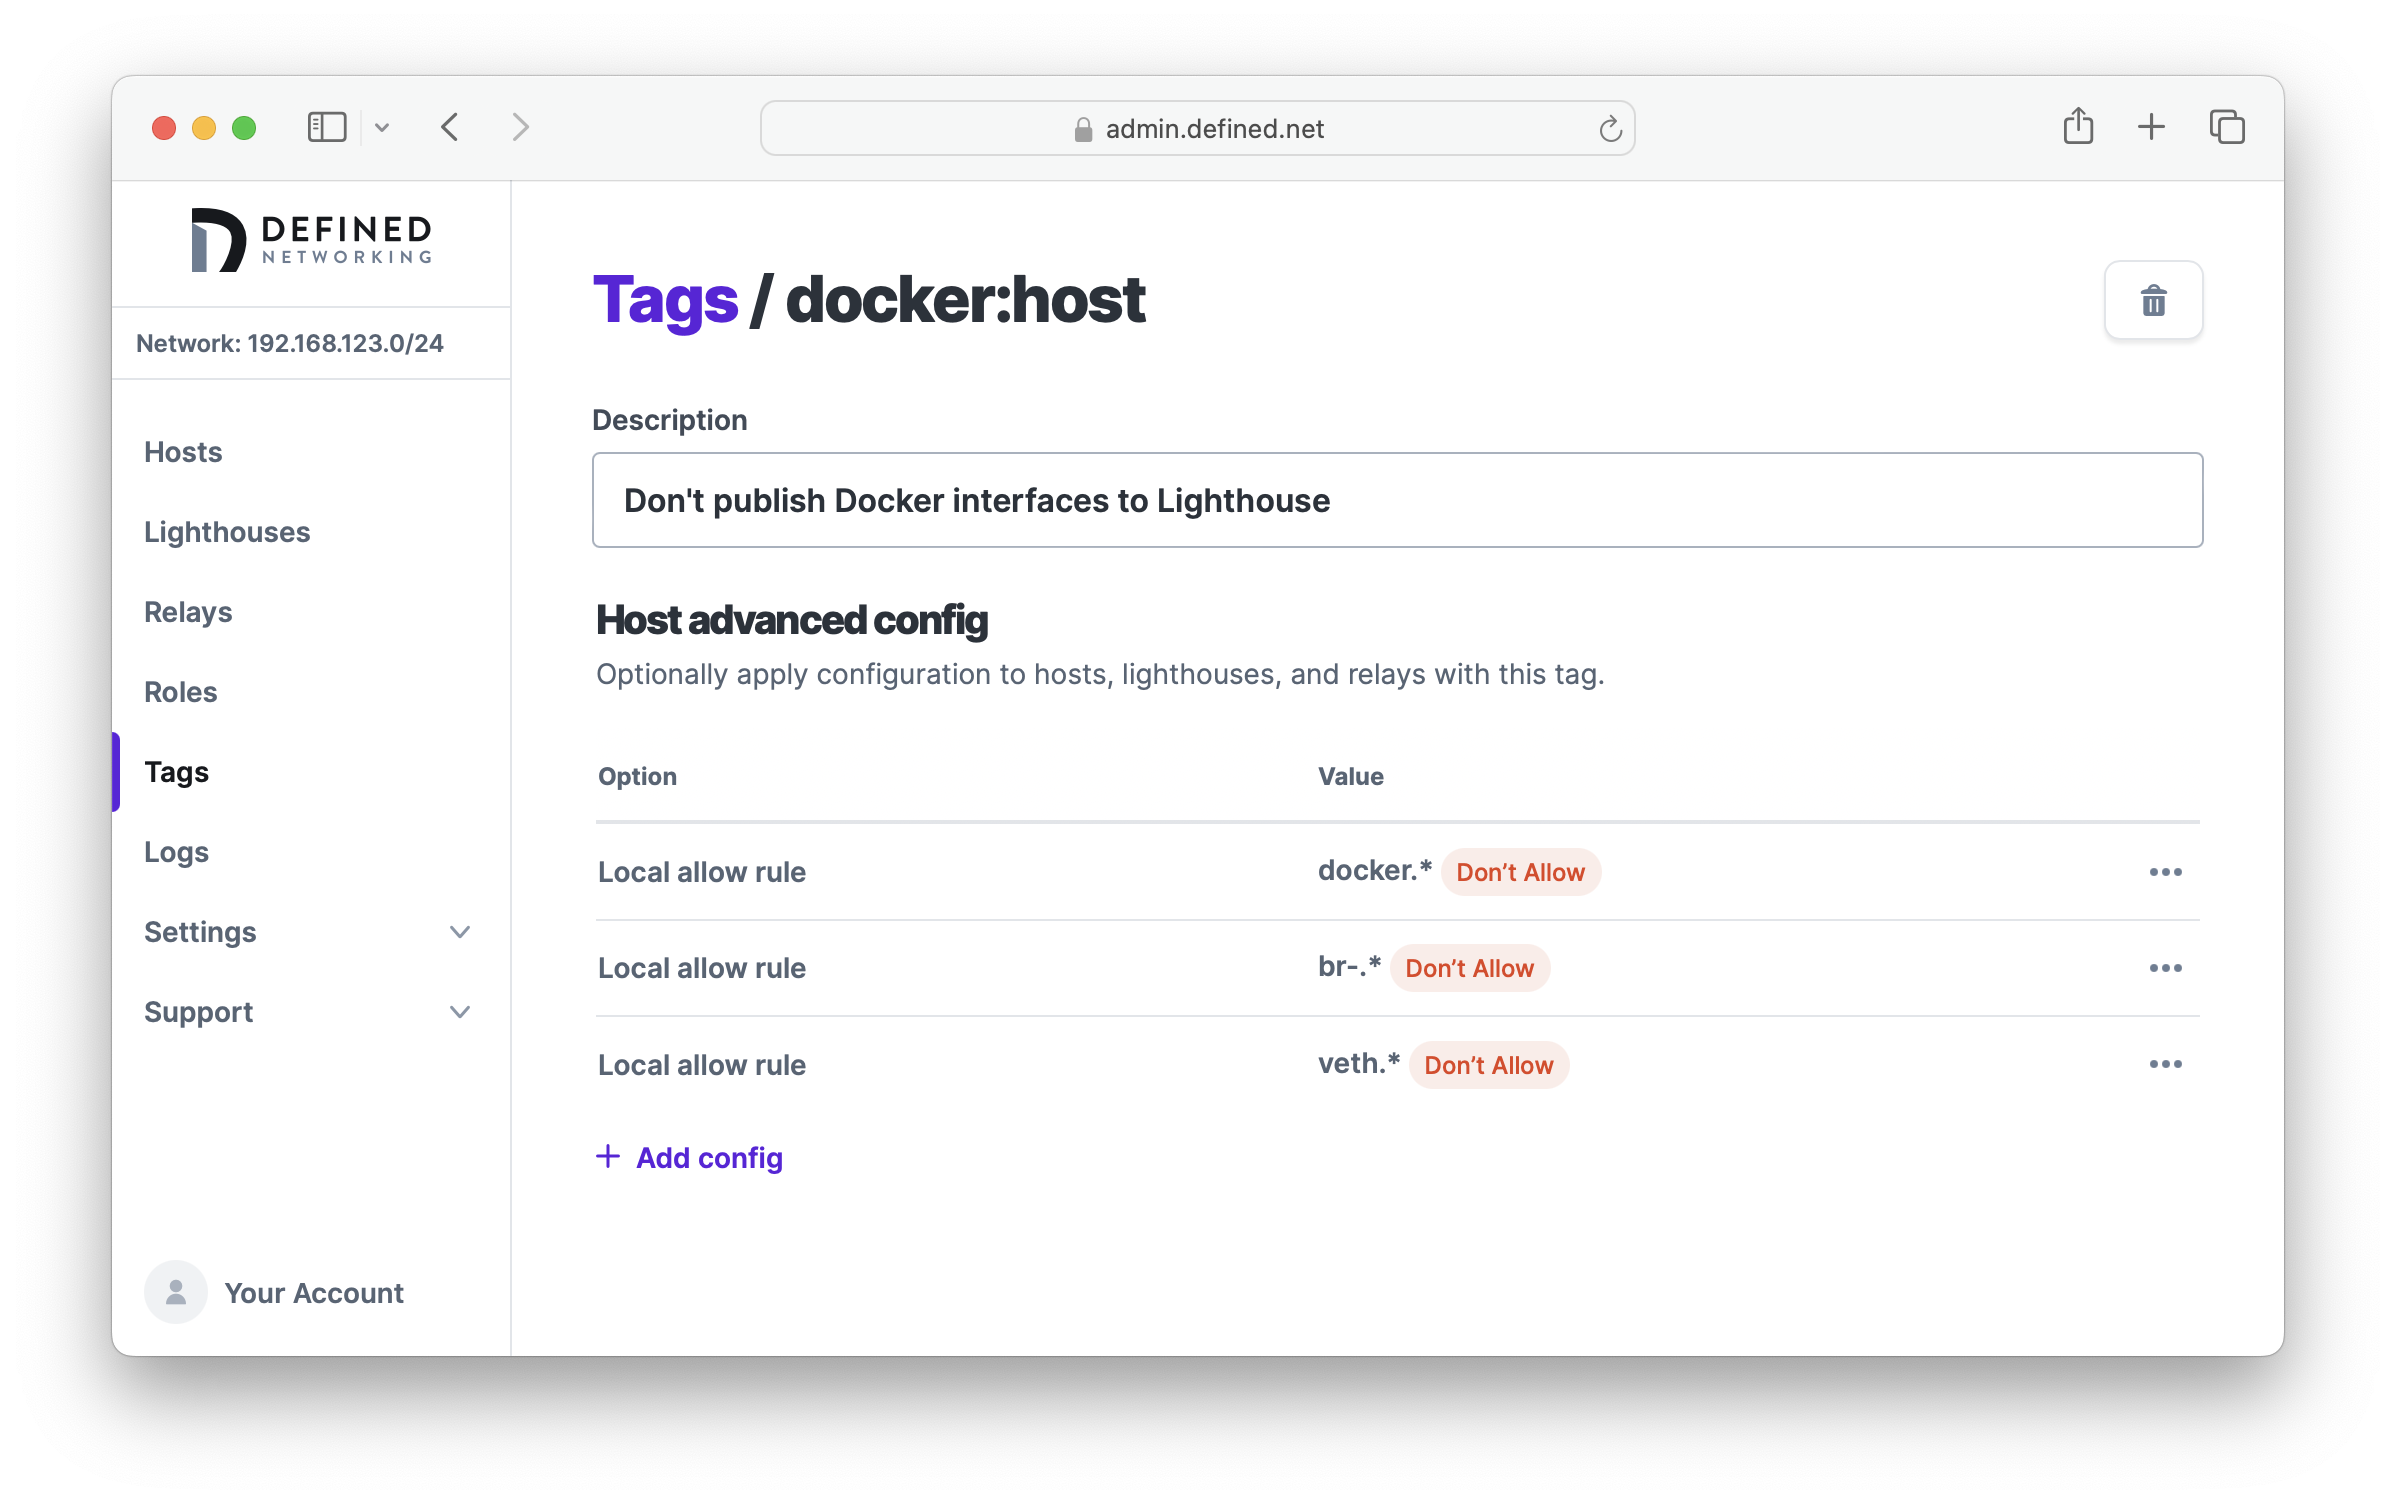
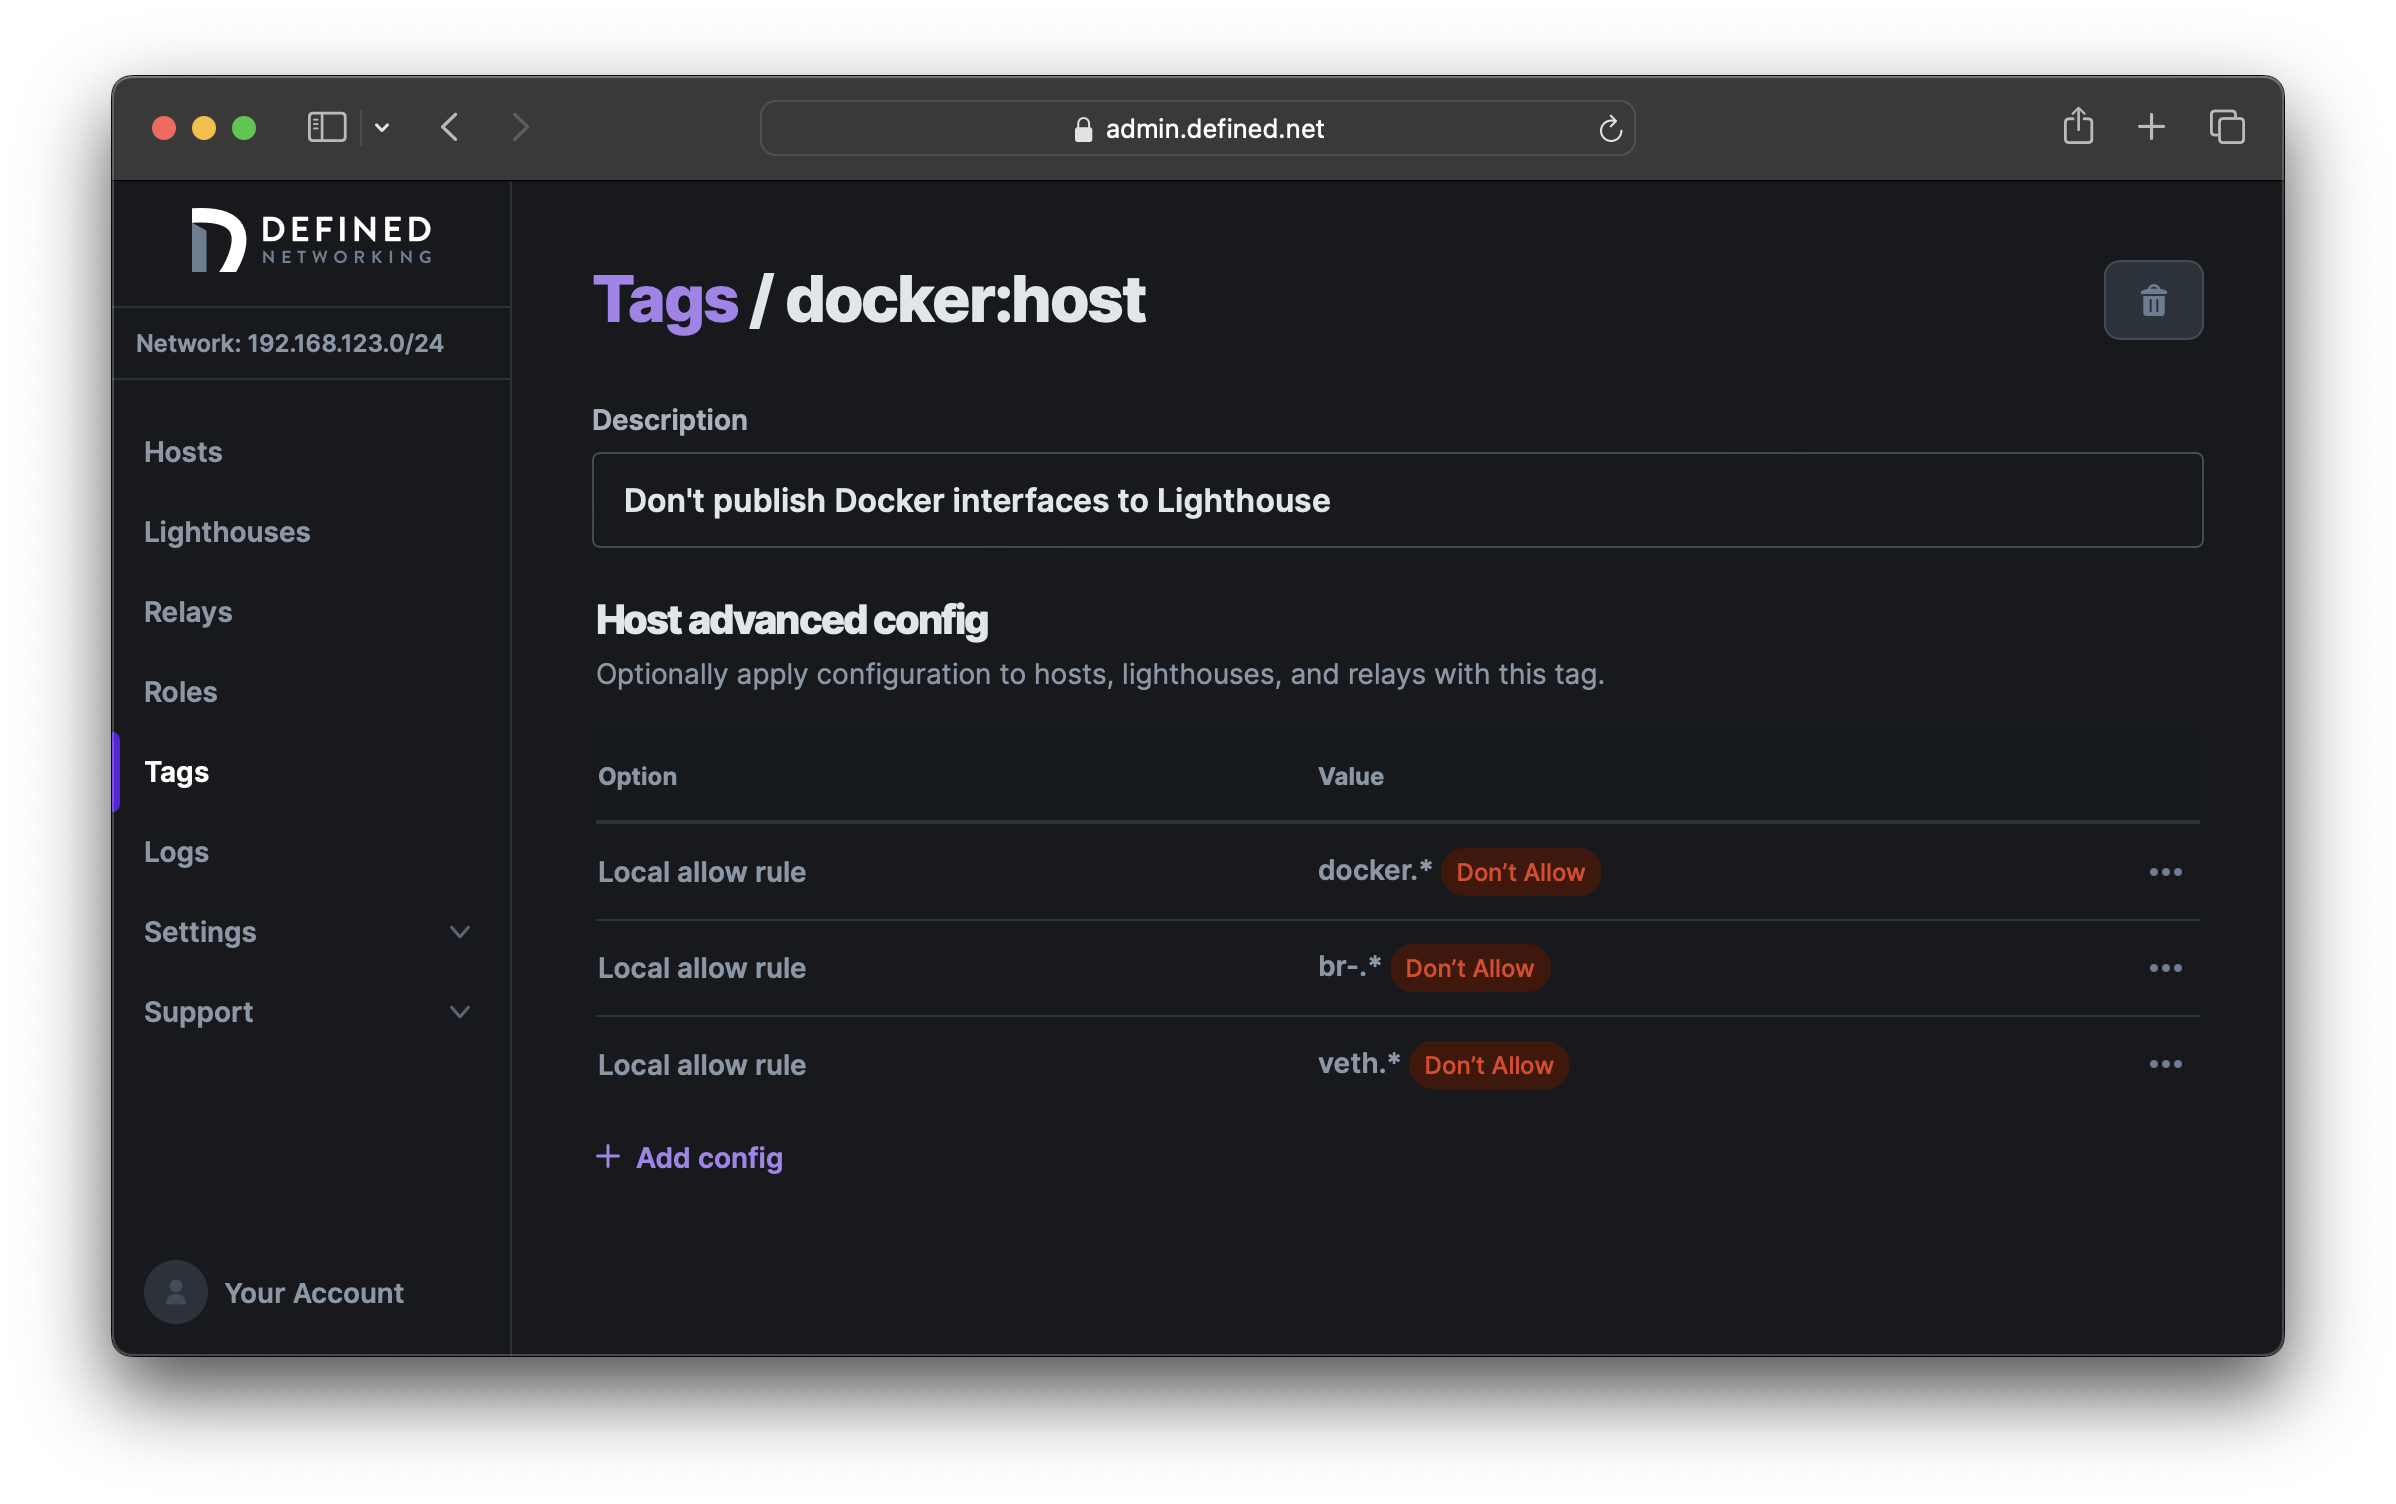
Lastly, assign the tag to any Docker hosts in your environment to ensure they don't report their Docker IP addresses to the Lighthouse.
Private networking
While Nebula encrypts all traffic between nodes, some users may find it desirable to have Nebula only send traffic over private (RFC 1918) networks. For this we can use the lighthouse.remote_allow_list option. This restricts which IP addresses nodes will consider when handshaking with peers.
Create a tag (e.g. private-only:true) and then create allow rules for each of '10.0.0.0/8', 172.16.0.0/12, and 192.168.0.0/16. When all rules are set to "allow," the default will be to "deny" IP addresses that don't match these CIDRs.
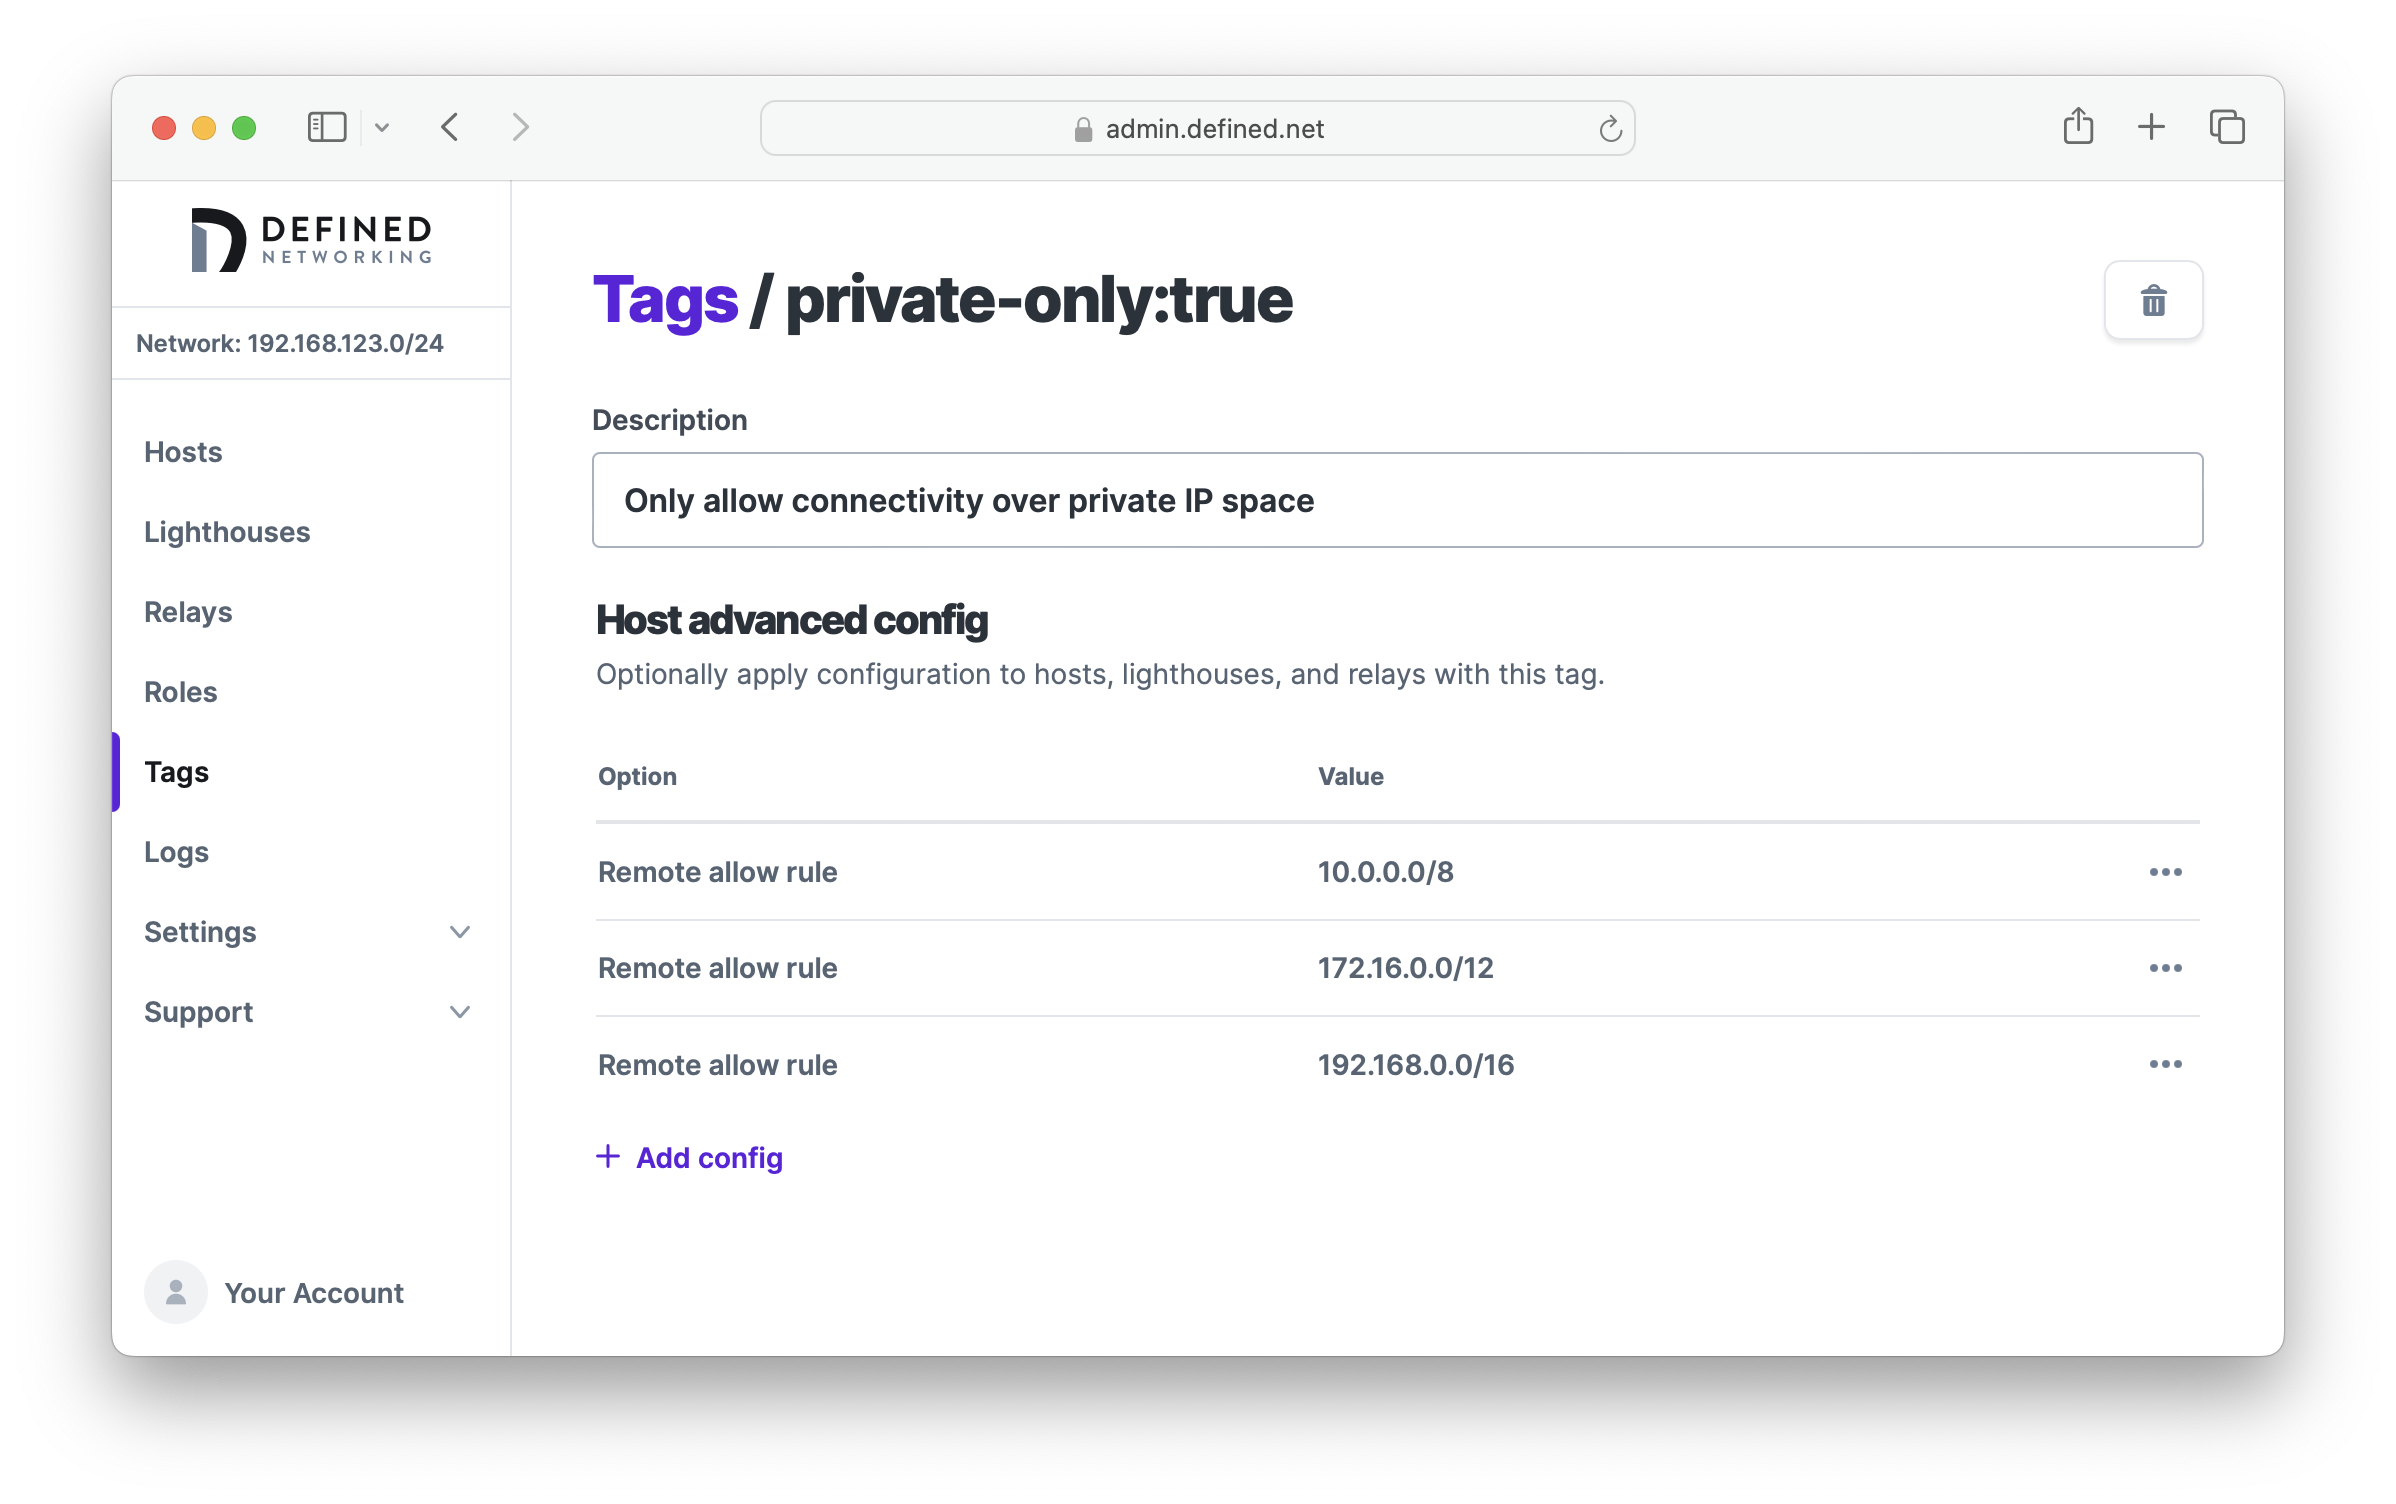
Now any hosts assigned the private-only:true tag will communicate to other Nebula nodes only over private IP space.