Creating firewalls using roles and tags
Even within a private network like Managed Nebula, it's a good idea to restrict the types of communication which can occur between different kinds of devices. For example, web server machines might need to communicate with database machines over certain ports, but they should not be able to ssh into user laptops. In Managed Nebula, these access rules are configured through firewall rules on roles and tags. This guide will explain what roles are and how they are used to manage both identity and access within a Managed Nebula network.
In Managed Nebula, a role represents the primary purpose and group-identity of a host. For example, you might create roles such as user device, webserver, database, etc. Each machine that you create should be assigned a role when it is created. Firewall rules are configured for inbound traffic at the role level. Newly created roles allow only ICMP traffic so that ping requests can be used for troubleshooting. All other inbound traffic is denied by default, and the rules can be configured to allow other kinds of traffic from machines belonging to other specific roles and/or having specified tags.
Example scenario
As an example, let's imagine you have an internal company webserver which serves a dashboard that only employees on the Manged Nebula network should be able to access. In addition, some employees, let's call them "admins", need to have SSH access to the webserver so they can perform maintenance on it. Let's take a look at how this can be accomplished using roles and tags.
Creating roles
To create a role, visit the Roles page of your Defined Networking admin panel. A default “Lighthouse” role was created automatically when your account was provisioned. Let's create a new webserver-internal role to use for web servers of an internal website. Start by clicking the Add button on the top right of the page and filling out the role name (required) and a description (optional). We will come back to this role and add firewall rules later, but for now we can click "Add role" to create it.
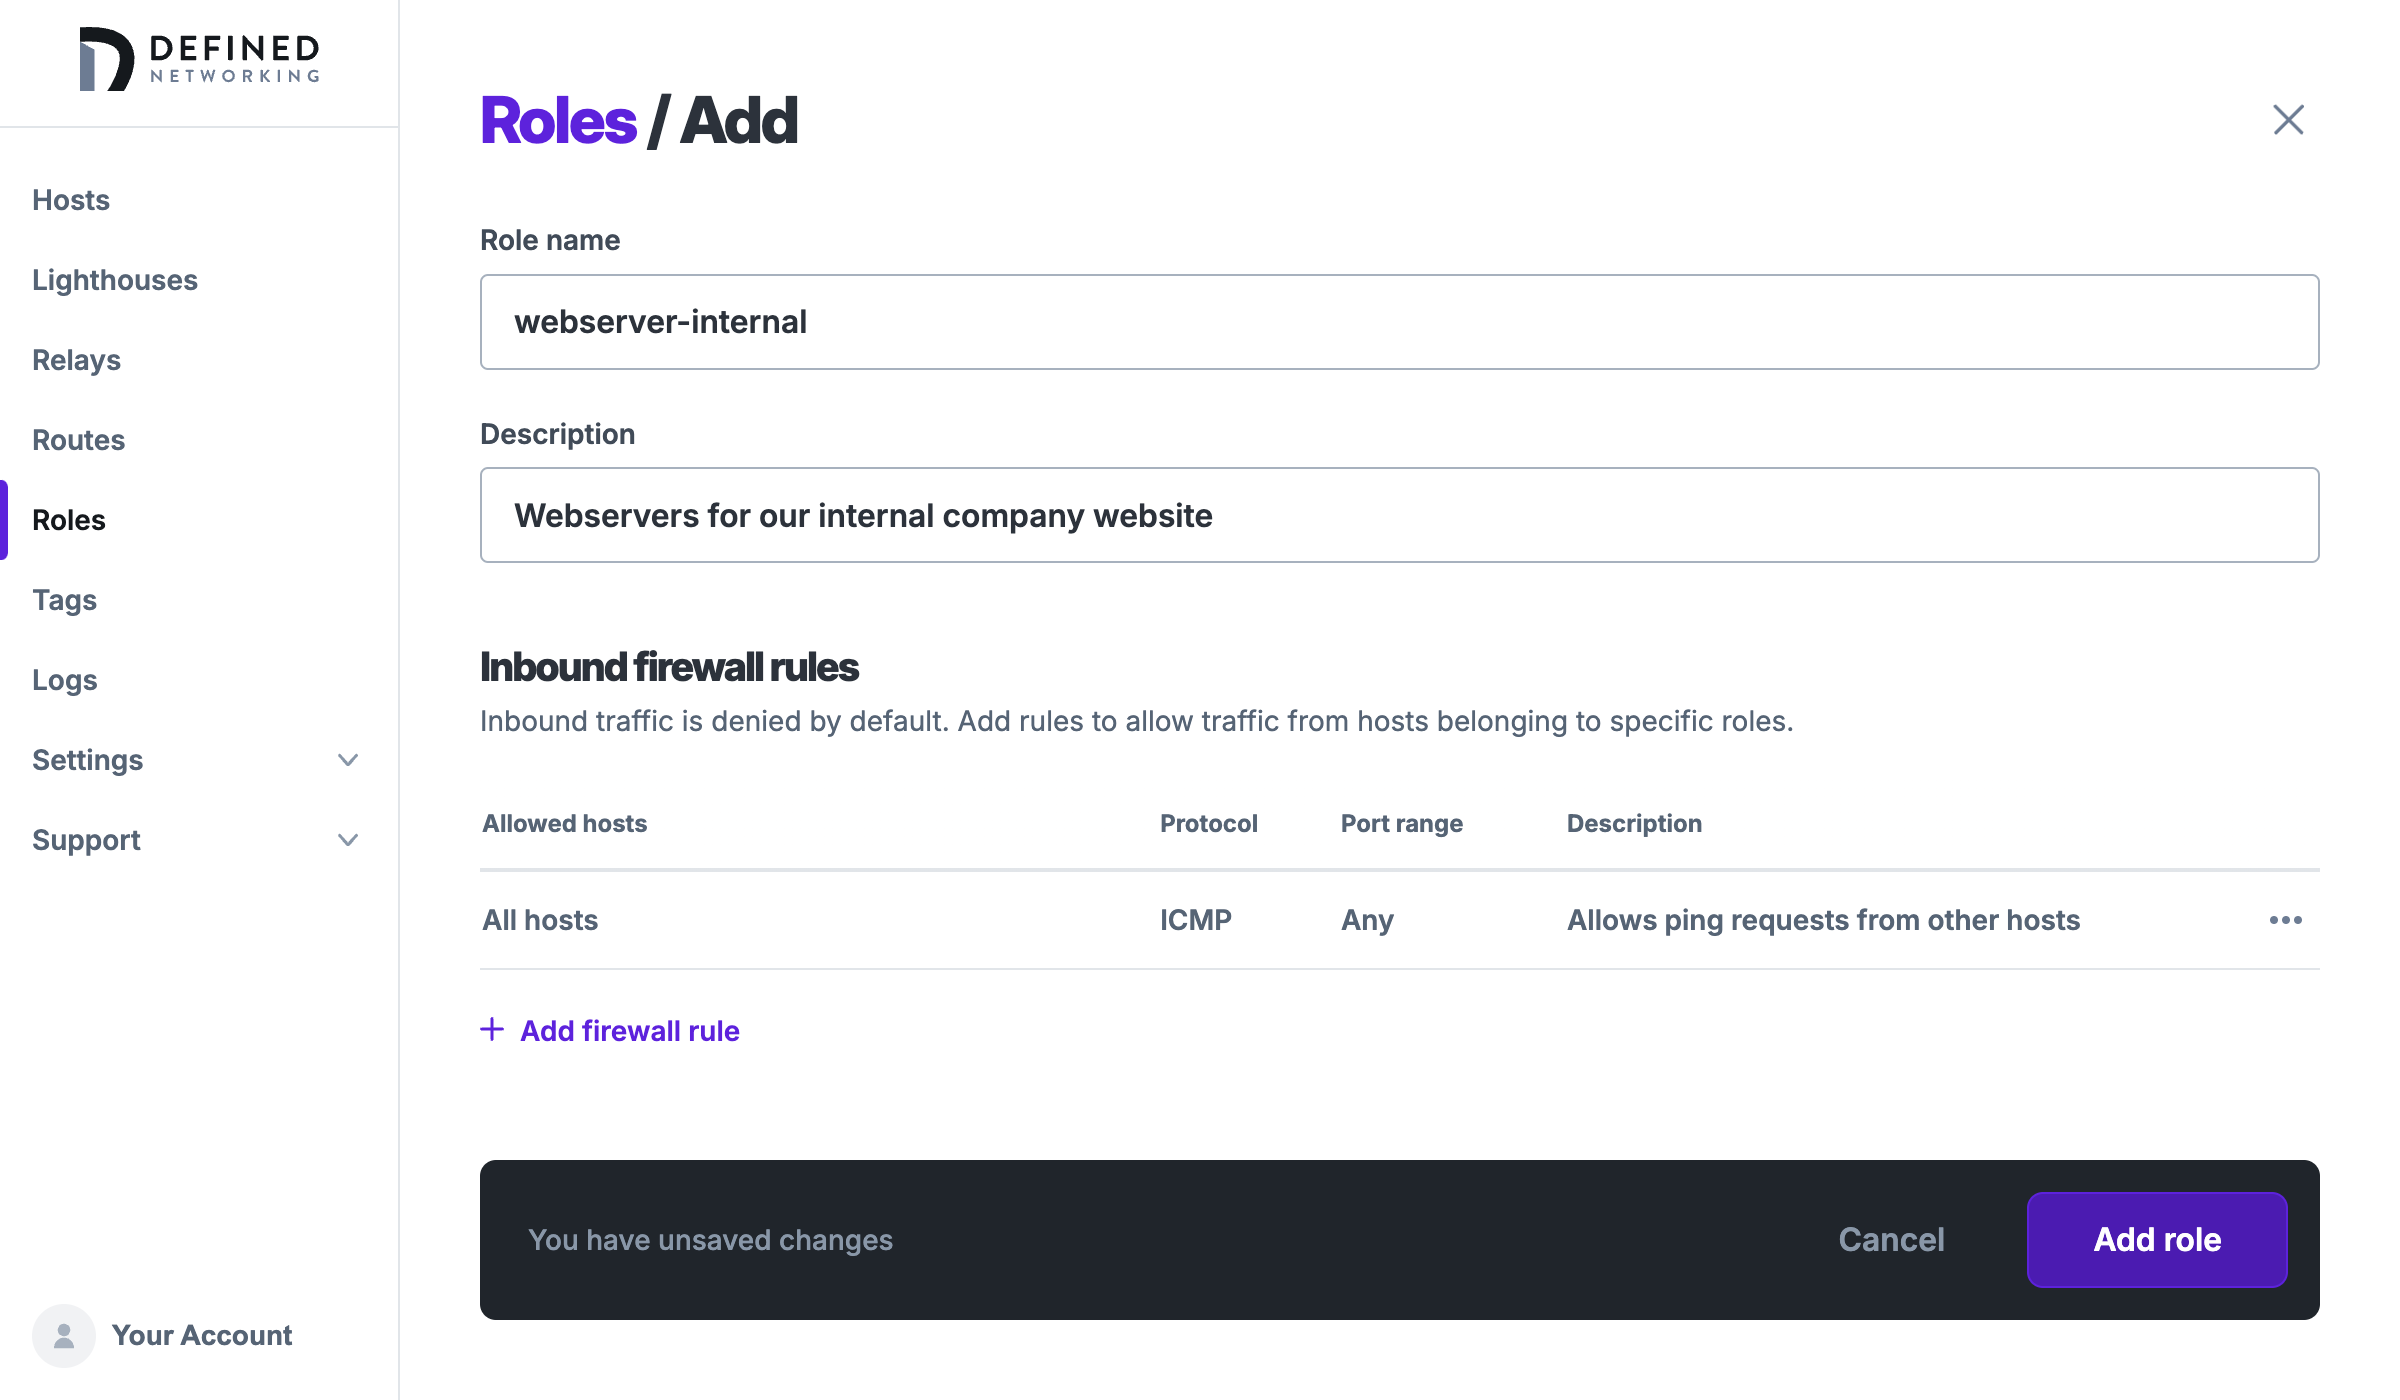
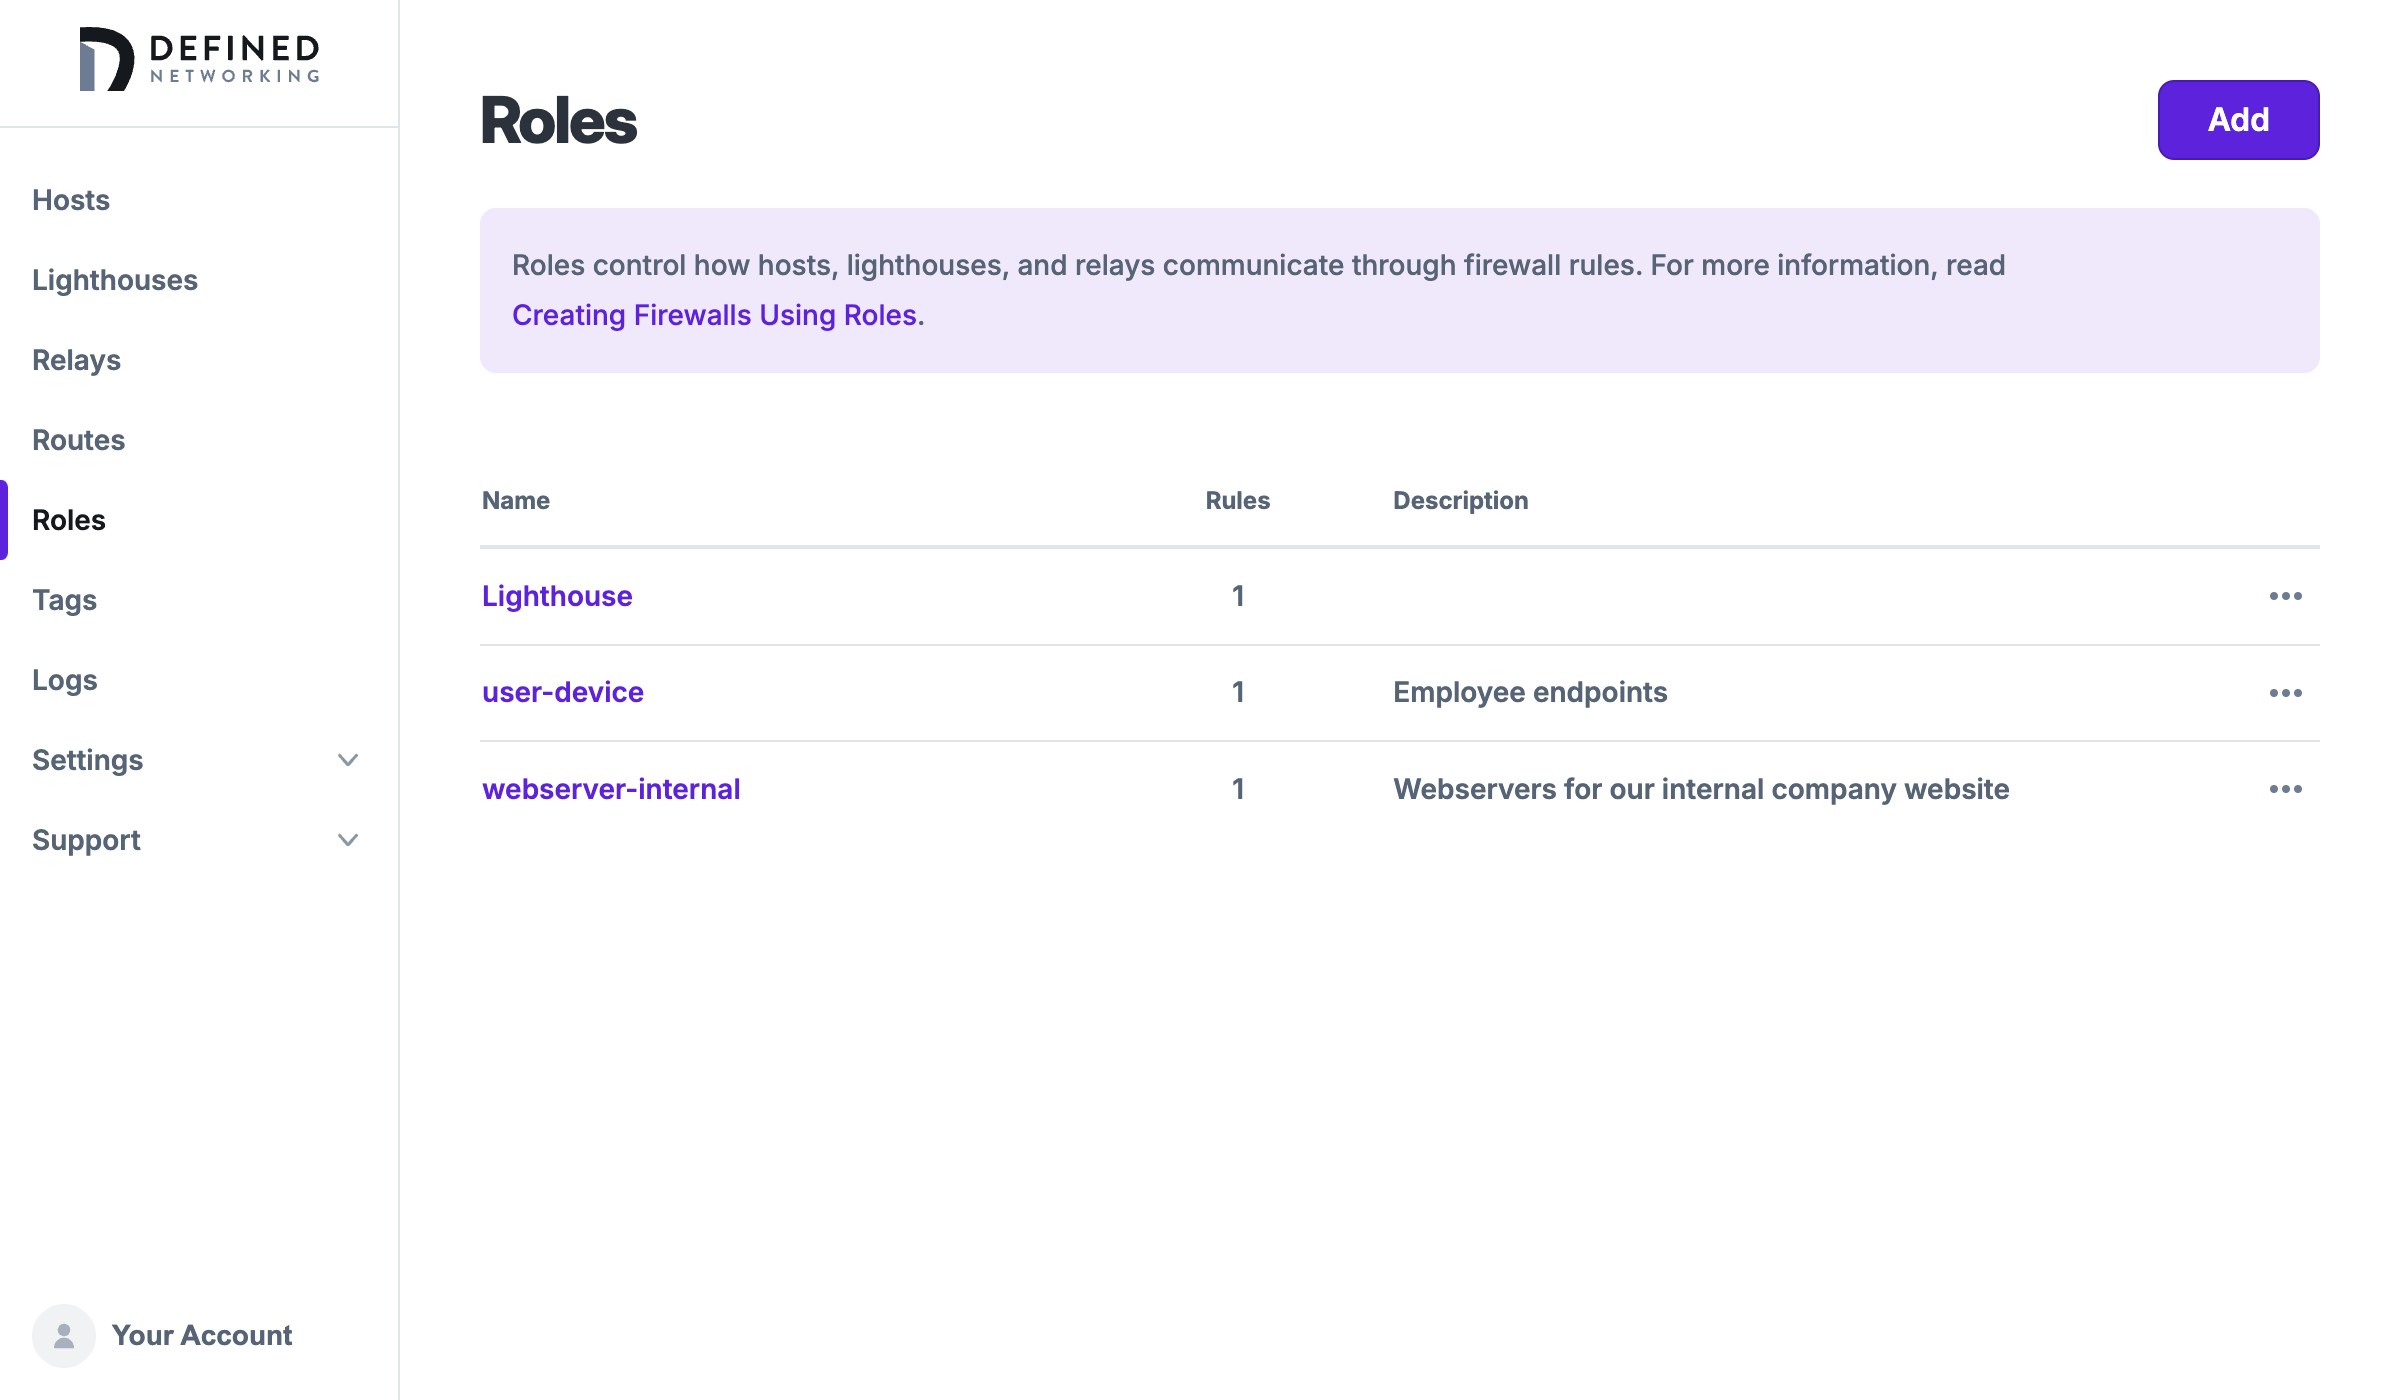
We'll create another role for user-device as well, and we can see both new roles in the roles list page:
Note that due to the way identity is securely managed, role names cannot be changed after they are created, but hosts can be edited to change their role. The firewall rules of roles can be changed at any time, and updates will be sent out to all affected machines automatically. Roles can be deleted so long as there are no hosts, lighthouses, or relays using the role.
Adding firewall rules
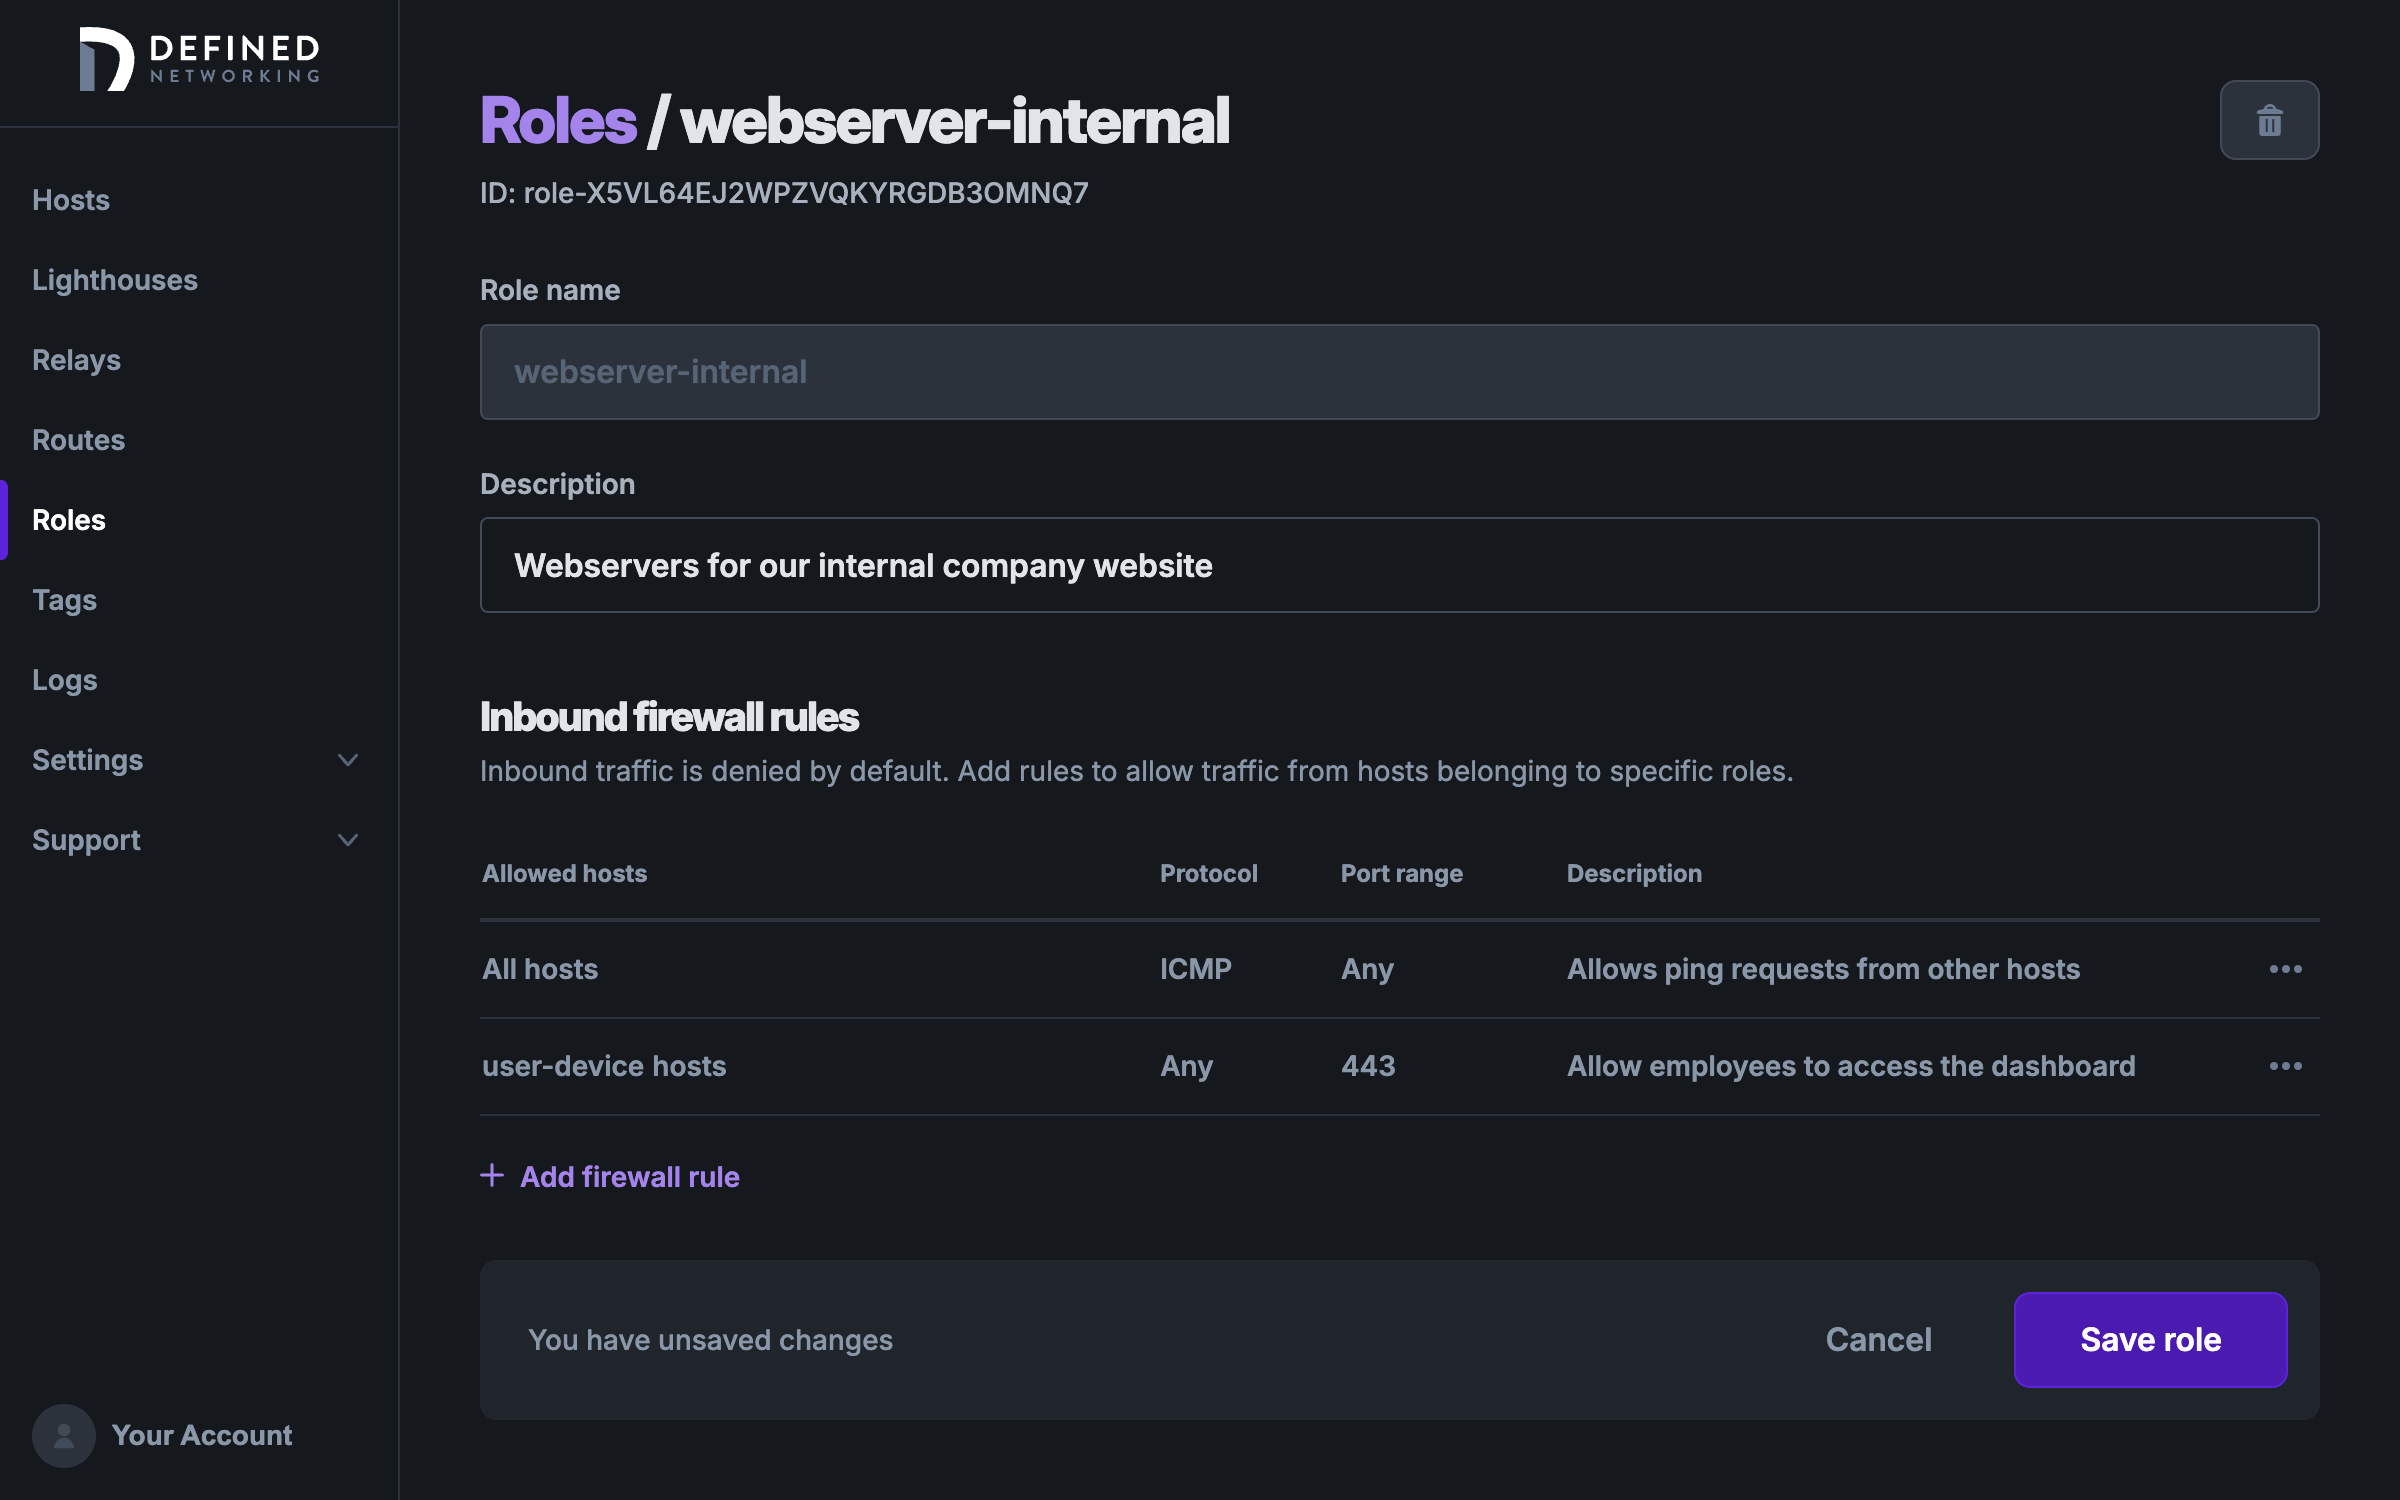
By default, roles only have one firewall rule, to allow ping requests between them. Now let's open up TCP port 443 to allow https requests from employees so they can access the company dashboard. We'll click on webserver-internal to open that role's page, and then click the “Add firewall rule” button, then choose TCP for the protocol, type 443 as the port range, and select the user-device role from the Allowed role dropdown. We've entered a description as well, which is a good idea to help provide context for rules.
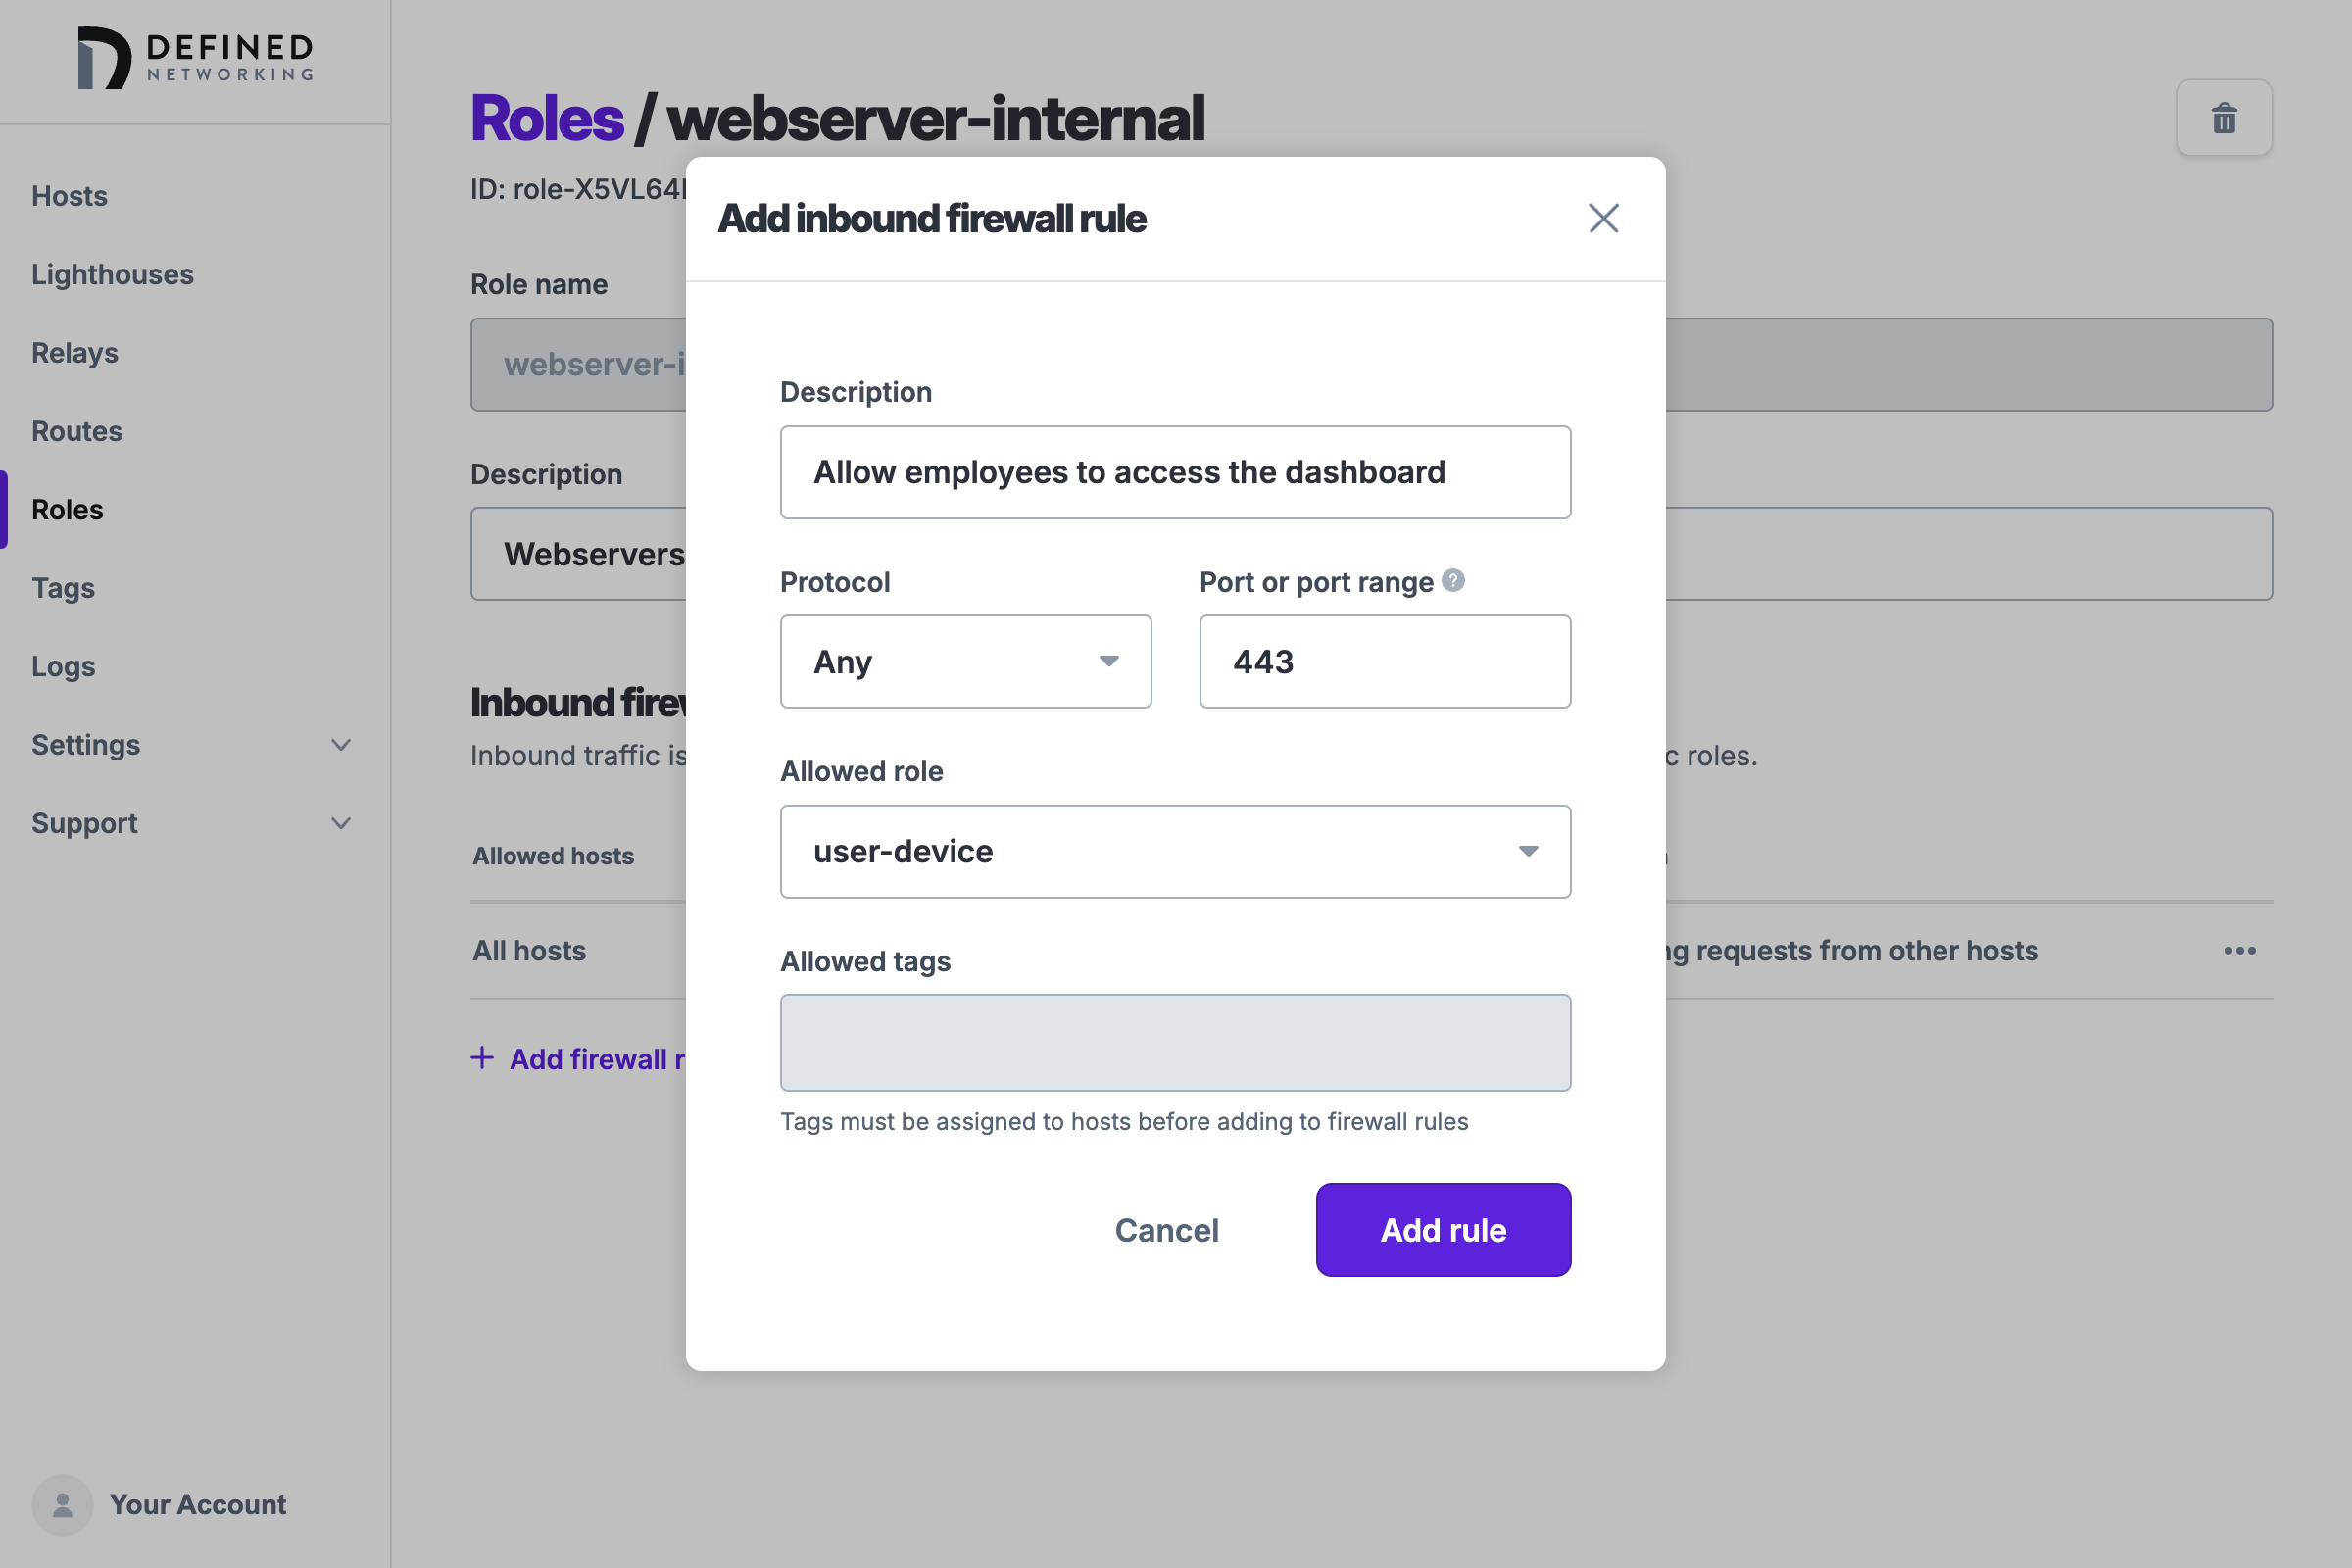
Click the "Add rule" button to apply the change, but note that changes to roles are not saved until the “Save role” button is clicked, to minimize the number of updates sent to hosts on the network.

Next we will see how to apply this role to hosts, and finally how to grant admin users SSH access to the webserver.
Applying roles to hosts
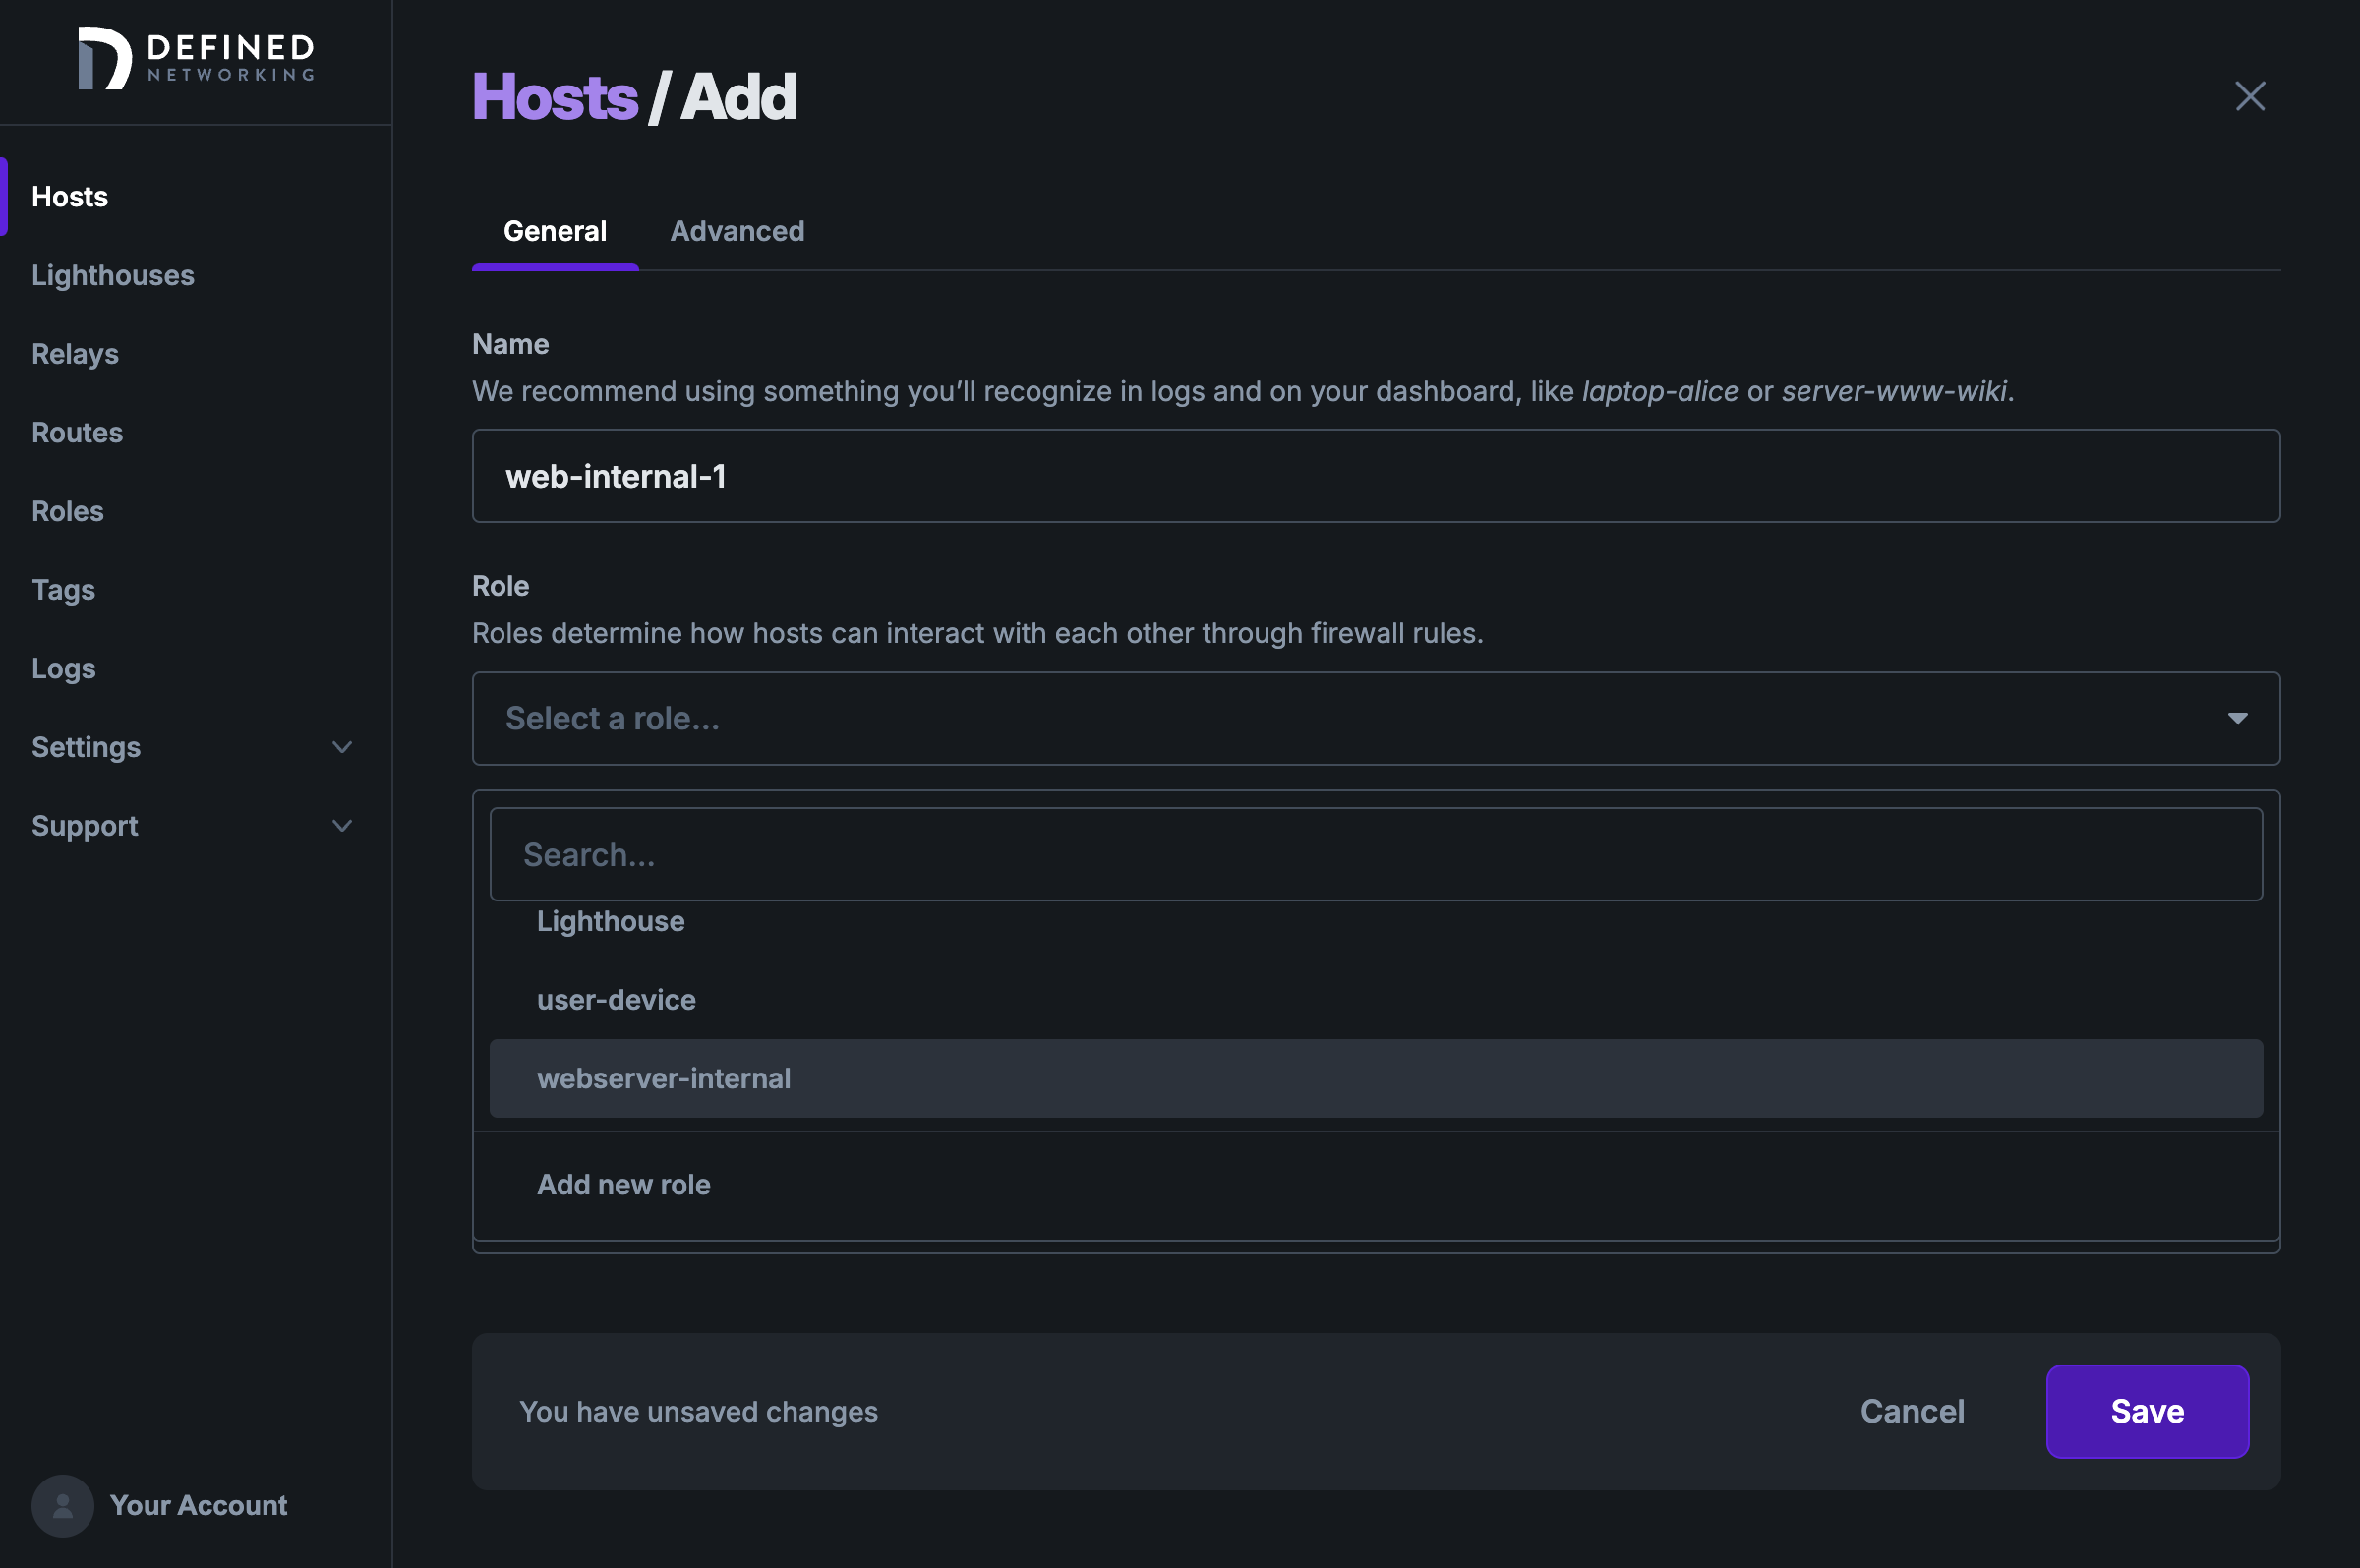
Let's start by adding a web server host. Visit the Hosts page, and click the “Add” button. Choose a name, and click on the Role dropdown. Hosts (as well as lighthouses and relays) are only allowed to have one role.

Similarly, we will create two user device hosts and give them both the appropriate user-device role.
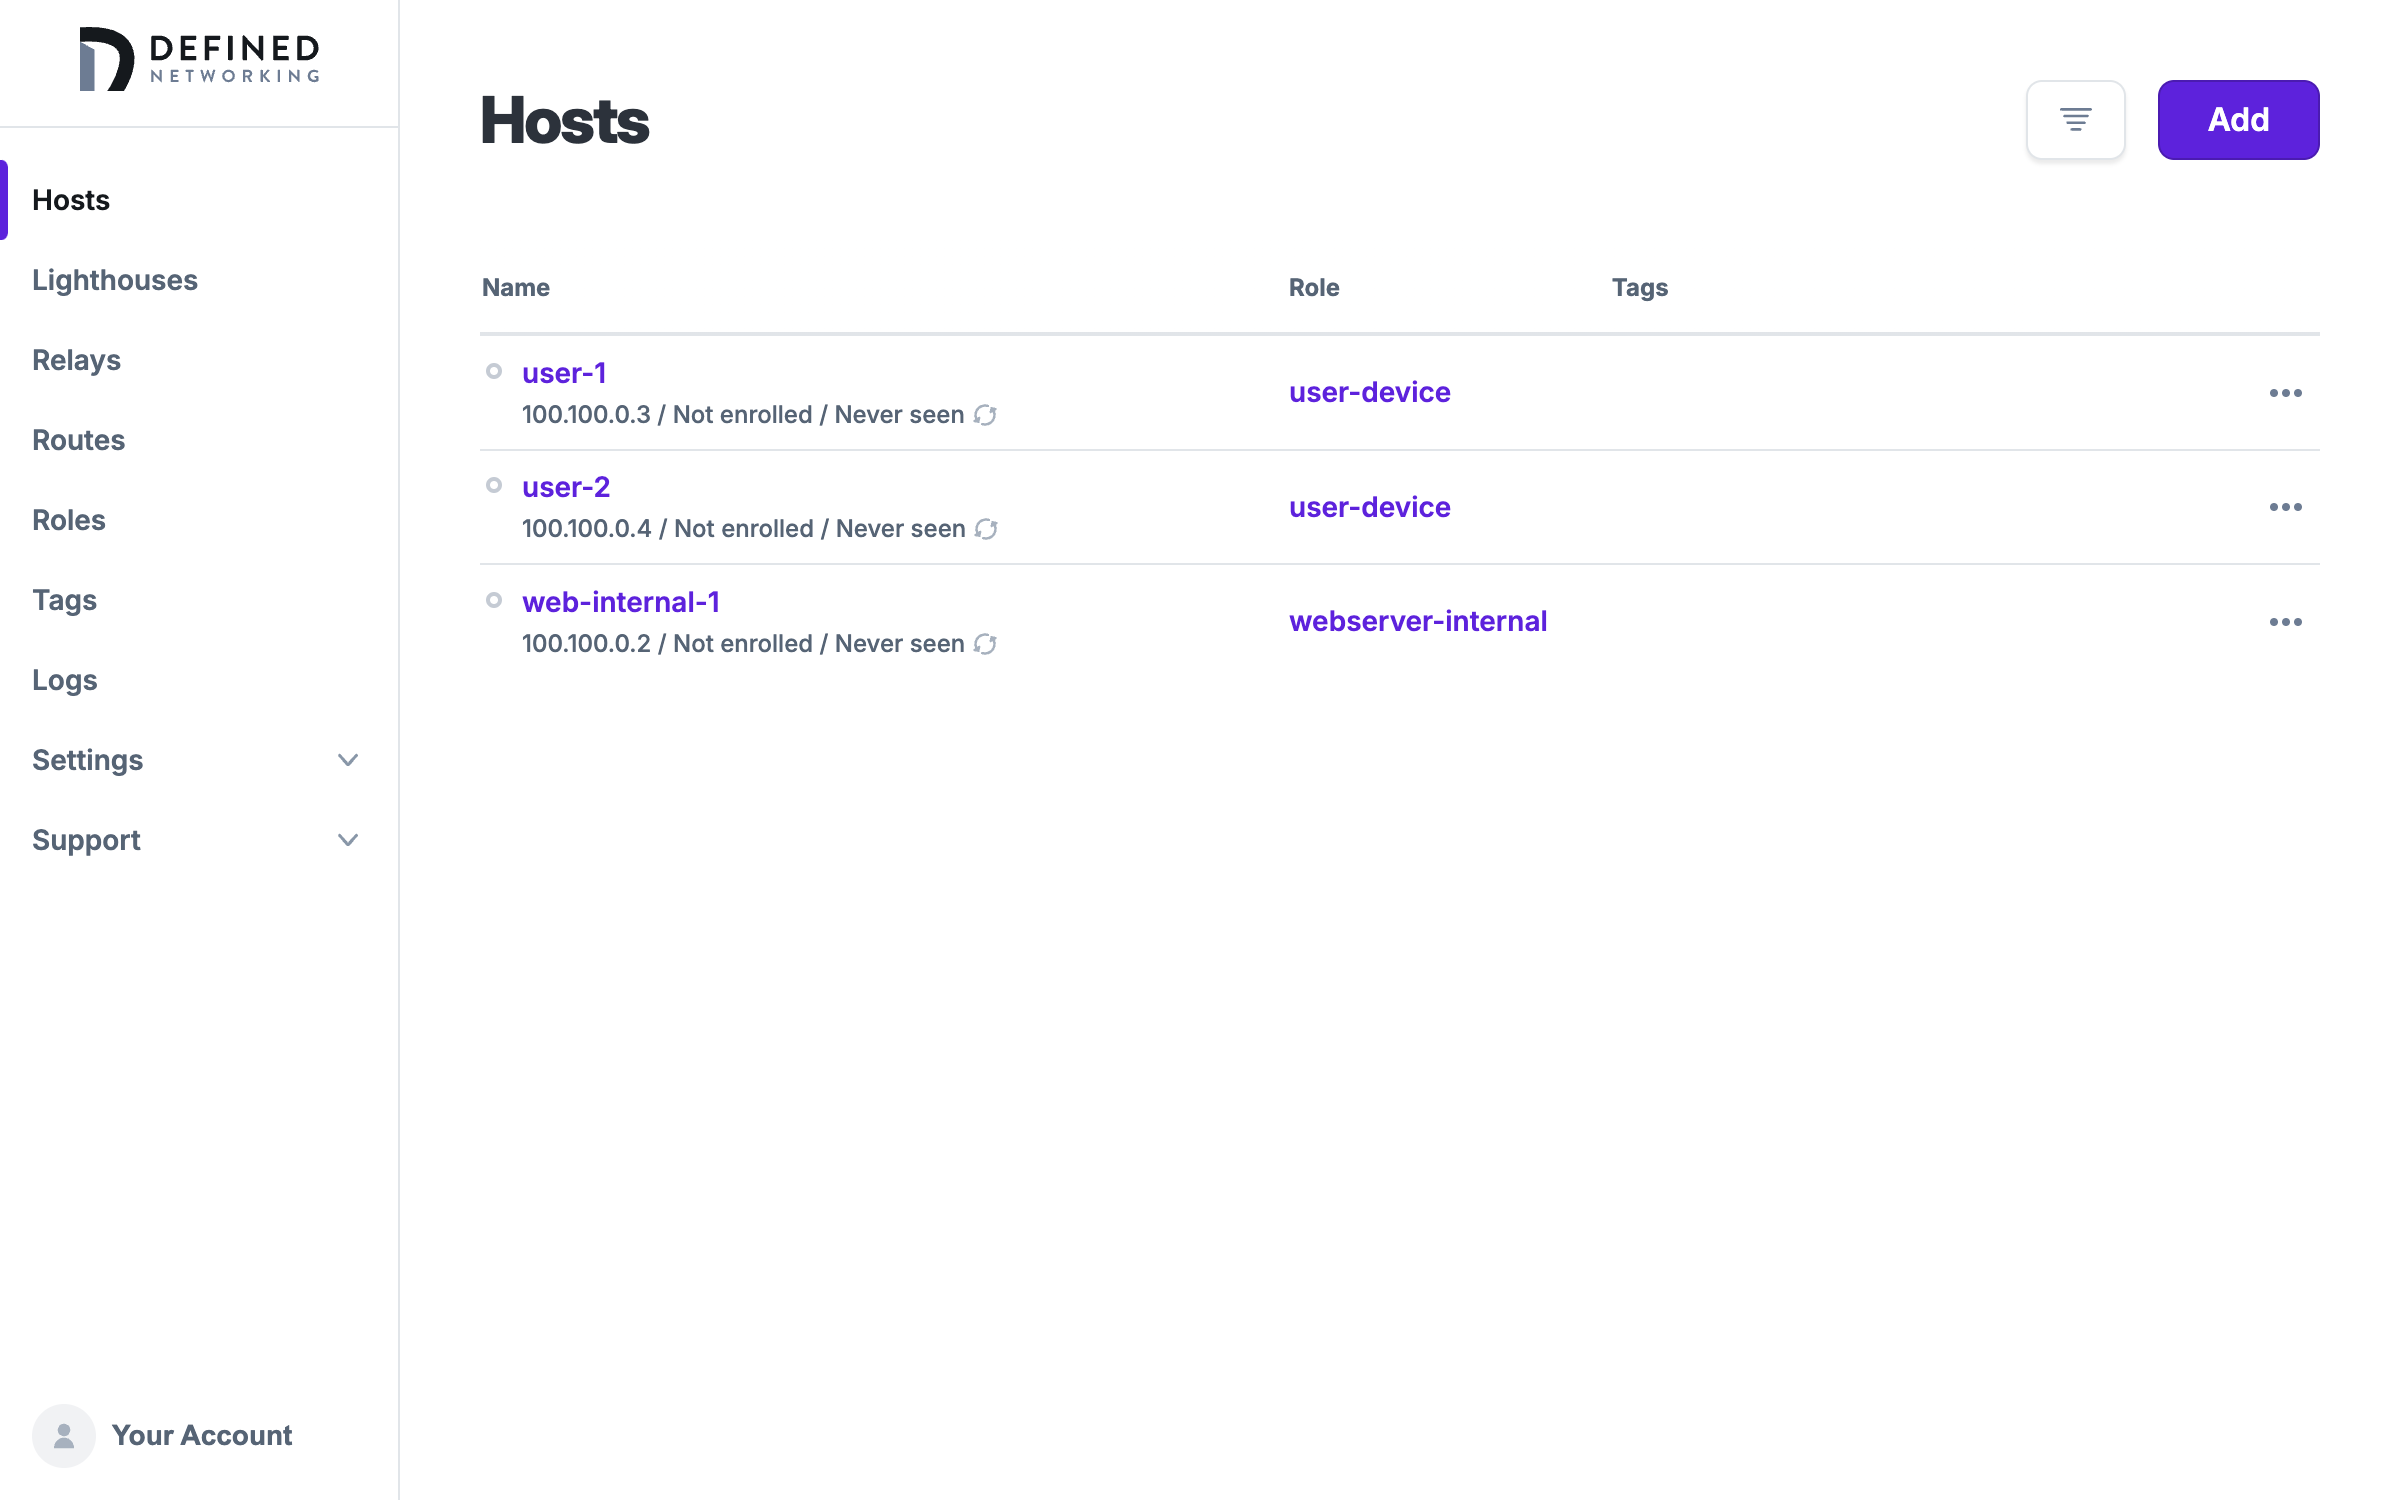
The last thing we need to do is allow one of these users access to SSH into the webserver, which we will accomplish using tags.
Tags
Tags can be thought of as attributes or slices of identity which can be applied to devices on your Managed Nebula network. They contain a key and a value, formatted as key:value. Each host can have multiple tags, and new tags can be created on-the-fly as you create or edit your hosts, or in the Tags page.
In our case, we can use a tag to indicate which employees should be considered admins, giving them SSH access to the webserver. Let's say that user-2 is an admin, and edit the user-2 host. Find the "Tags" field, and type user-type:admin.
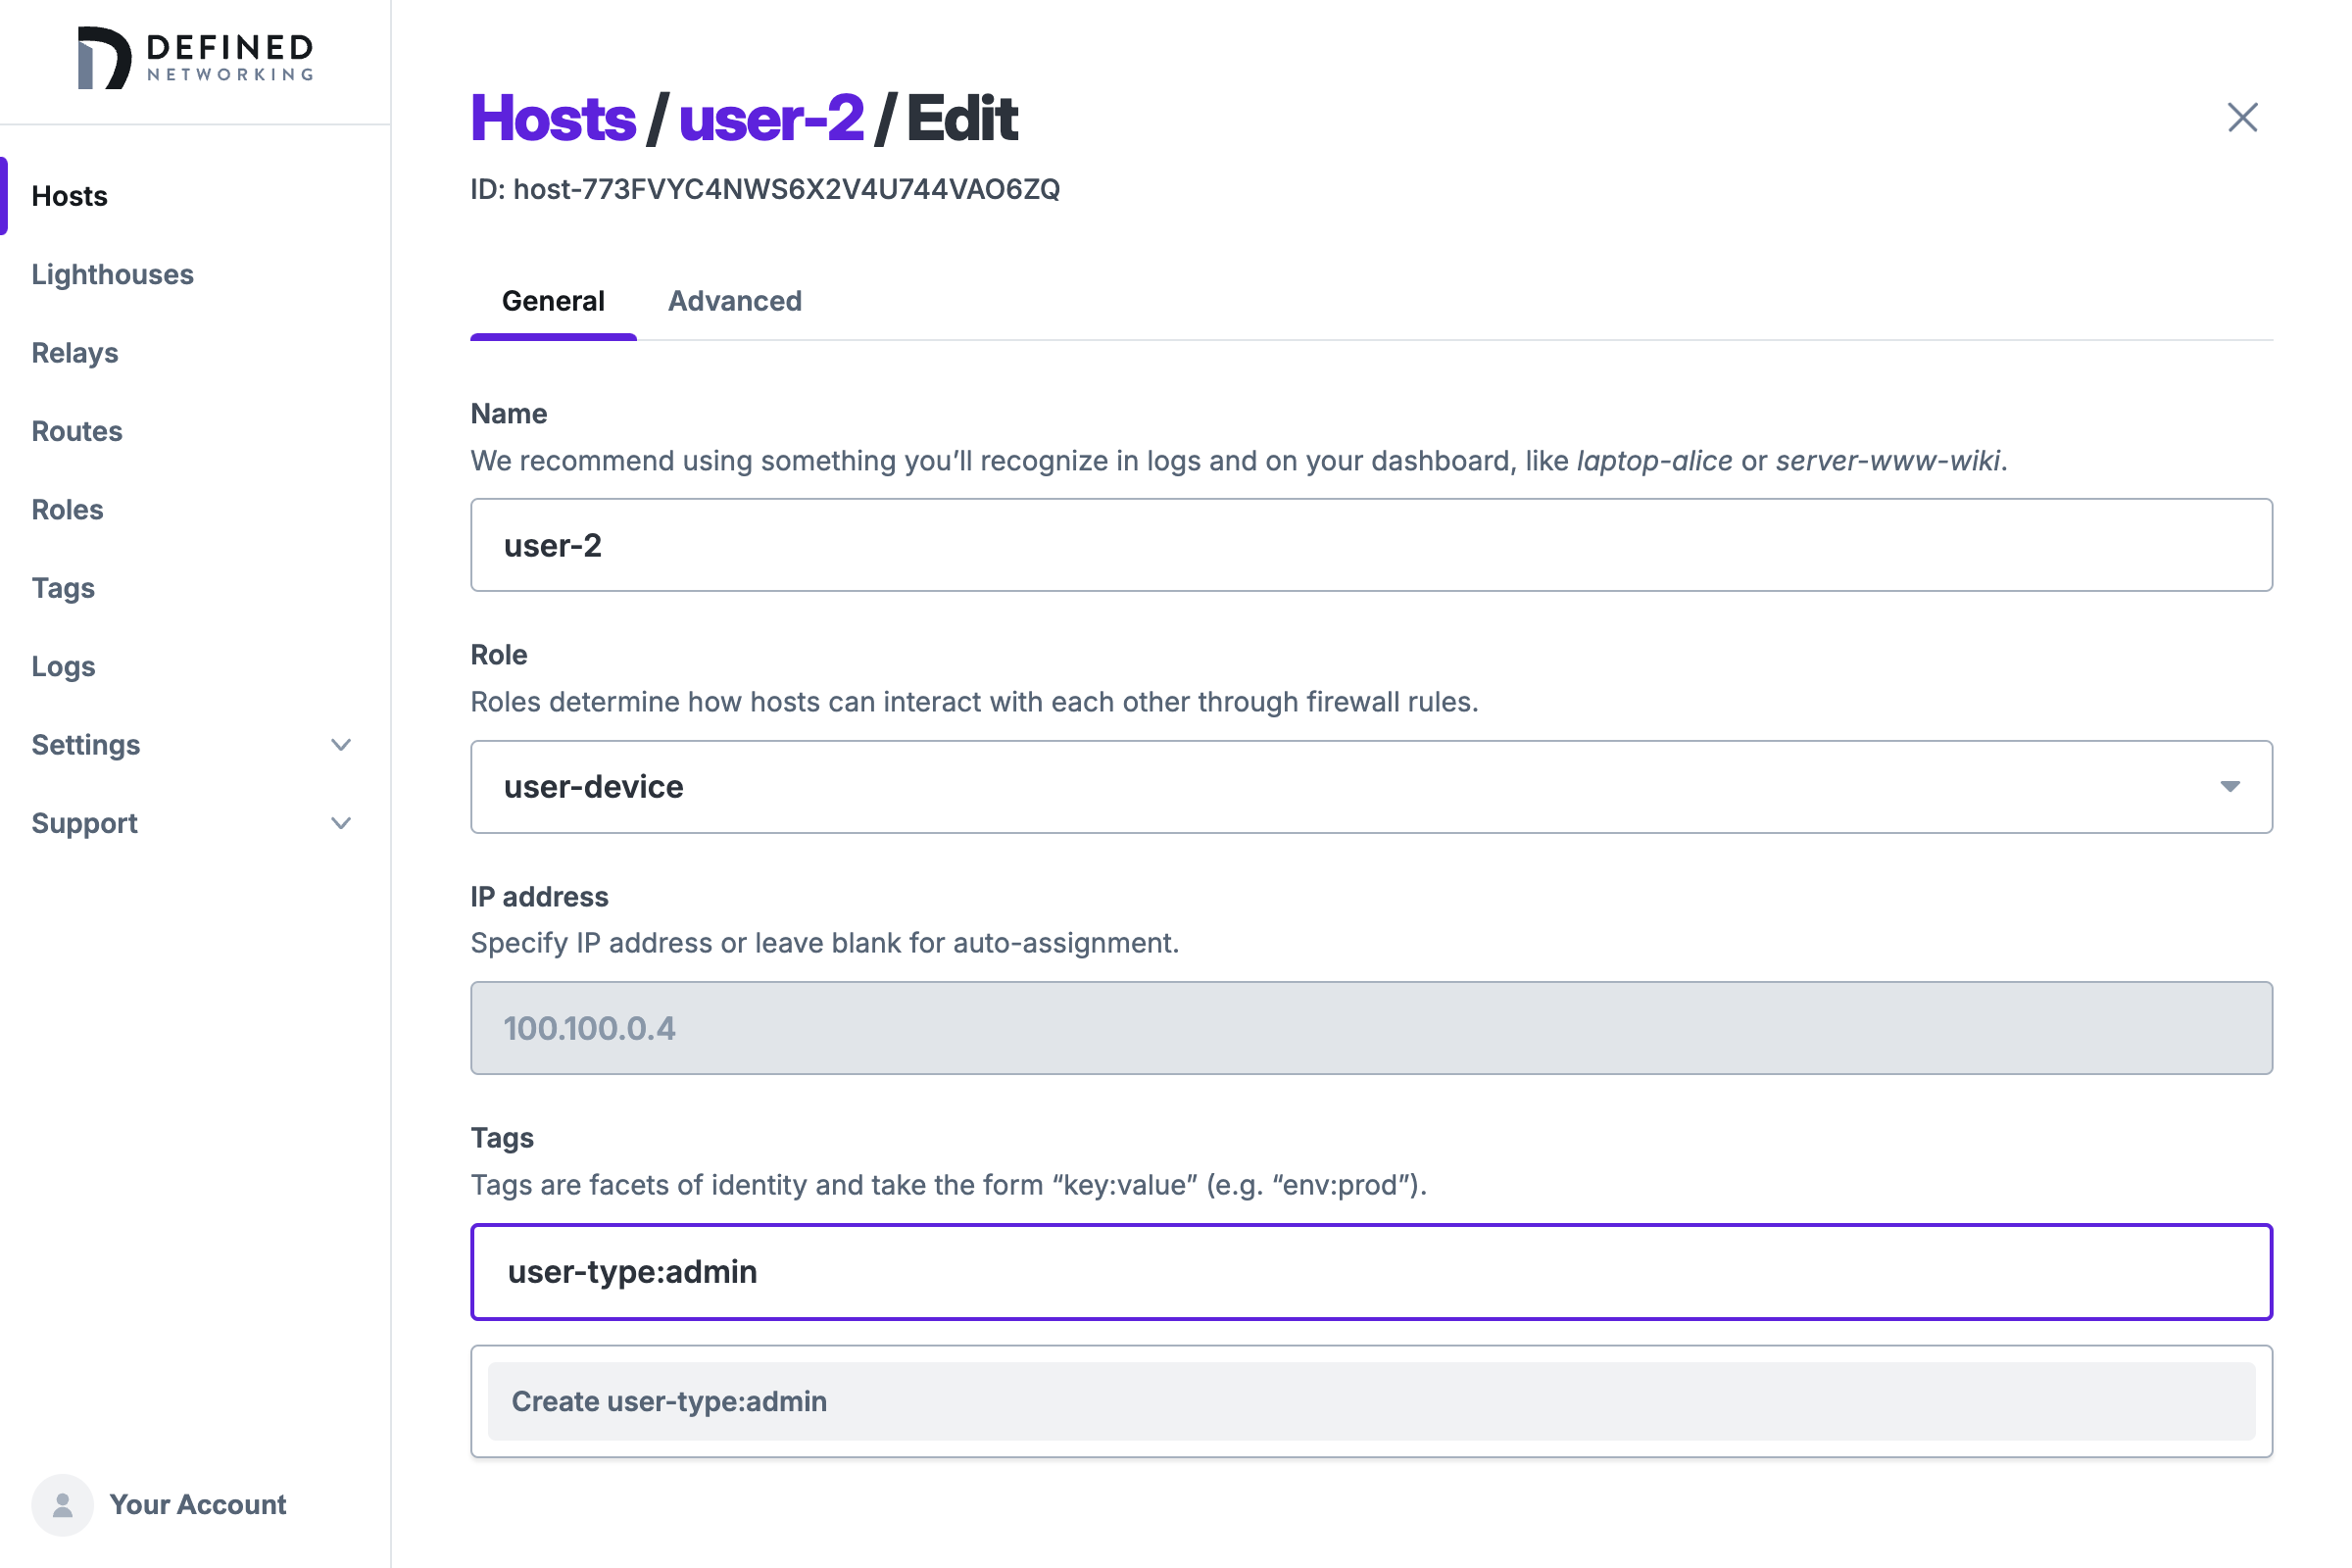
Tags can be defined and created on-the-fly when creating or editing hosts, as we are doing here. When a new tag will be created, it will be shown in green. When choosing an existing tag, it will be gray.


Specifying tags in firewall rules
Now that we have a new tag created for admins, we can create another firewall rule on the webserver-internal role to allow them access to SSH on TCP port 22, choosing the user-type:admin tag from the dropdown.

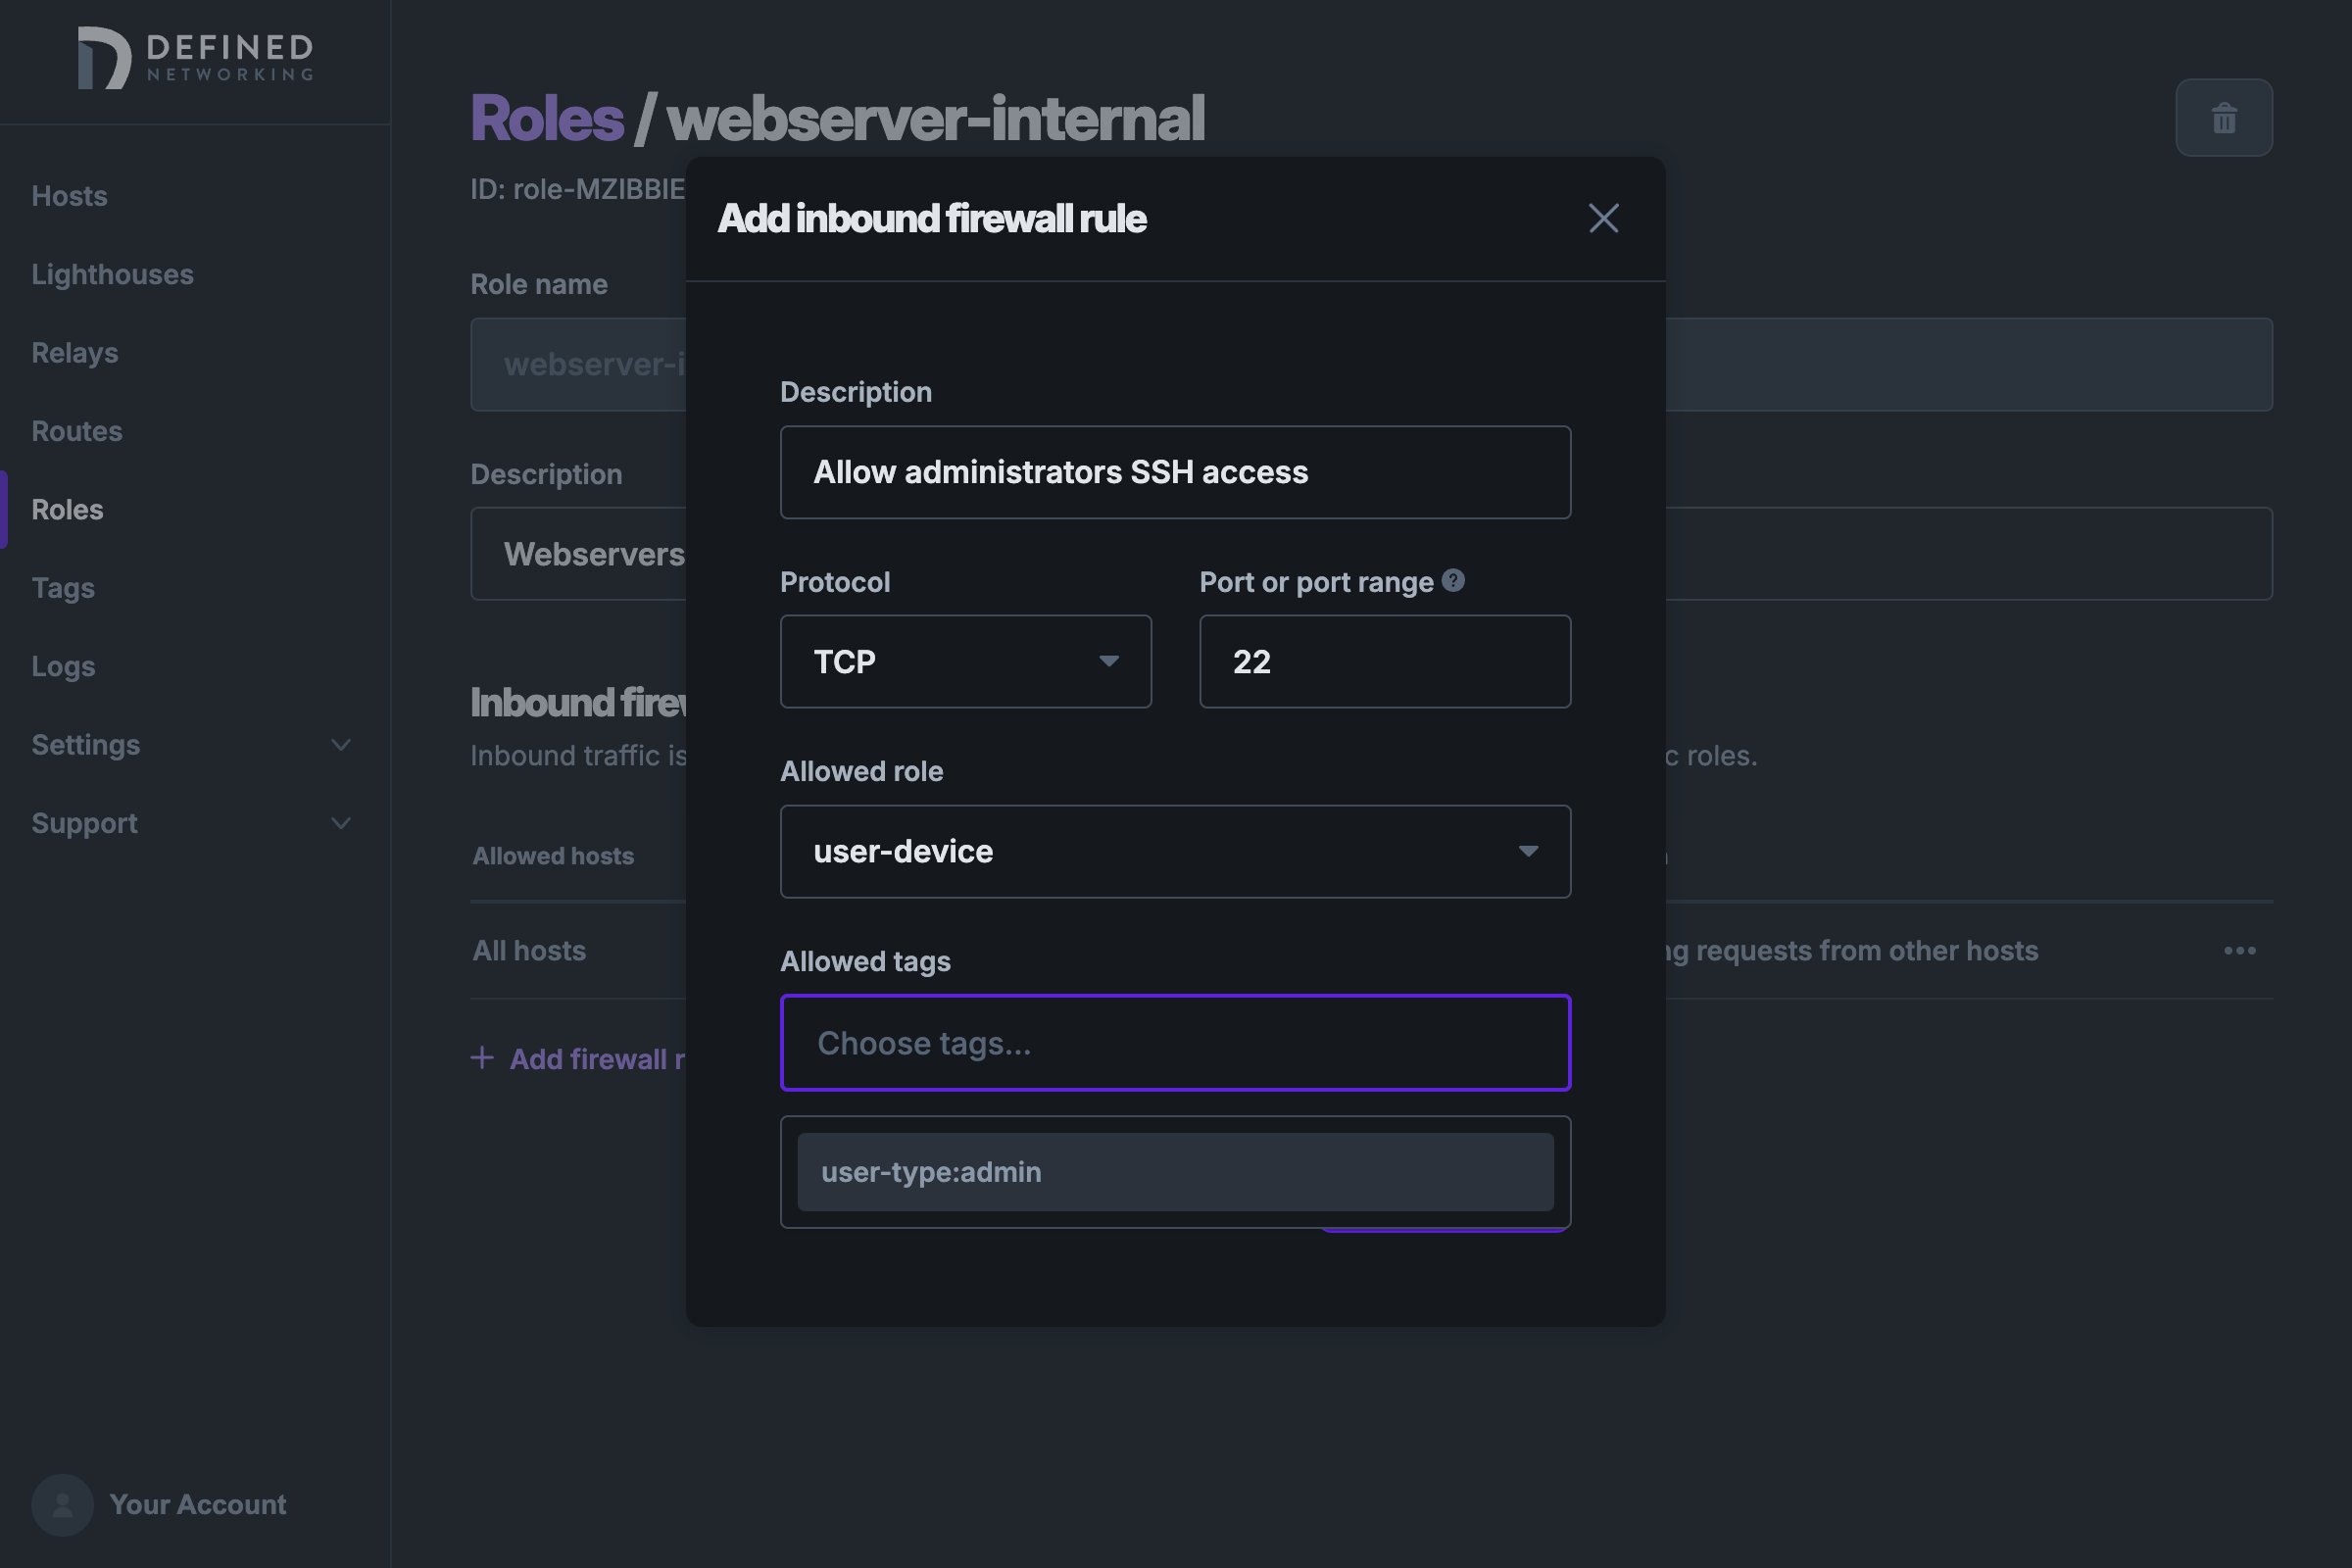
After adding this rule and saving the role, only hosts with a role of user-device and a tag of user-type:admin will have SSH access. Note that the role and all tags in a rule must match in order to allow access (the conditions are "AND"ed together).
Configuring firewall rules on tags
In the examples above, the firewall rules live on a role, so they protect every host that has that role. You can also configure inbound firewall rules directly on a tag. When you do, those rules apply to every host that carries the tag, in addition to the rules the host already inherits from its role.
This is a useful distinction because a host has exactly one role but can carry many tags. Configuring firewall rules on a tag lets you attach a piece of access policy to an attribute that cuts across roles, rather than repeating the same rule on every role that needs it. For example, you could put an "allow SSH from user-type:admin" rule on a managed:true tag; every host you then tag managed:true—no matter its role—would allow that access.
To do this, open a tag from the Tags page and add firewall rules exactly as you would on a role. The rule form is the same: you pick a protocol, an optional port range, and the allowed role and/or tags a connecting host must match. A host's effective inbound firewall is the union of the rules from its role and the rules from every tag it carries, and each individual rule still requires its own role and tag conditions to all match before it allows a connection.
Conclusion
By clearly defining the purpose of each type of machine on your network through the use of roles and assigning attributes of their identity using tags, it's possible to easily create targeted and effective firewall rules in your Managed Nebula network. If you have any questions or are having trouble setting up what you need, feel free to contact us for support.