Extend network access beyond overlay hosts
This guide explains how to configure Nebula to route traffic destined for a specific subnet through a specific overlay network host using Managed Nebula's Routes feature.
This is especially useful for accessing hosts that cannot be modified to run DNClient, such as managed cloud resources and other proprietary devices on which you cannot install arbitrary software.
Prerequisites
Read the Quick setup guide to learn how to create your first Managed Nebula network.
Before getting started, ensure you have the following:
- Two enrolled hosts using DNClient at least
v0.4.1in your Managed Nebula network:- A Linux host that will act as the router between the overlay network and its local network
- A Linux, macOS, or Windows host that needs access to the router's local network
- Root access to the Linux host that will act as a router
Example scenario
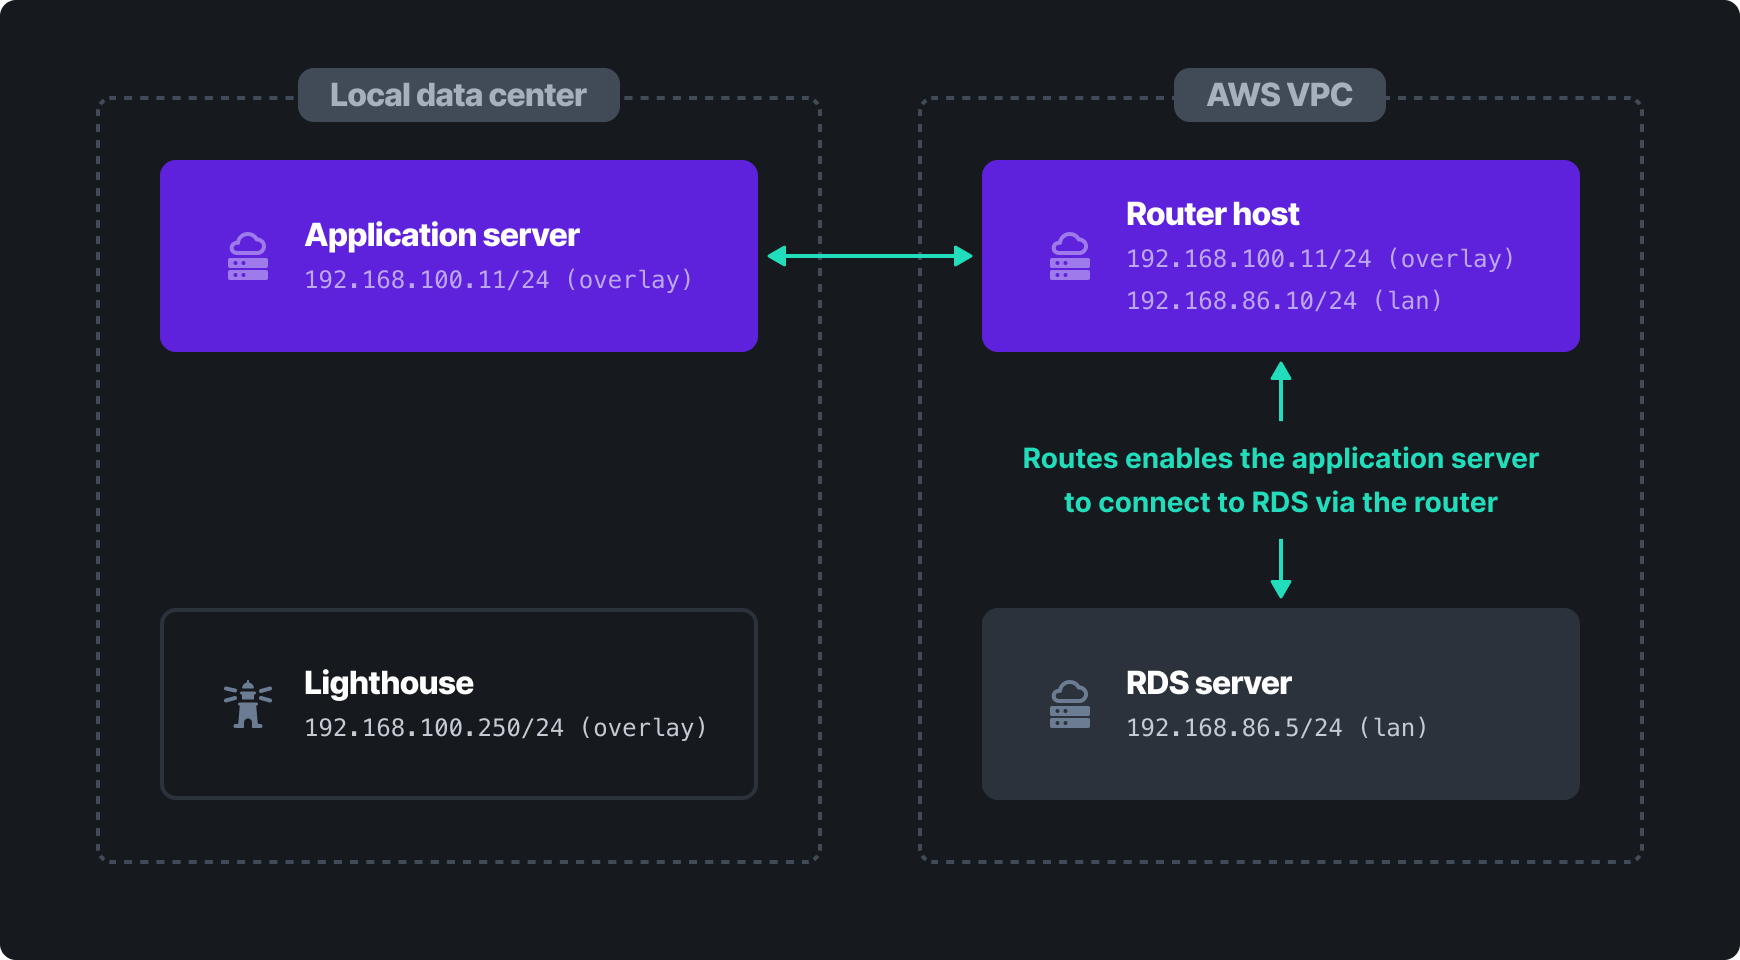
For the sake of this example, we'll pretend that we are using Amazon Web Services (AWS) Relational Database Service (RDS) to host a database. We need to enable an application server in another datacenter (e.g. Google Cloud Platform or a local, on-premises datacenter) to access the database. Since we don't have control over the server RDS runs on, we can't install DNClient directly. Instead, we'll create a dedicated host to act as a router for the AWS VPC.
Network layout: AWS VPC
This is the subnet containing resources (e.g. RDS) which we cannot install DNClient on, but need to expose on the overlay network.
192.168.86.0/24(192.168.86.1–192.168.86.254)- The Linux host routing traffic from Nebula to Amazon resources is connected to this network
| LAN Host IP | Hostname | Description |
|---|---|---|
192.168.86.5 | example-rds | RDS instance that cannot run Nebula |
192.168.86.10 | vpc1-router | Linux host that will handle routing |
Network layout: Managed Nebula
This is the overlay network that will be used by hosts running DNClient.
192.168.100.0/24(192.168.100.1–192.168.100.254)- The application server in this example has Internet access but is not on the same local network as the Linux host or AWS RDS instance
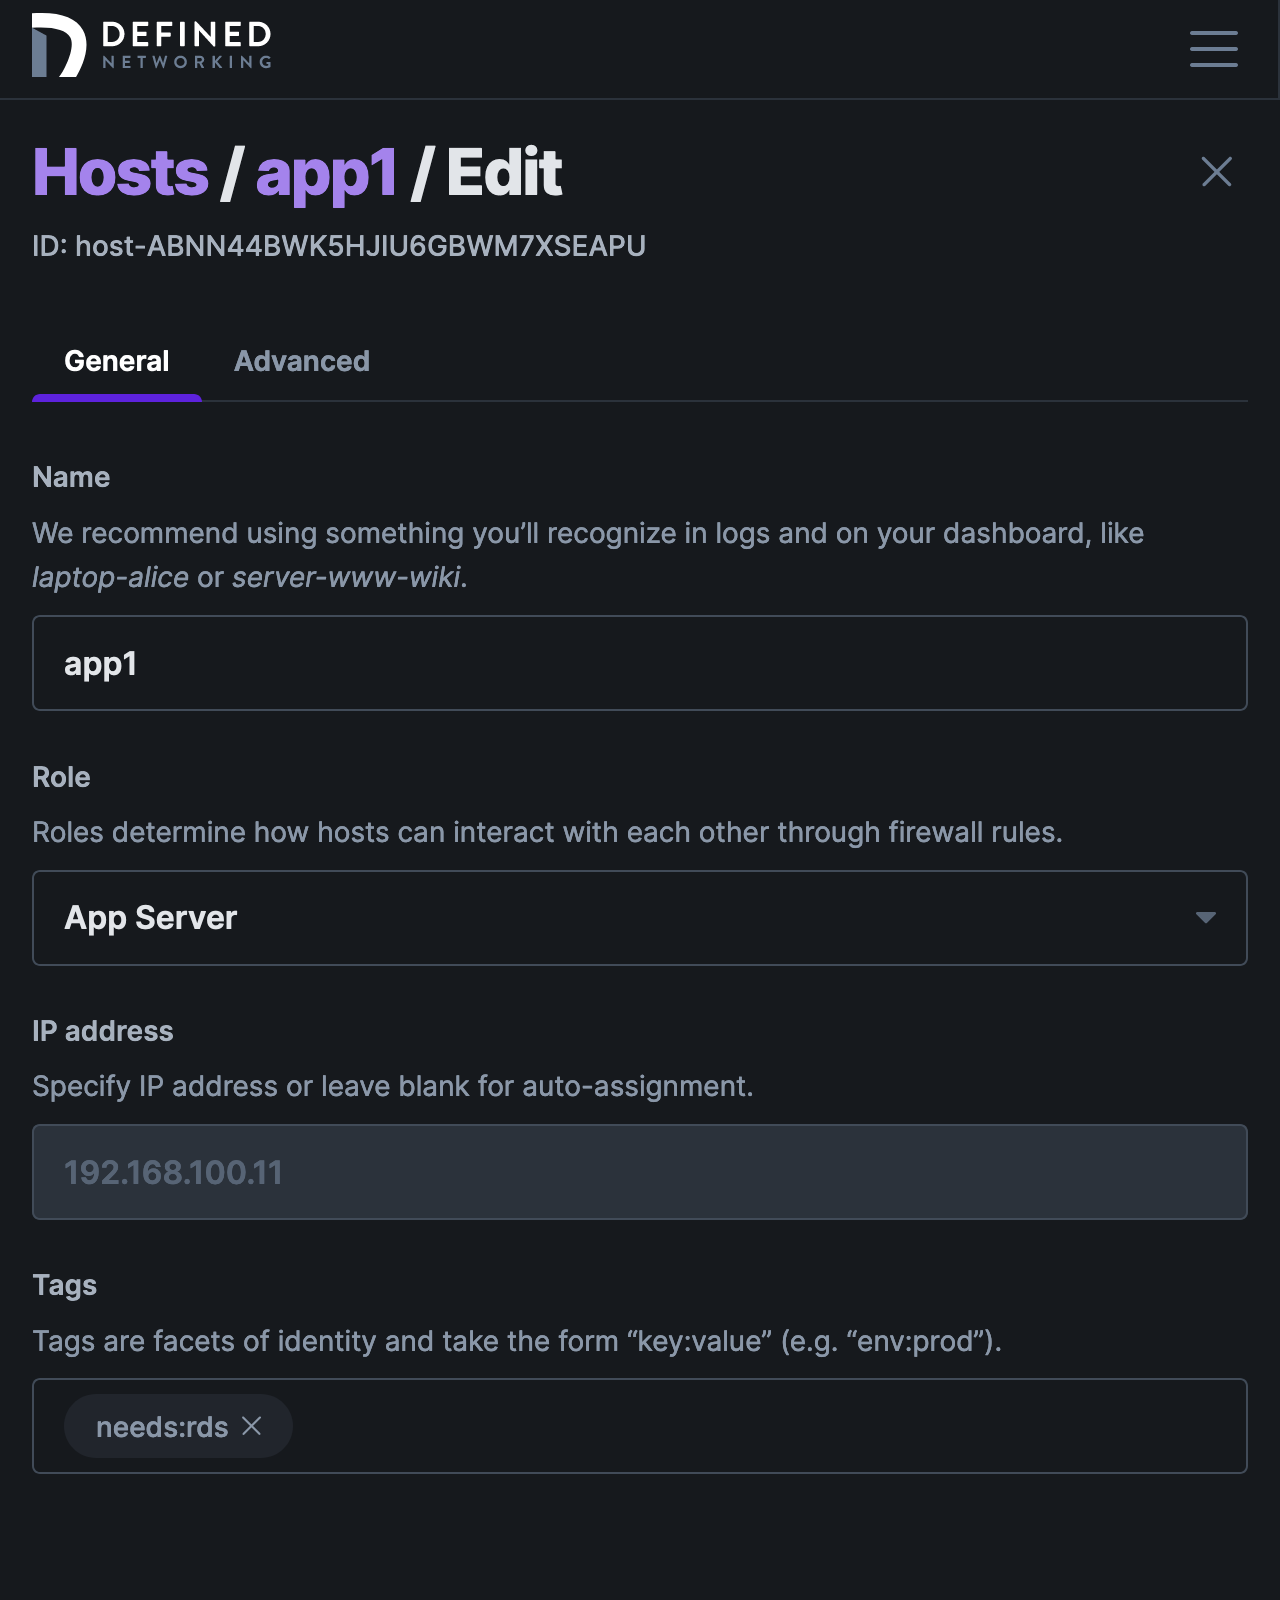
| Overlay Host IP | Hostname | Role | Tags | Description |
|---|---|---|---|---|
192.168.100.10 | vpc1-router | VPC1 Router | Linux host that will handle routing | |
192.168.100.11 | app1 | App Server | needs:rds | Application server that will access AWS RDS |
For the purposes of this guide, we will assume the above hosts have already been created and enrolled.
Configuration steps
Step 1. Create the route in Defined Networking
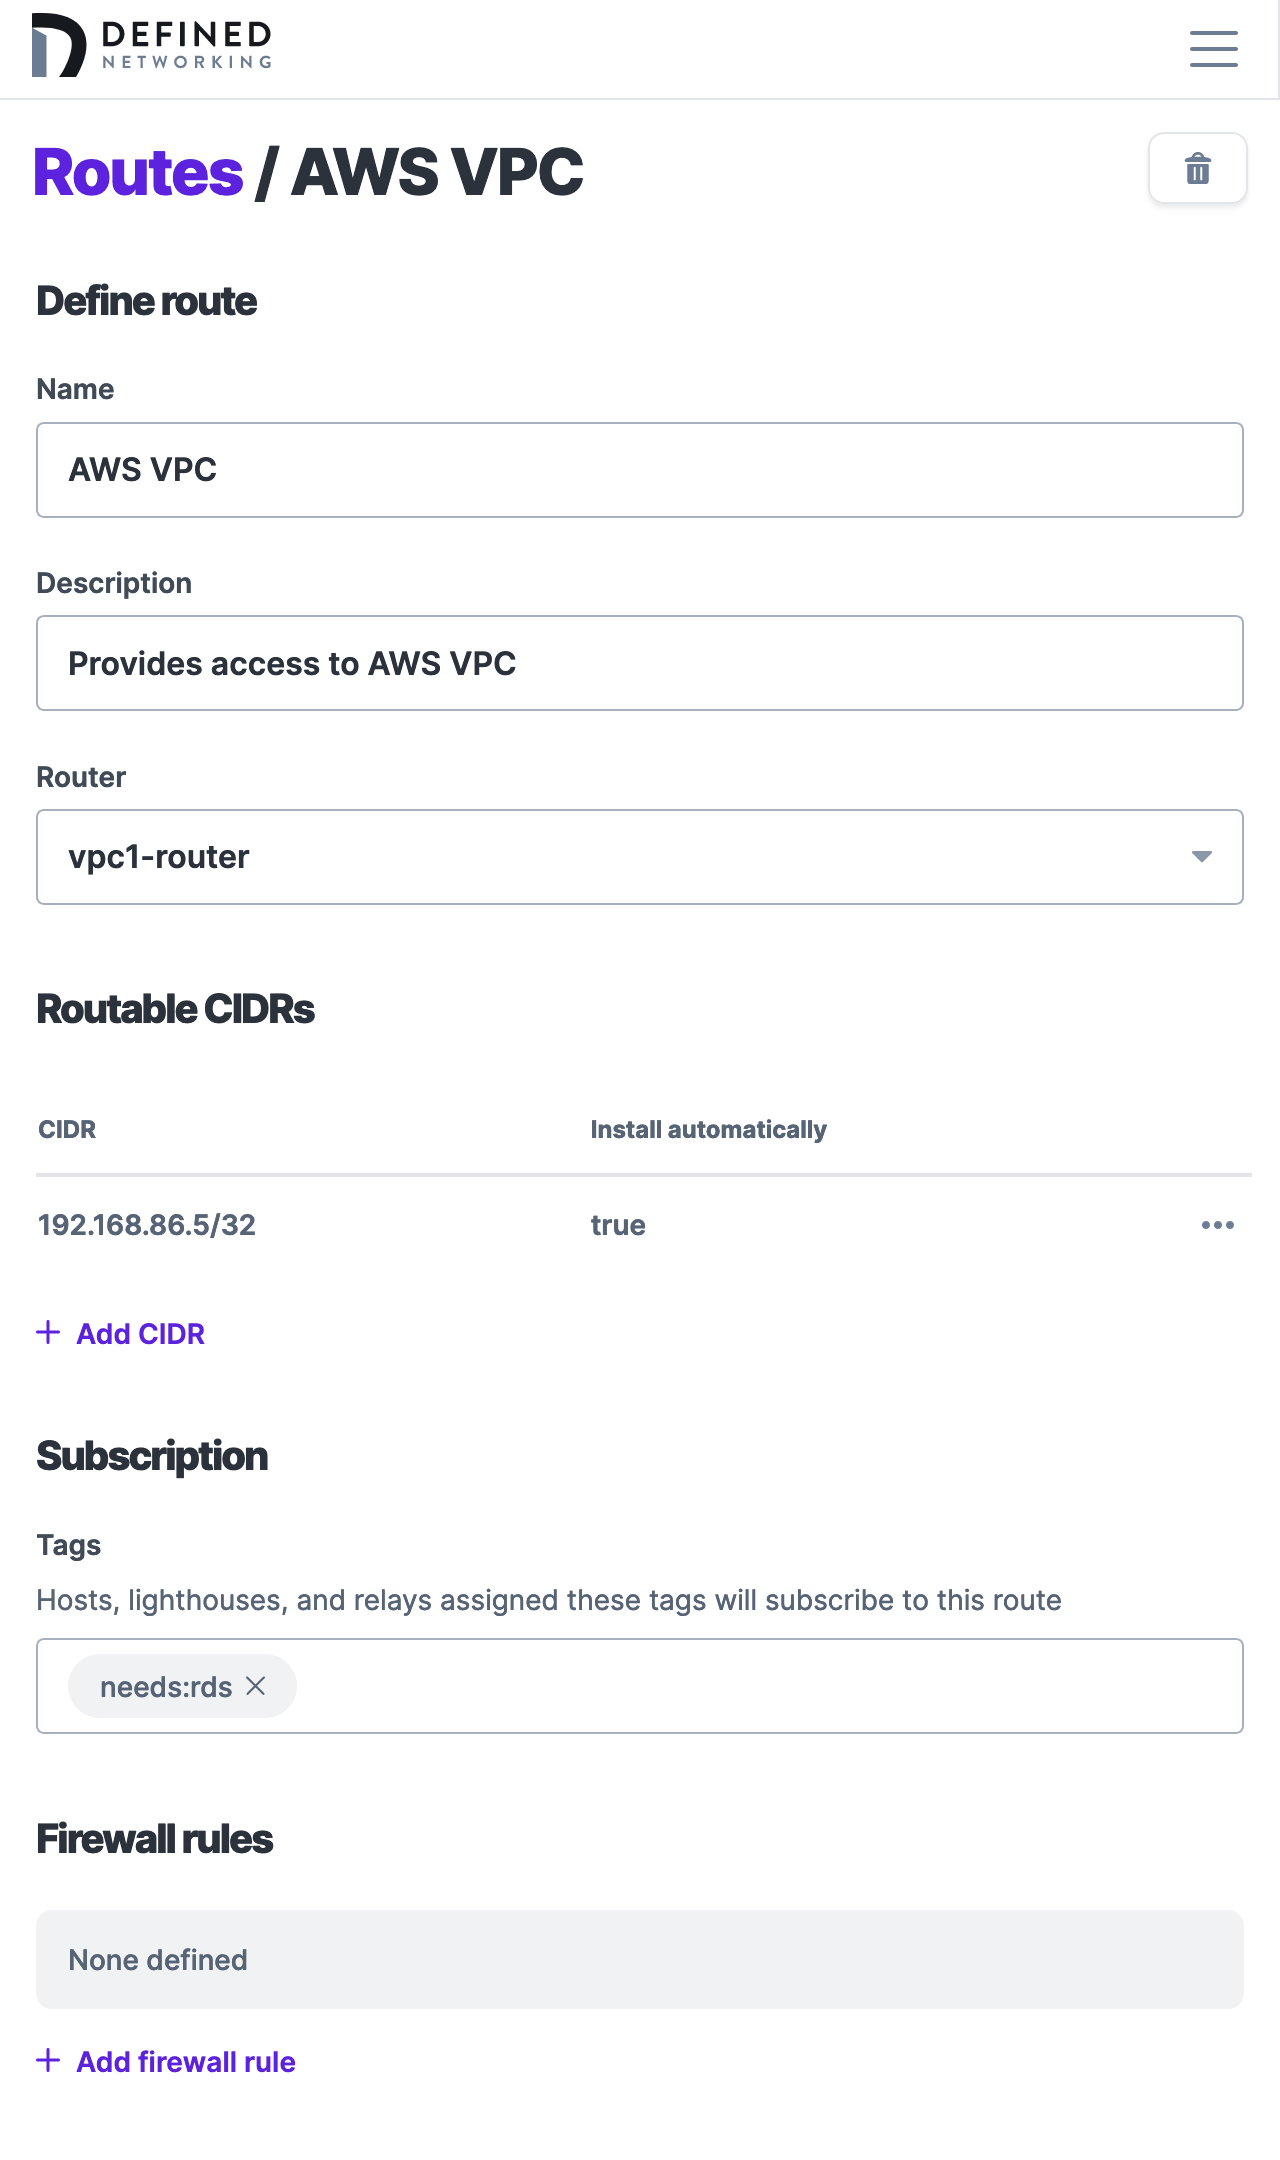
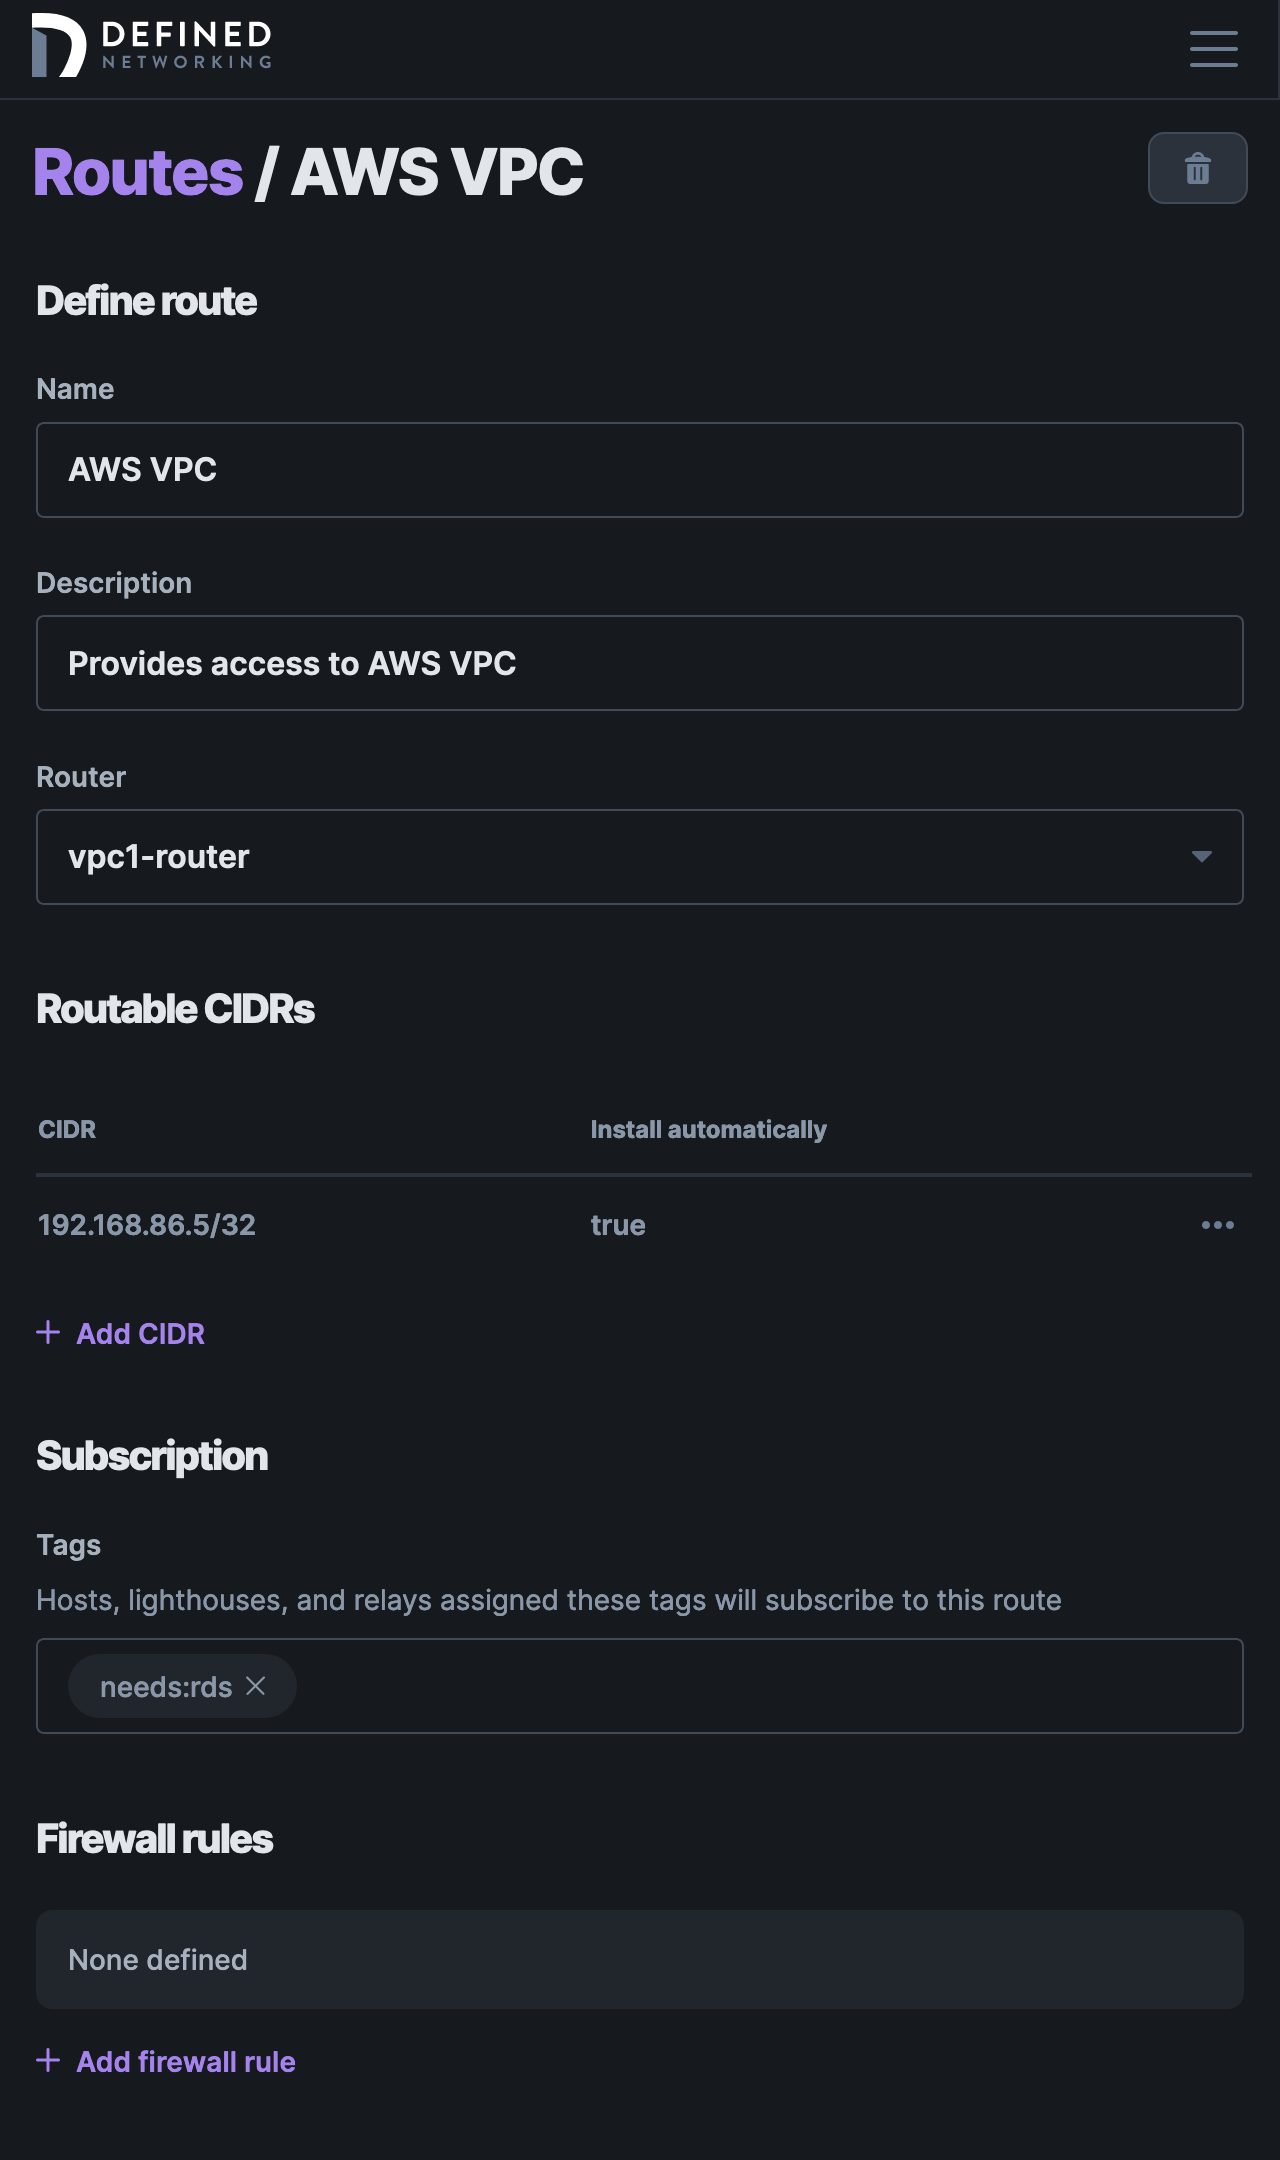
Navigate to the Routes tab in the sidebar, and click "Add route." Choose a name and description that will help you to remember the role of the route in the future.
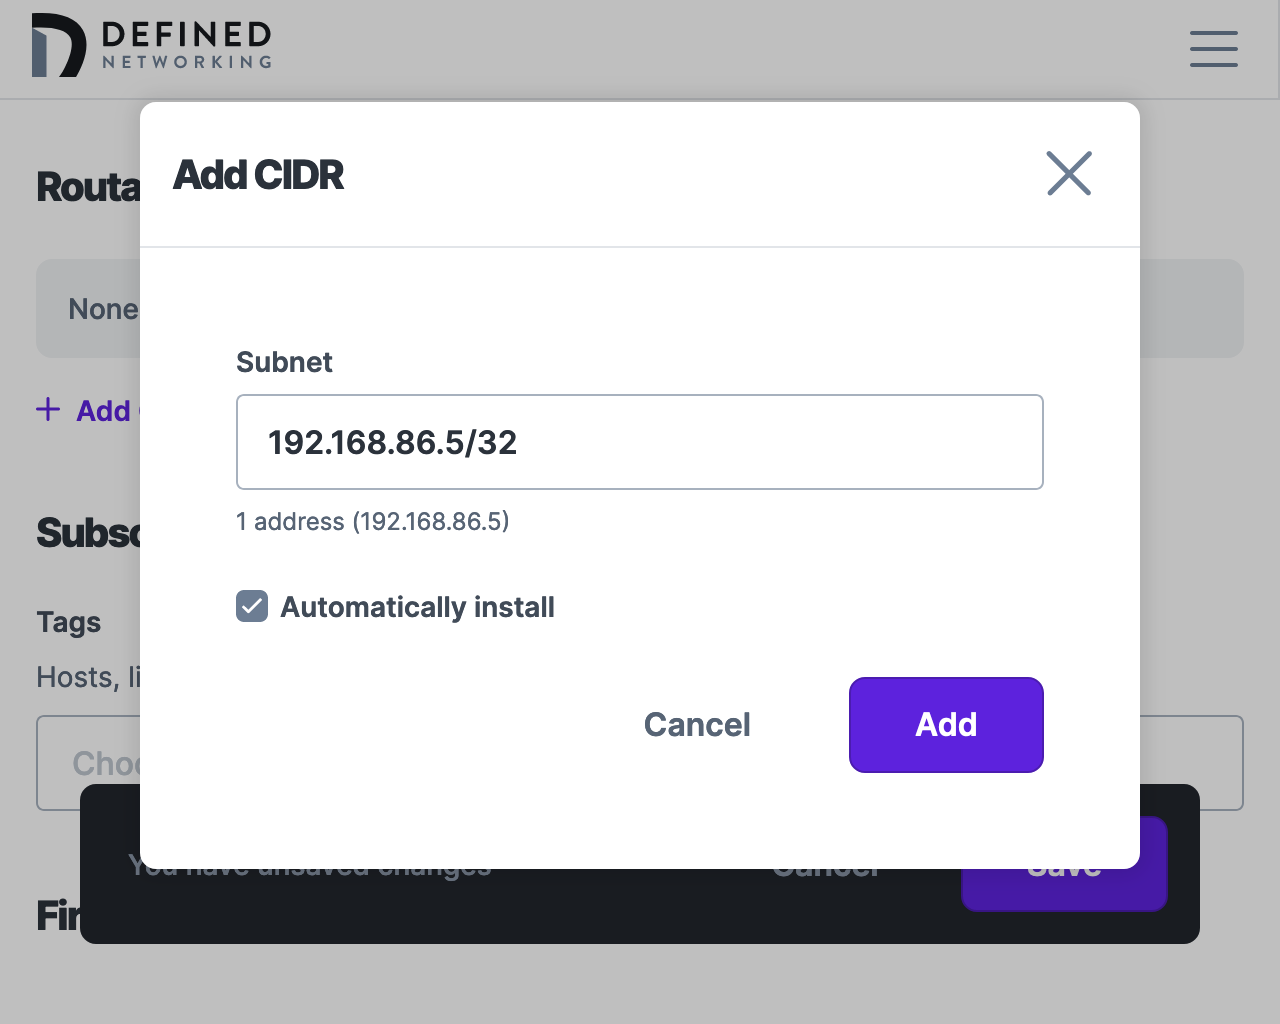
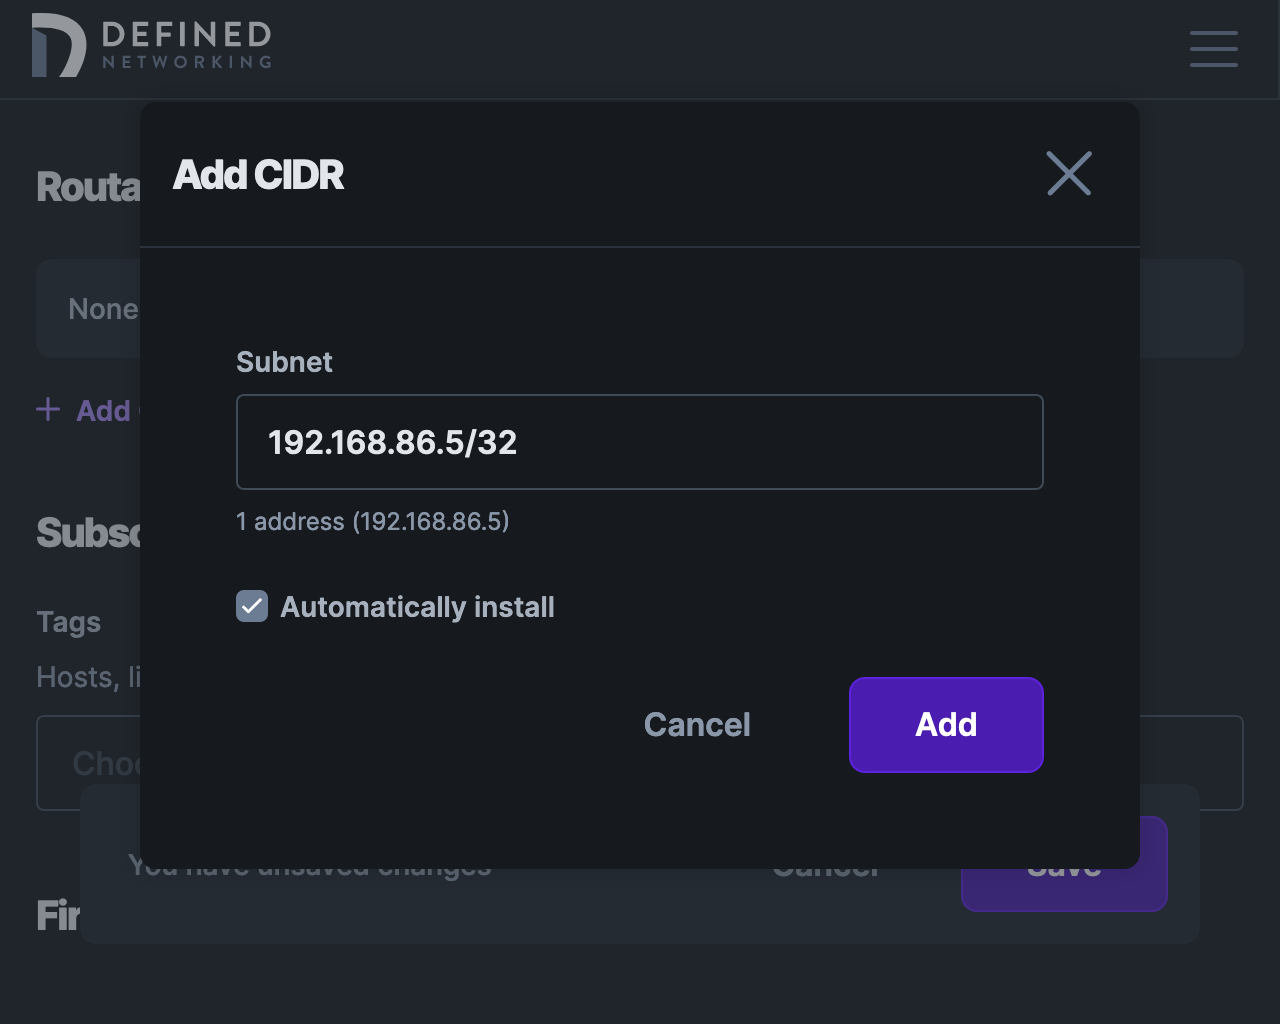
In the Router field, select the router host you created above (e.g. vpc1-router). Next, define the subnets the router should serve under Routable CIDRs.
For example, if you would like to route the entire VPC, you might enter 192.168.86.0/24. Alternatively, if you would like to expose only the RDS instance, enter 192.168.86.5/32. You can define multiple routable CIDRs for a given route. For the purposes of this guide, we'll use the RDS instance /32.
When adding a routable CIDR, you have the option to "Automatically install" the route on subscribed hosts, or to perform this action manually. Manual creation of routes on hosts is outside the scope of this guide. Unless you have a reason not to, it's recommended to leave this checked.
Finally, under Subscriptions, add the tag you want to assign hosts in order to have them subscribe to the route. In this example, we're using the tag needs:rds. Only tagged hosts will be able to access the configure route.
Step 2. Enable IP forwarding on Linux router host
Linux hosts need a kernel parameter set in order to allow packet forwarding. This is often disabled by default as shown in the following read example.
sysctl net.ipv4.ip_forward
net.ipv4.ip_forward = 0
Here's how you update that variable at runtime.
sudo sysctl -w net.ipv4.ip_forward=1
net.ipv4.ip_forward = 1
This change is only persistent until you reboot. To make it permanent, add a new line with net.ipv4.ip_forward = 1 to the end of the /etc/sysctl.conf file.
Step 3. Configure firewall forwarding rules on Linux router host
Now that IP forwarding is enabled, we need to add a few firewall rules so that our Linux router host will be able to to act as a NAT and masquerade as the other Nebula nodes which are using the route to connect through the Linux host to the hosts in the VPC. The exact steps necessary will depend on the firewall you are using, and the current firewall state on the host.
ufw
Open /etc/ufw/before.rules and add the following lines to the bottom of the file.
# NAT table rules
*nat
:POSTROUTING ACCEPT [0:0]

# flush all existing POSTROUTING rules in the nat table to avoid duplicates
-F POSTROUTING

# 192.168.100.0/24 is the overlay network, 192.168.86.0/24 is the route CIDR
-A POSTROUTING -s 192.168.100.0/24 -d 192.168.86.0/24 -j MASQUERADE

# don't delete the 'COMMIT' line or these nat table rules won't be processed
COMMIT
Then run the following commands, replacing defined1 (DNClient interface) and enp5s0 (local network interface) with the correct interface names, if necessary:
sudo ufw route allow in on defined1 out on enp5s0 from 192.168.100.0/24 to 192.168.86.0/24
sudo ufw reload
Confirm the new rule is active by running the following:
$ sudo ufw status
Status: active

To                         Action      From
--                         ------      ----
192.168.86.0/24 on enp5s0  ALLOW FWD   192.168.100.0/24 on defined1
nftables
Create a new nftables configuration (e.g. /etc/nftables-routing.conf) with the following configuration:
table ip dnclient_routing
delete table ip dnclient_routing
table ip dnclient_routing {
  chain postrouting {
    type nat hook postrouting priority srcnat; policy accept;
    ip saddr 192.168.100.0/24 ip daddr 192.168.86.0/24 counter masquerade
  }

  chain forward {
    type filter hook forward priority filter; policy accept;
    ct state related,established counter accept
    iifname defined1 oifname enp6s0 ip saddr 192.168.100.0/24 ip daddr 192.168.86.0/24 counter accept
  }
}
Then run the following command to load the rules:
sudo nft -f /etc/nftables-routing.conf
You can verify the rule has taken effect by running the following command:
$ sudo nft list table dnclient_routing
table ip dnclient_routing {
	chain postrouting {
		type nat hook postrouting priority srcnat; policy accept;
		ip saddr 192.168.100.0/24 ip daddr 192.168.86.0/24 counter packets 1 bytes 84 masquerade
	}

	chain forward {
		type filter hook forward priority filter; policy accept;
		ct state established,related counter packets 134763 bytes 123879509 accept
		iifname "defined1" oifname "enp6s0" ip saddr 192.168.100.0/24 ip daddr 192.168.86.0/24 counter packets 726 bytes 85482 accept
	}
}
These rules will only be persistent until you reboot the host. You will need to configure the file to be loaded at boot.
iptables
Run the following commands to add the rules specific to our example networks, replacing defined1 (DNClient interface) and epn5s0 (local network interface) with the correct interface names, if necessary. Note that if you opted to use a /32 for your routable CIDR, you can also use the /32 here.
sudo iptables -t nat -A POSTROUTING -s 192.168.100.0/24 -d 192.168.86.0/24 -j MASQUERADE
sudo iptables -I FORWARD 1 -m conntrack --ctstate RELATED,ESTABLISHED -j ACCEPT
sudo iptables -I FORWARD 2 -i defined1 -o enp5s0 -s 192.168.100.0/24 -d 192.168.86.0/24 -j ACCEPT
Once complete, you can confirm that the new rules are active by running the following.
This first list shows the second and third rule.
$ sudo iptables -vL
Chain INPUT (policy ACCEPT 10M packets, 6461M bytes)
 pkts bytes target     prot opt in     out     source               destination

Chain FORWARD (policy ACCEPT 86 packets, 11057 bytes)
 pkts bytes target     prot opt in     out     source               destination
 1034 1469K ACCEPT     all  --  epn6s0 defined1  anywhere             anywhere             ctstate RELATED,ESTABLISHED
    0     0 ACCEPT     all  --  defined1 enp6s0  192.168.100.0/24     192.168.86.0/24

Chain OUTPUT (policy ACCEPT 18M packets, 58G bytes)
 pkts bytes target     prot opt in     out     source               destination
And this command shows the first rule, specific to the NAT table.
$ sudo iptables -t nat -L
Chain PREROUTING (policy ACCEPT)
target     prot opt source               destination

Chain INPUT (policy ACCEPT)
target     prot opt source               destination

Chain POSTROUTING (policy ACCEPT)
target     prot opt source               destination
MASQUERADE  all  --  192.168.100.0/24     192.168.86.0/24

Chain OUTPUT (policy ACCEPT)
target     prot opt source               destination
You may see additional rules listed depending on your host and whether or not you've modified it.
These rules will only be persistent until you reboot the host. Depending on your distribution, you need to run additional commands (e.g. iptables-save) to save these rules to disk and load them at boot.
Step 4. Configure the router's firewall
Add firewall rules as necessary to the route to permit access to any required services exposed by the router.
For example, if you're just exposing a single RDS instance (e.g. 192.168.86.5/32), create a rule to allow inbound access on TCP port 3306 only. You can specify which roles and tags are required to access a given port, in addition to the destination CIDR served by the route.
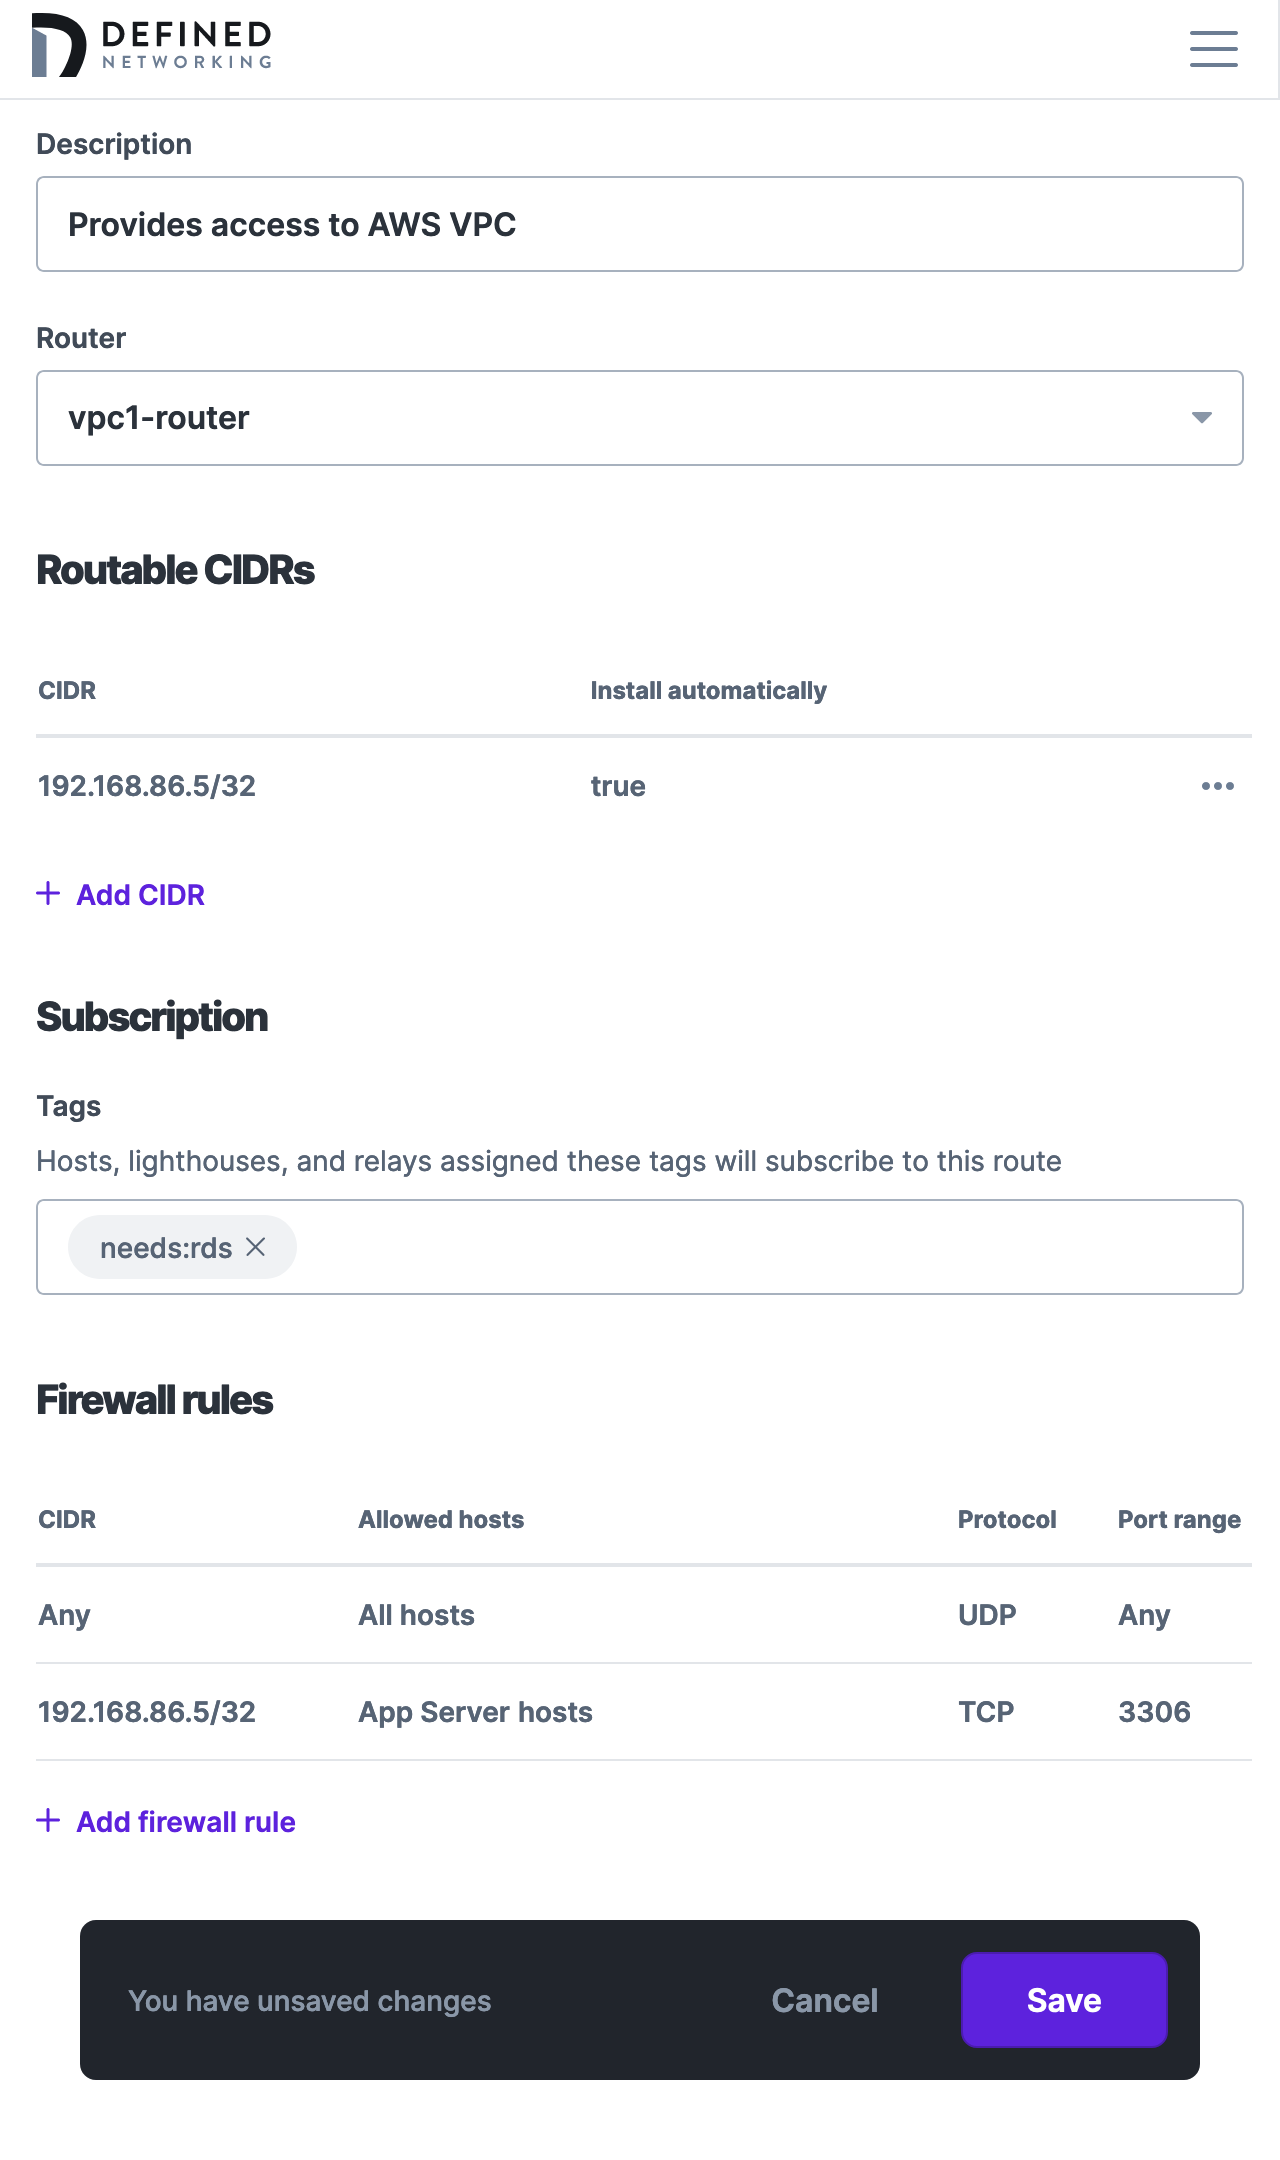
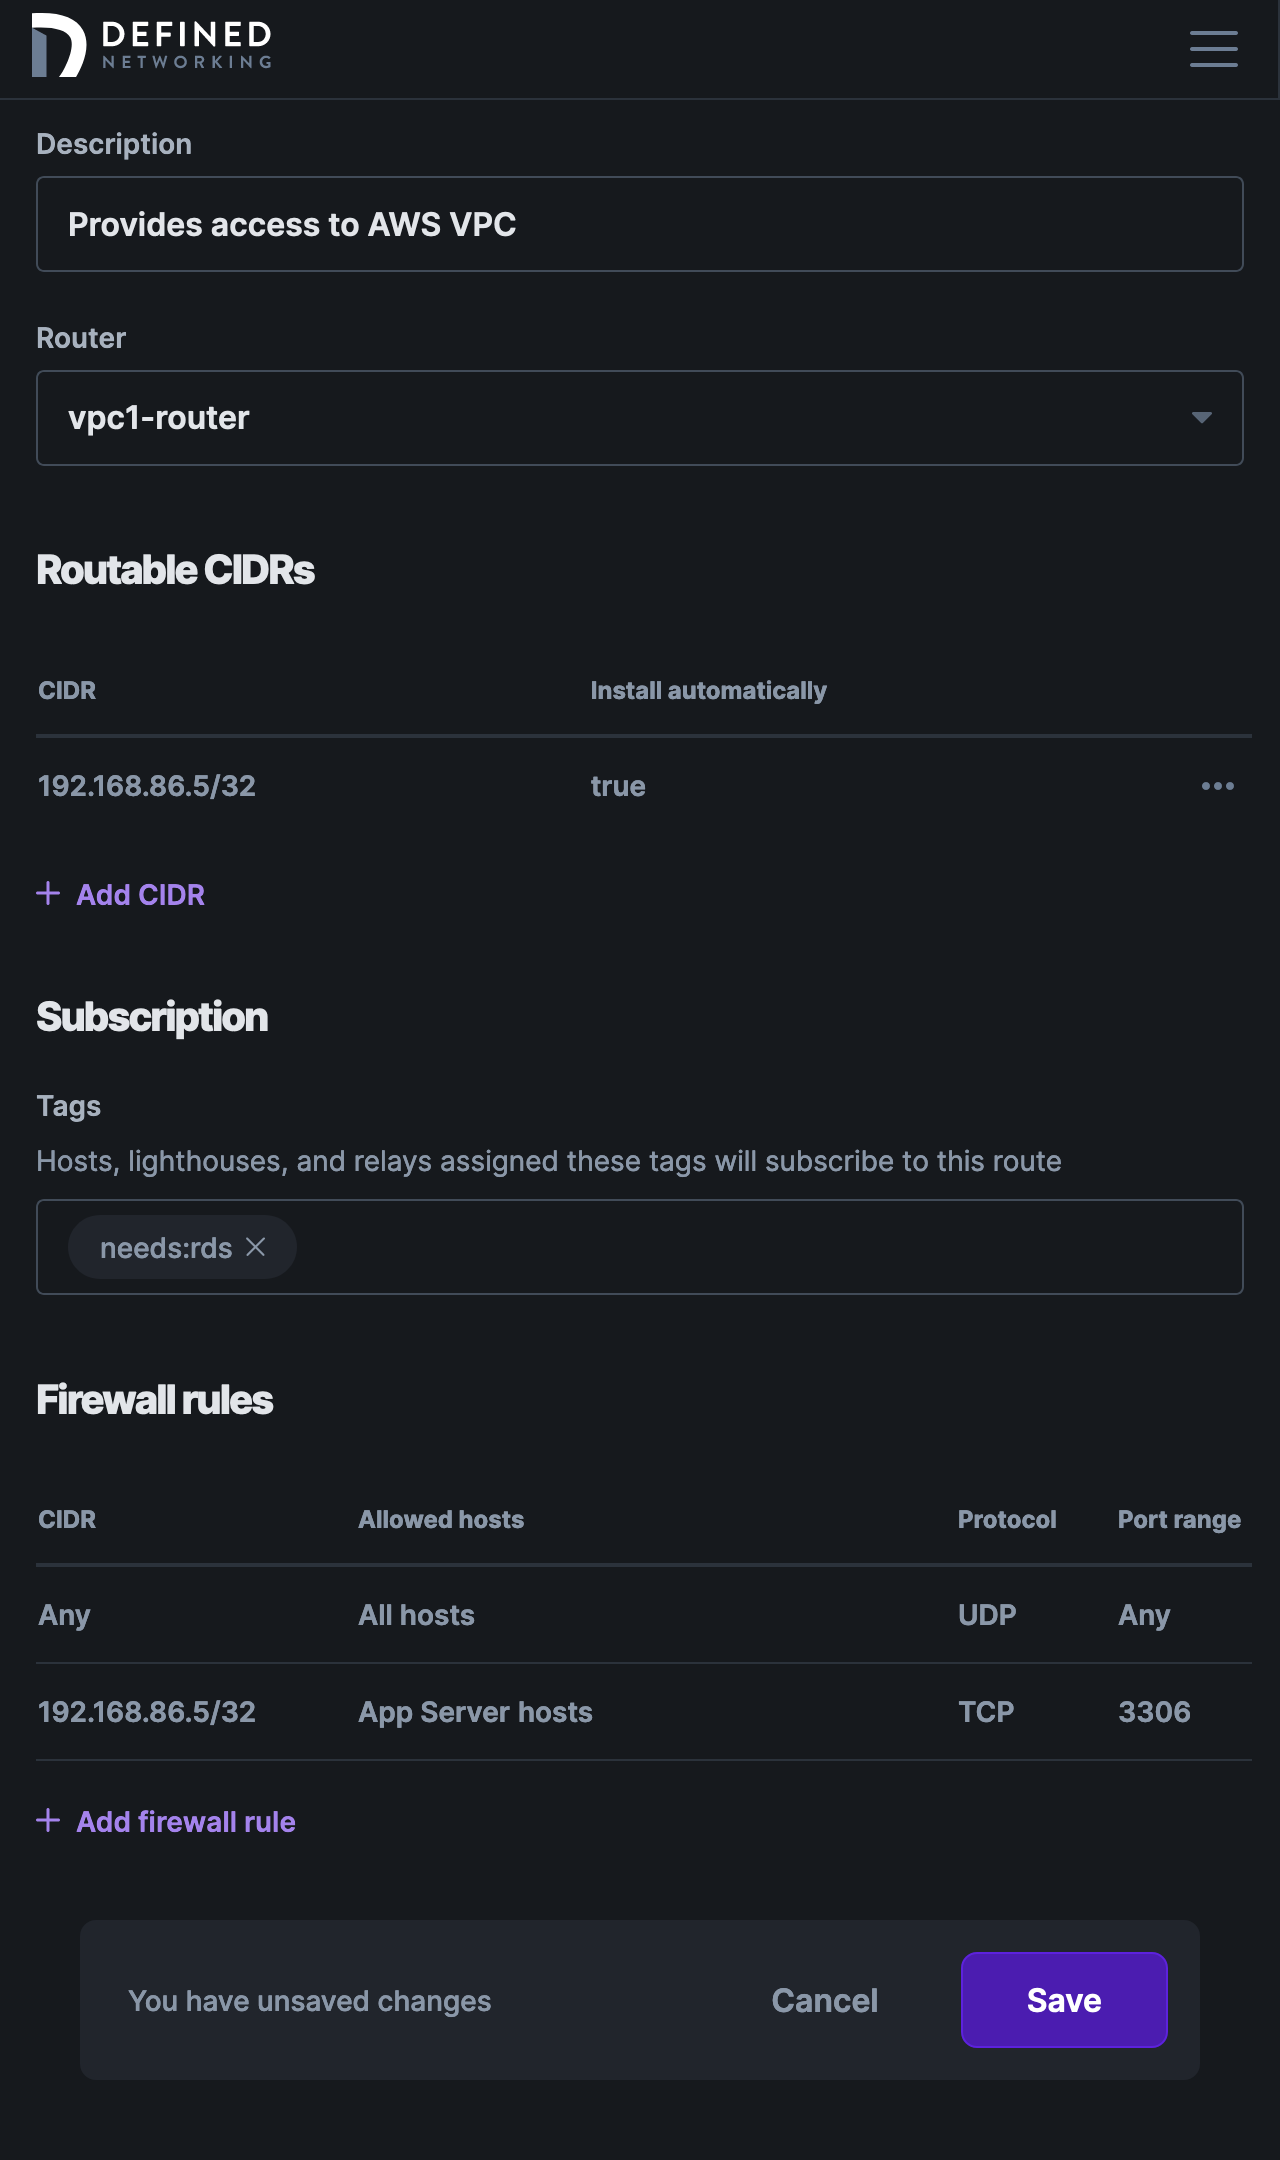
Note that in the screenshot above, we restricted the firewall rule to 192.168.86.5/32. It's good practice to always specify the allowable CIDRs in route firewall rules, because if a router host servers two routes, the firewall rules are combined together on the host. That means that a rule targeting "All hosts" in one route would allow access to the routable CIDRs in the other route the host is serving.
For this reason, it's also a good practice to assign a single route per router host.
Regardless of what firewalls you create, it's generally recommended to allow ICMP traffic in order to test the route configuration.
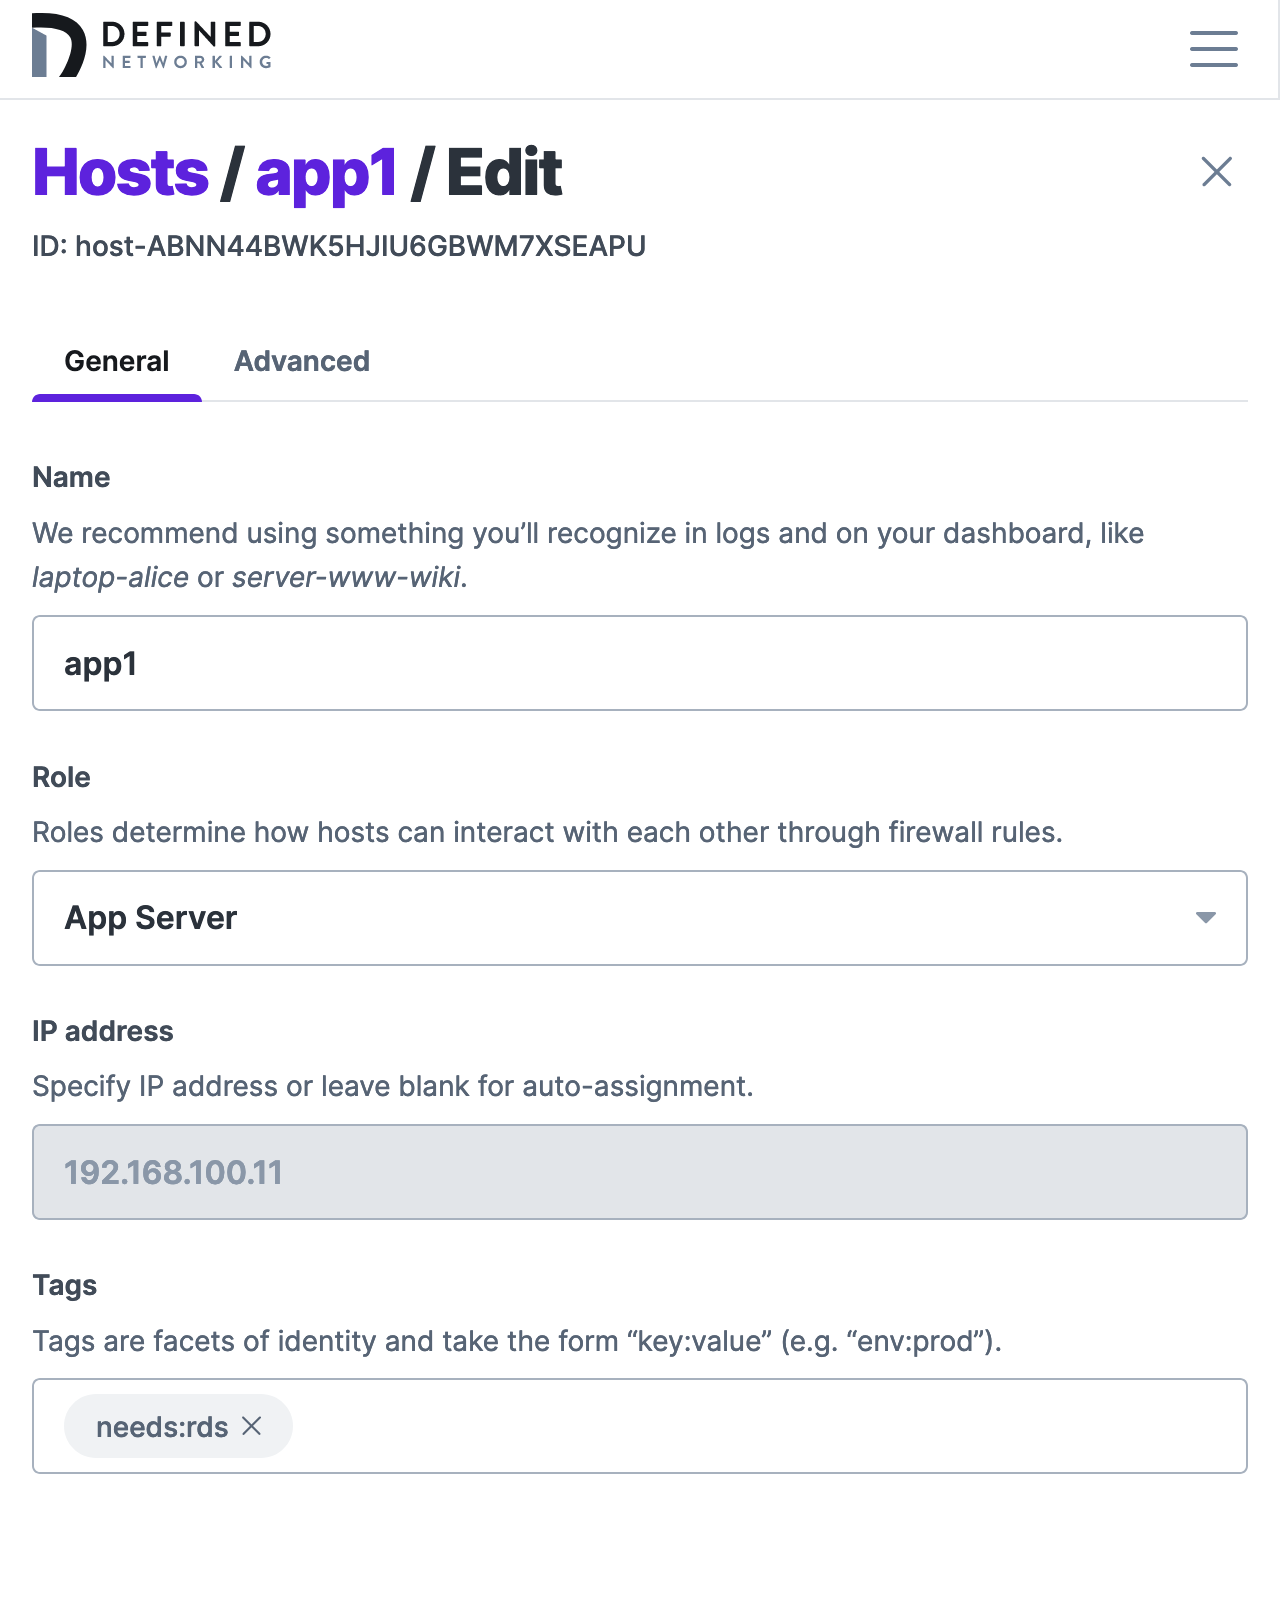
Step 5. Assign hosts the route tag as needed
In order to receive the route in its Nebula config, you must subscribe hosts to the route. In our example, we chose the needs:rds tag to indicate a route subscription, and assigned it to the app1 application server.
Step 6. Test out the new route!
It's time to test the route. Oftentimes, a ping is a good place to start: go ahead and from the app1 host, run ping 192.168.86.5. If everything is working, and the host exposed by the router responds to pings, you should now be getting replies.
Unfortunately, AWS RDS does not respond to pings, so for the example scenario, you'll need to test it by connecting with MySQL directly. You can do this using the mysql CLI client, or by configuring your app to connect to the database using its AWS VPC IP address.
Were you able to connect? Great! If not, don't fret. Grab logs from the router host and the subscribed host and file a support ticket. We'll be happy to help you get up and running.
When you are running a Managed Nebula network with Routes, the OS of the host will forward all traffic destined for the route specified to your router. Keep in mind that this could cause a local IP conflict if your underlay network happens to use the same subnet as the subnet specified in your route configuration.