Setting up SSO for admins and endpoints
The Single Sign On (SSO) features allows multiple people at your company to securely log into and administer your Managed Nebula network, using your OpenID Connect (OIDC) identity provider. This means that there is no separate password for them to manage, and onboarding/offboarding employees is a snap. Additionally, you can set up SSO for endpoints, allowing users of your Managed Nebula network to authenticate with your identity provider. You can also limit the group of people who have access to Defined Networking directly in your identity provider. This guide will walk through the process of setting up SSO in Managed Nebula.
Requirements
To use the SSO features of Defined Networking you will need:
- The ability to create a new application in your OIDC Identity Provider (IDP)
- The ability to set a TXT DNS record on the domain you want to use if adding endpoint auth
- A Defined Networking account
Caveats
- Admin
- Endpoint
While administrators authenticating with SSO are able to perform most actions, they are unable to modify the account’s SSO configuration. For this, you will need to log in with a magic link and TOTP authenticator as you do today.
After disabling an SSO provider, existing sessions will continue to be valid and users will continue to have access to network resources unless their devices are blocked or deleted.
Configuration
Ready to set up SSO on your account? Let’s get started!
First, login to your Defined Networking account and navigate to the Single Sign-On page.
Next, login to your identity provider and create a new OIDC application. Begin configuration by copying the Sign-in Redirect URL from the Single Sign-On page of the Defined Networking admin panel to your identity provider. If asked to specify a grant type, choose “Authorization Code.” You may also need to explicitly allow the “email” OIDC scope. The screenshot below is an example of what this might look like within your IDP, though each provider will differ.
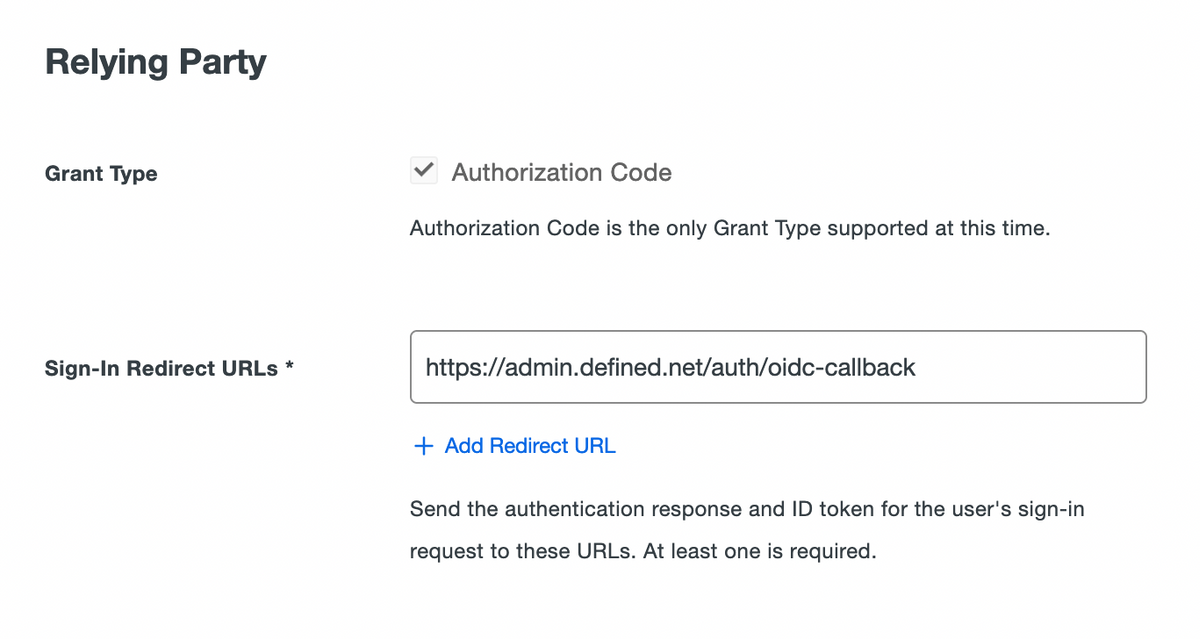
- Admin
- Endpoint
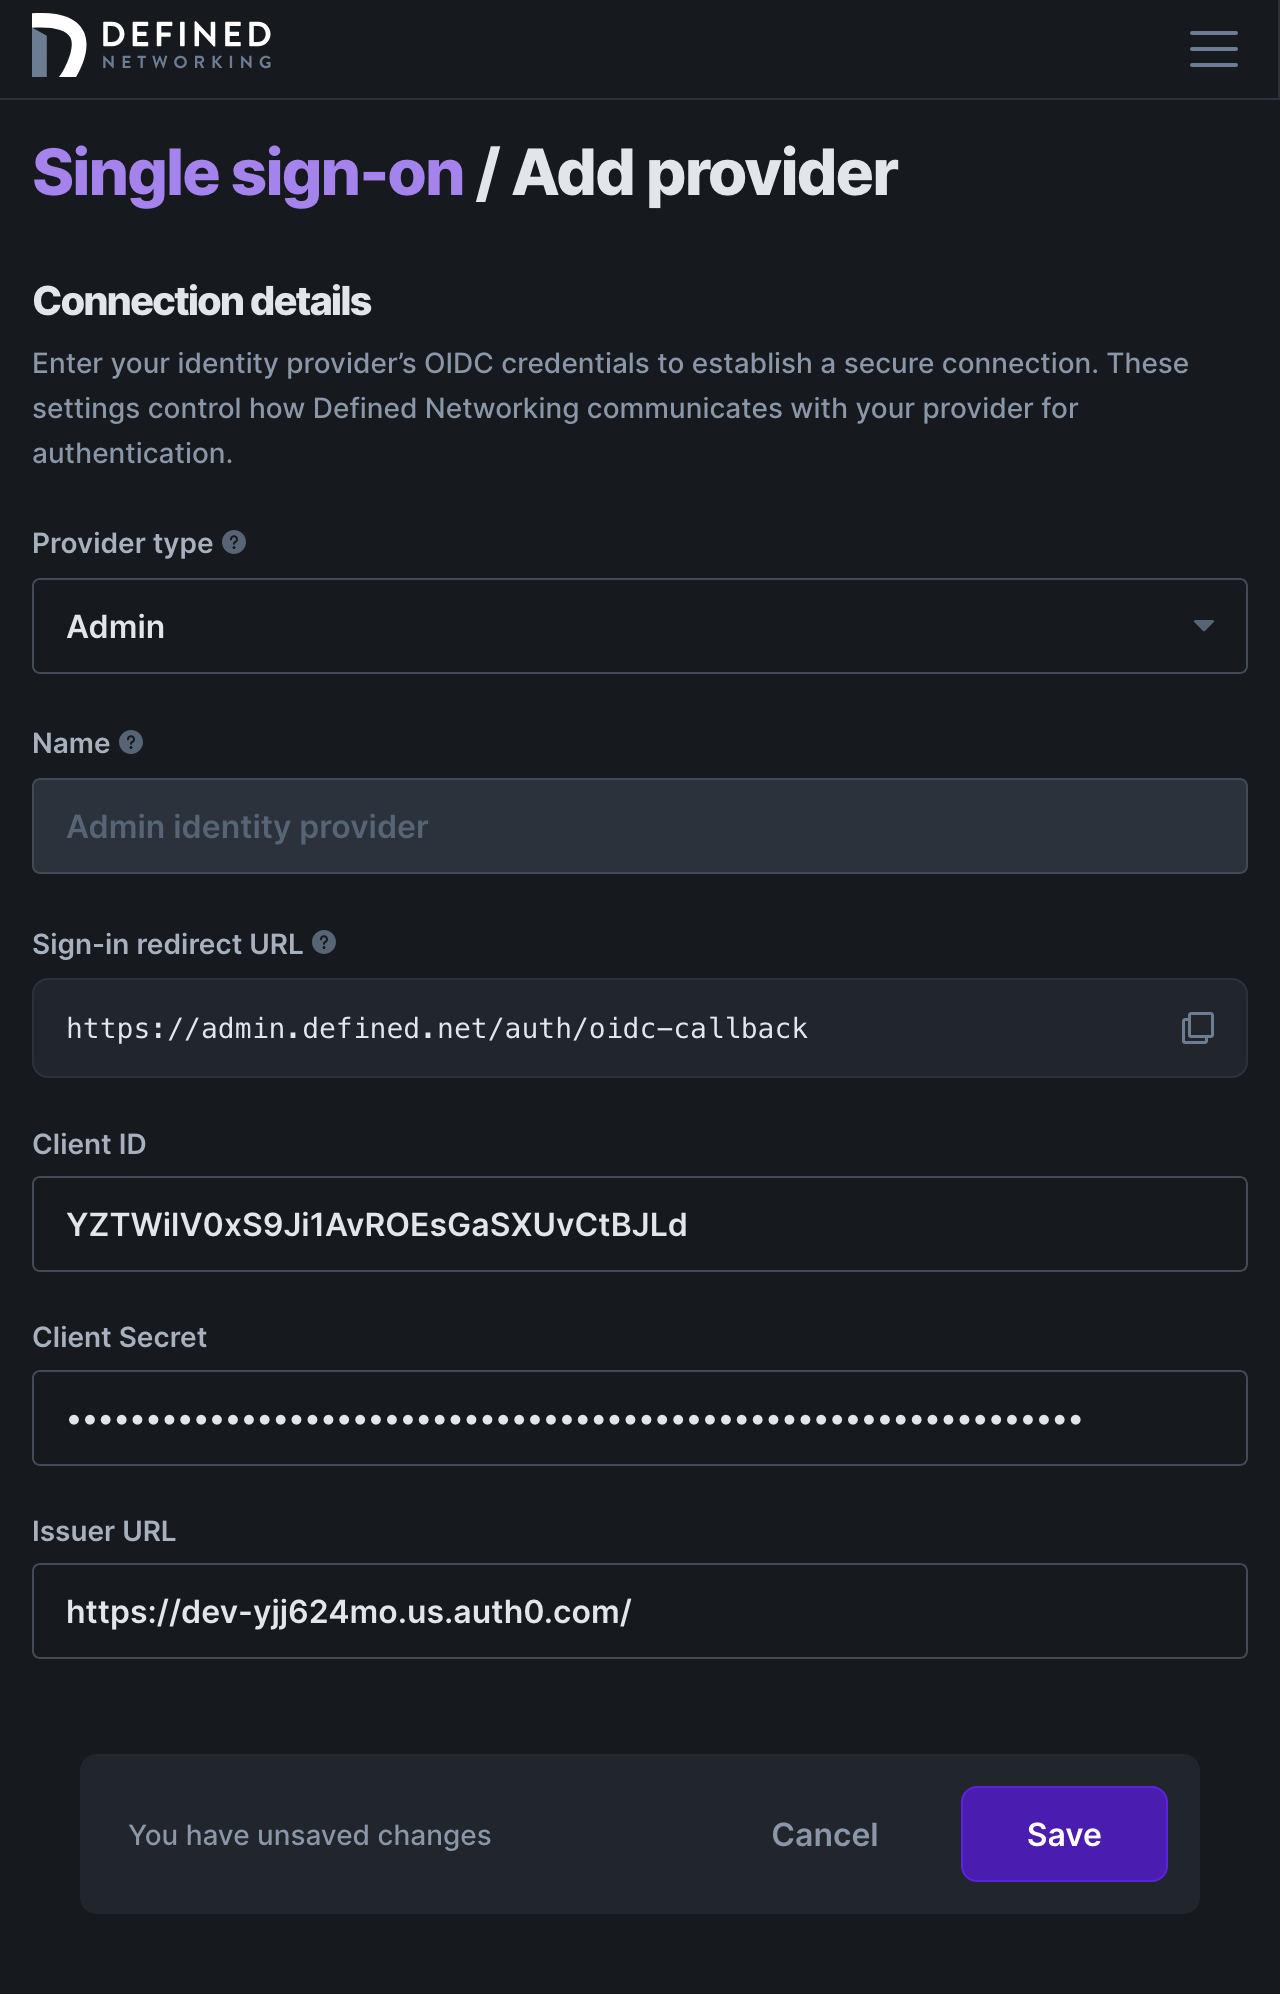
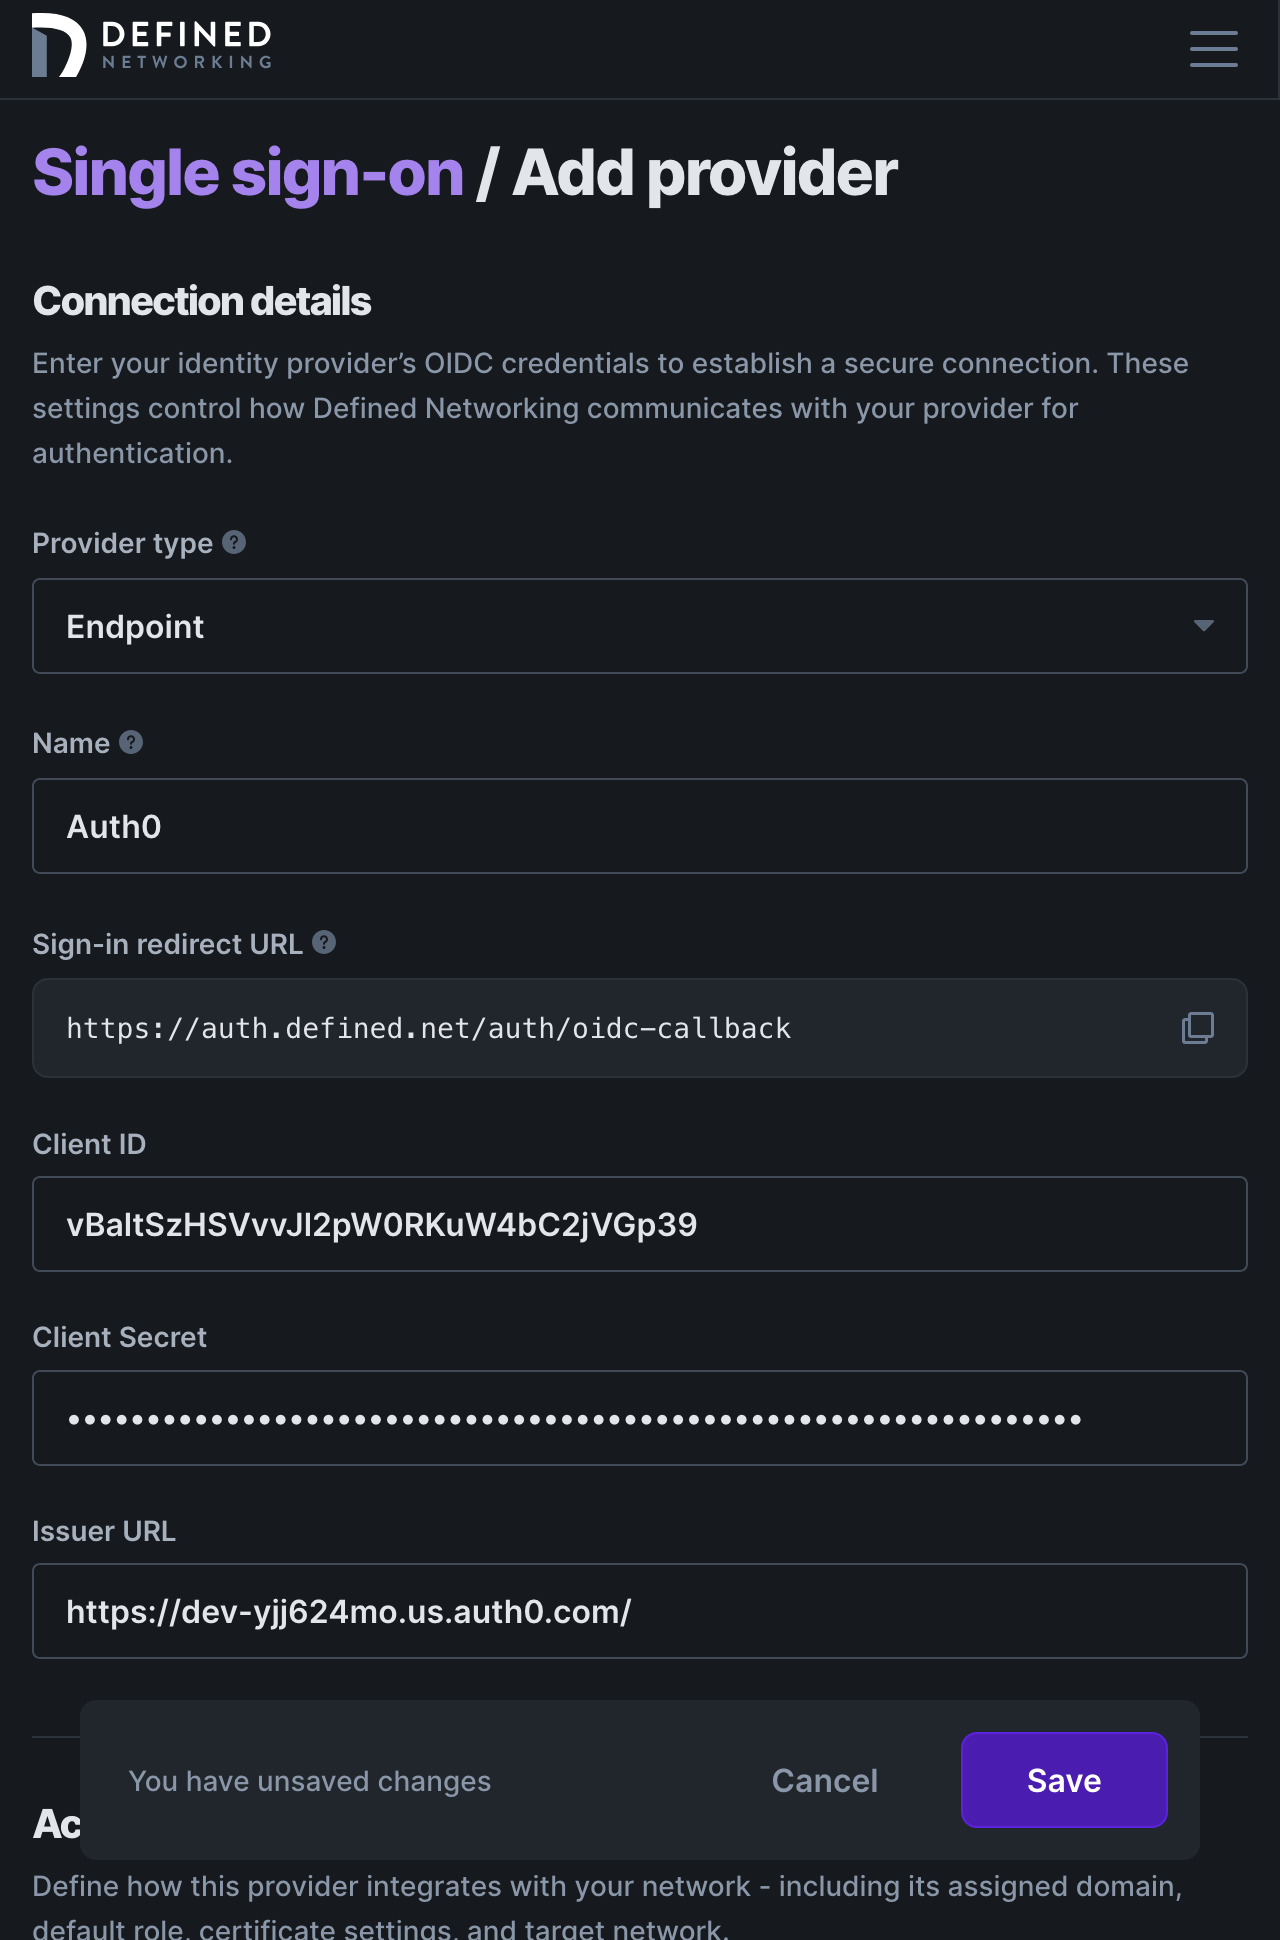
Once your application is created you’ll need to find three pieces of information from within your identity provider and copy them into the configuration page of your Defined Networking admin panel: Client ID, Client Secret, and the Issuer URL.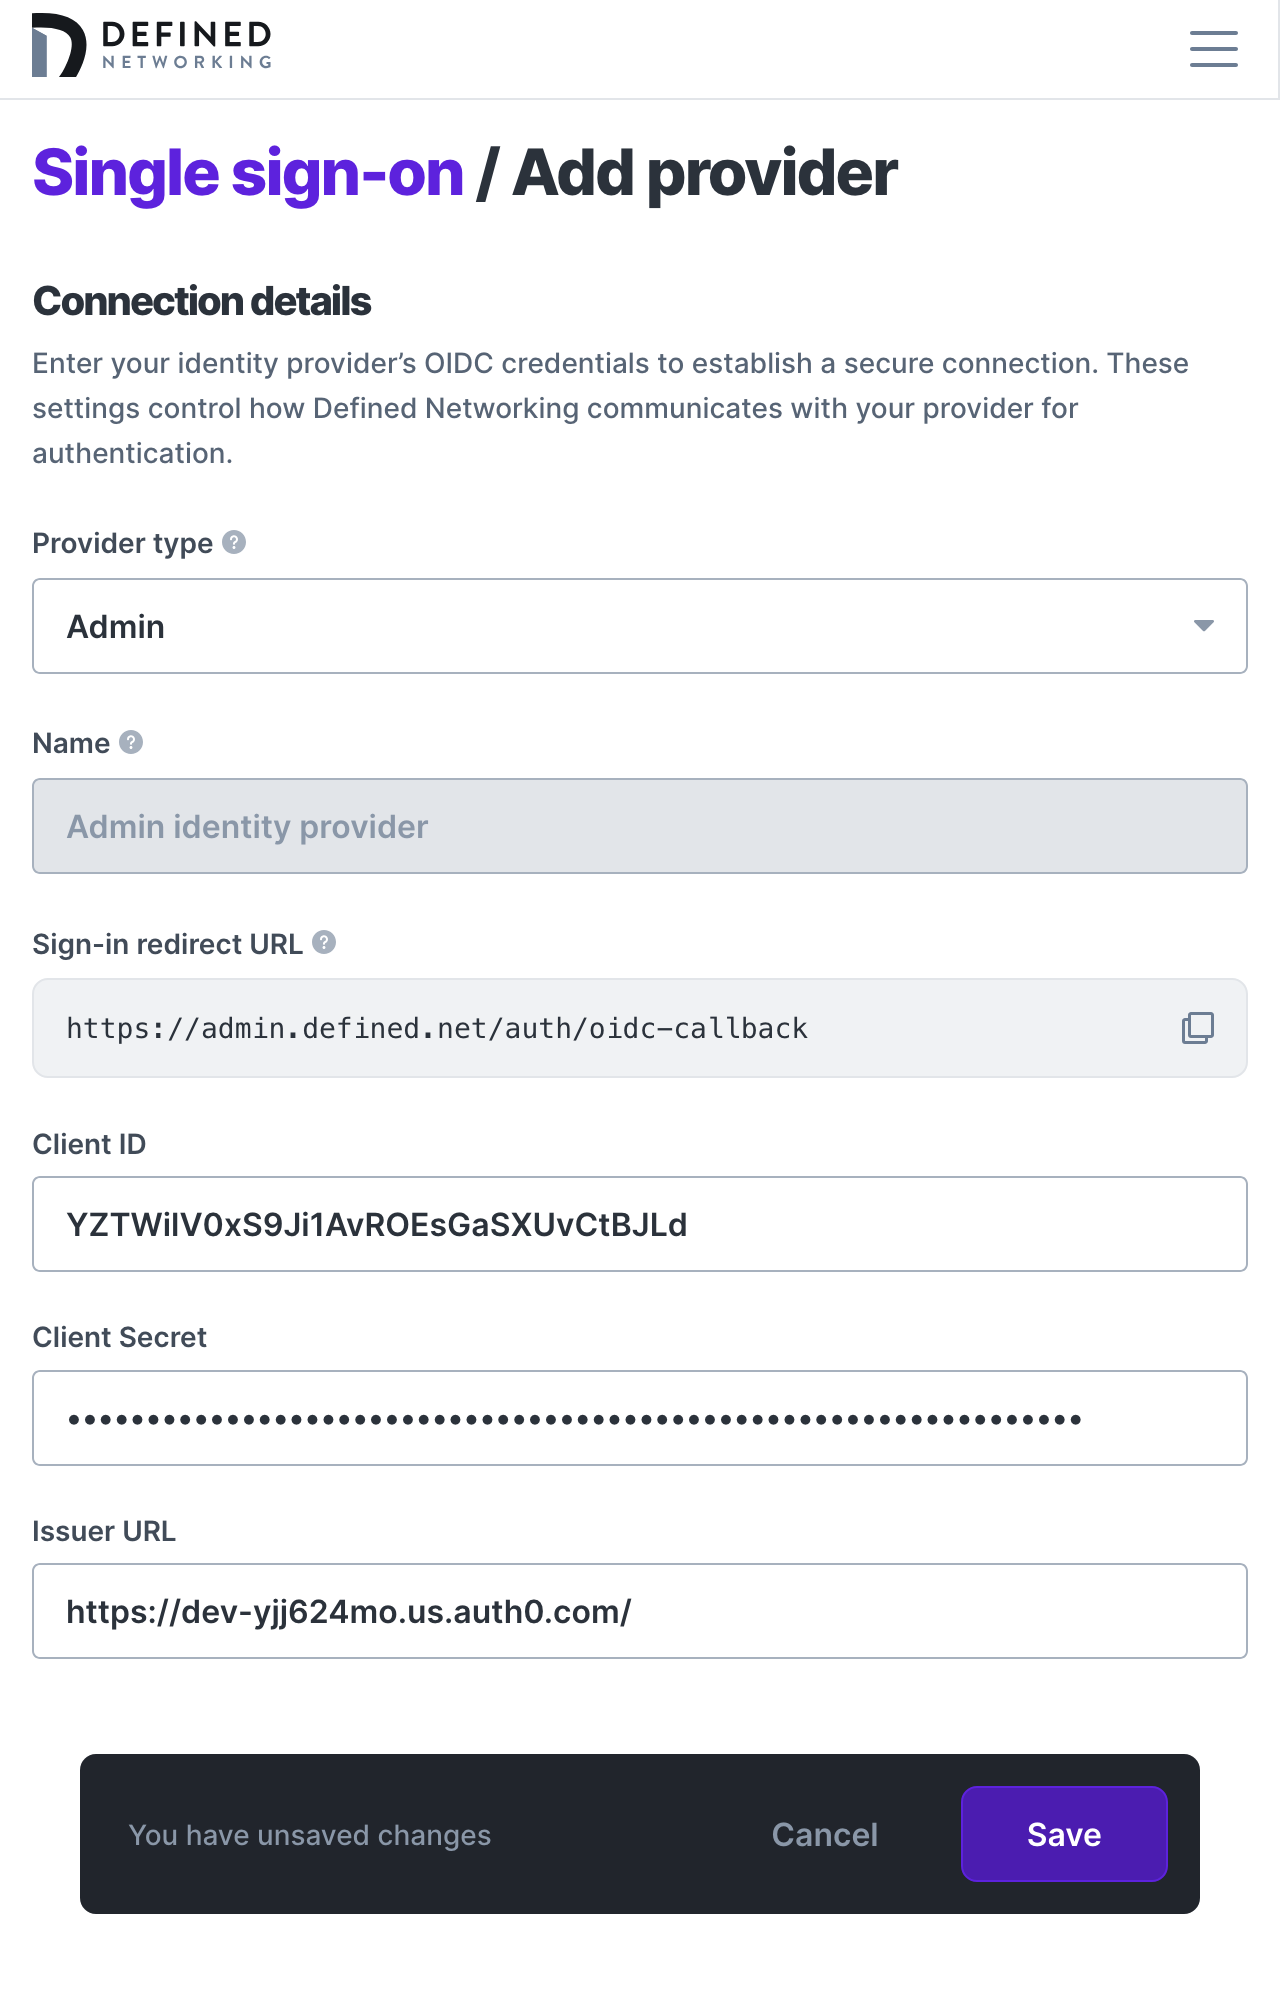
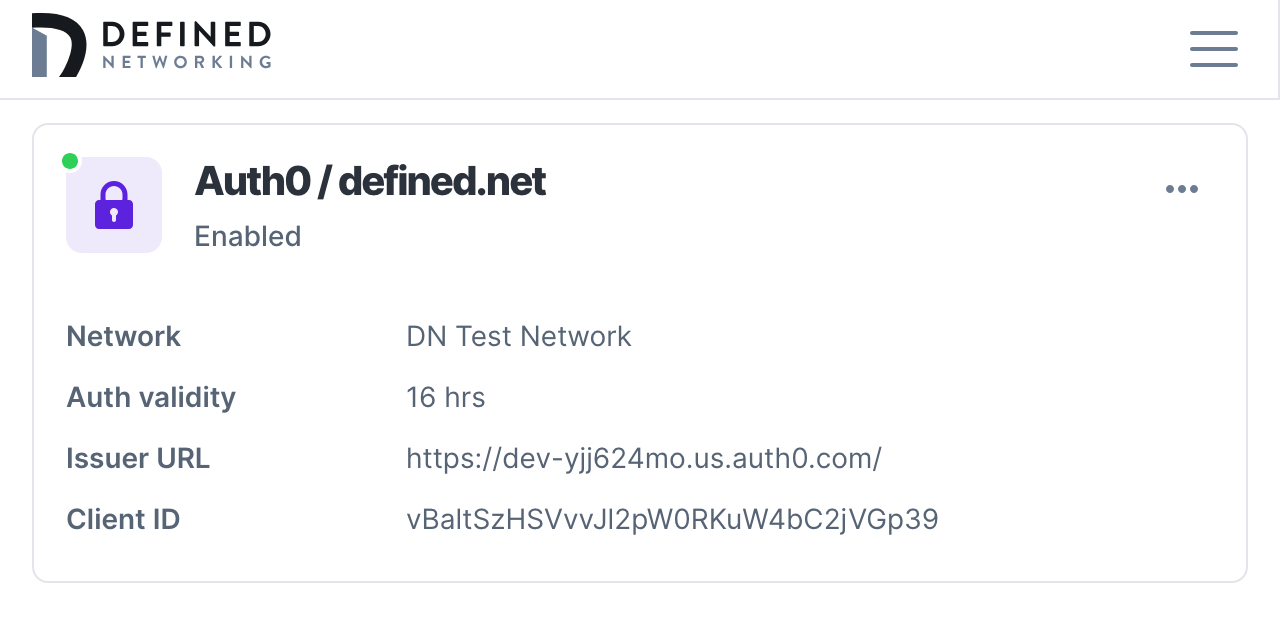
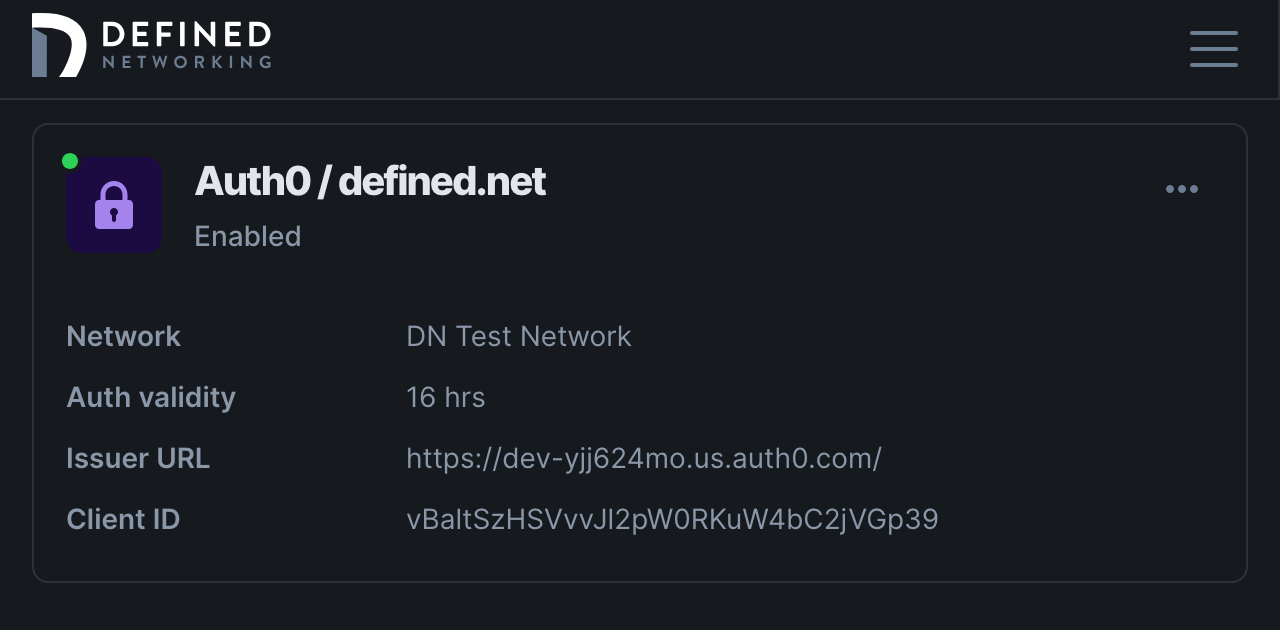
Now click “Save” and if everything was entered correctly you will see your new OIDC provider enabled and ready to accept logins!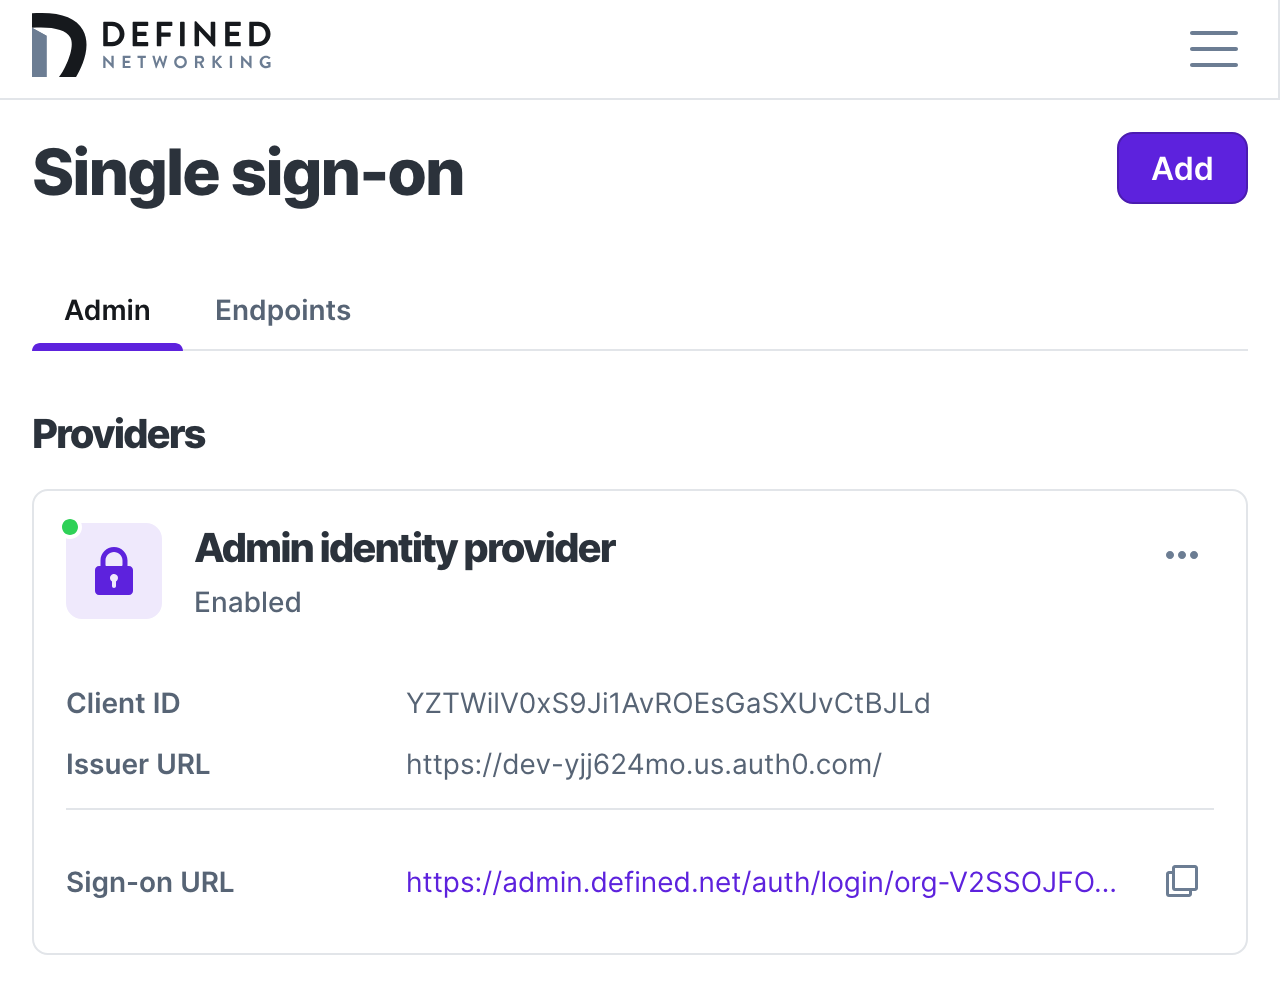

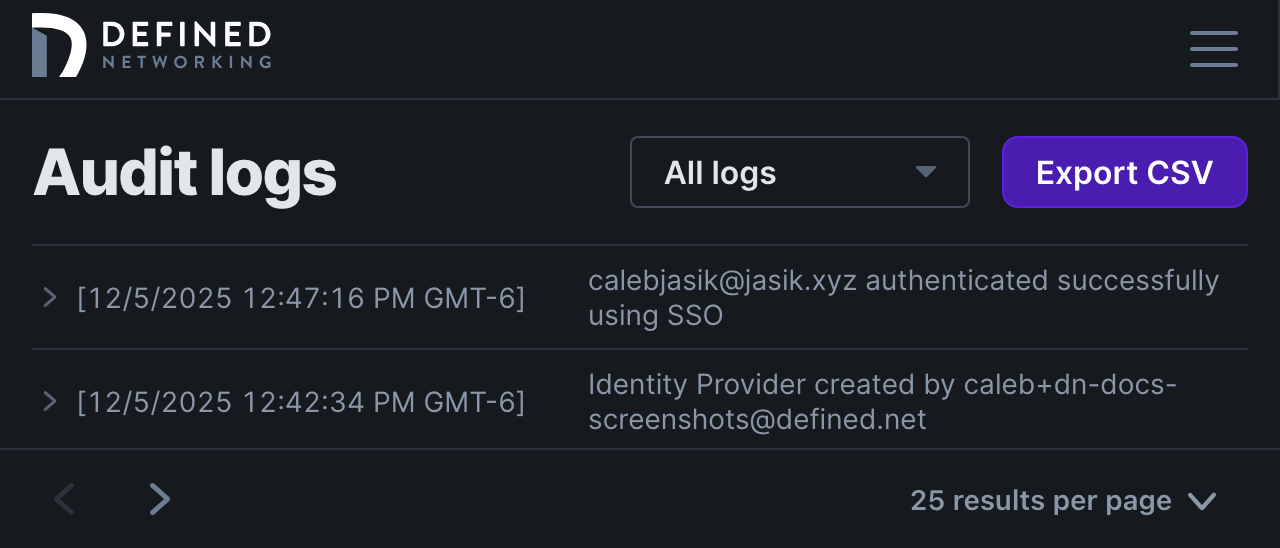
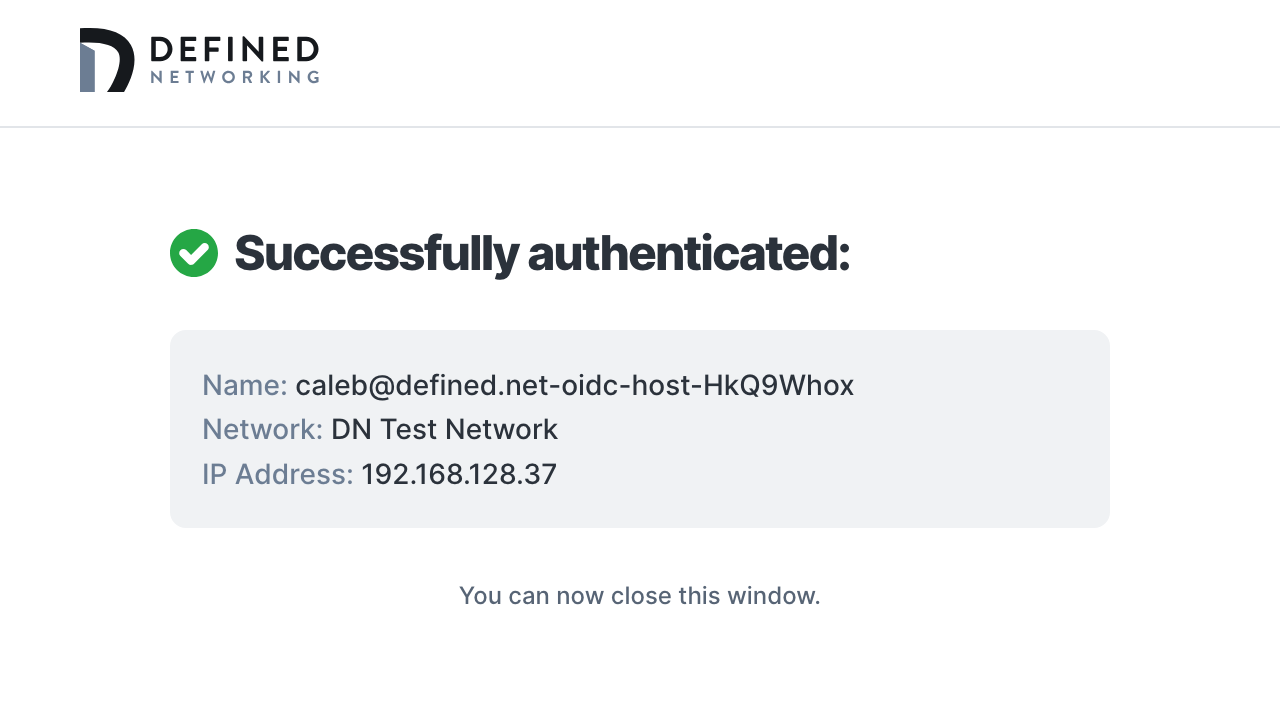
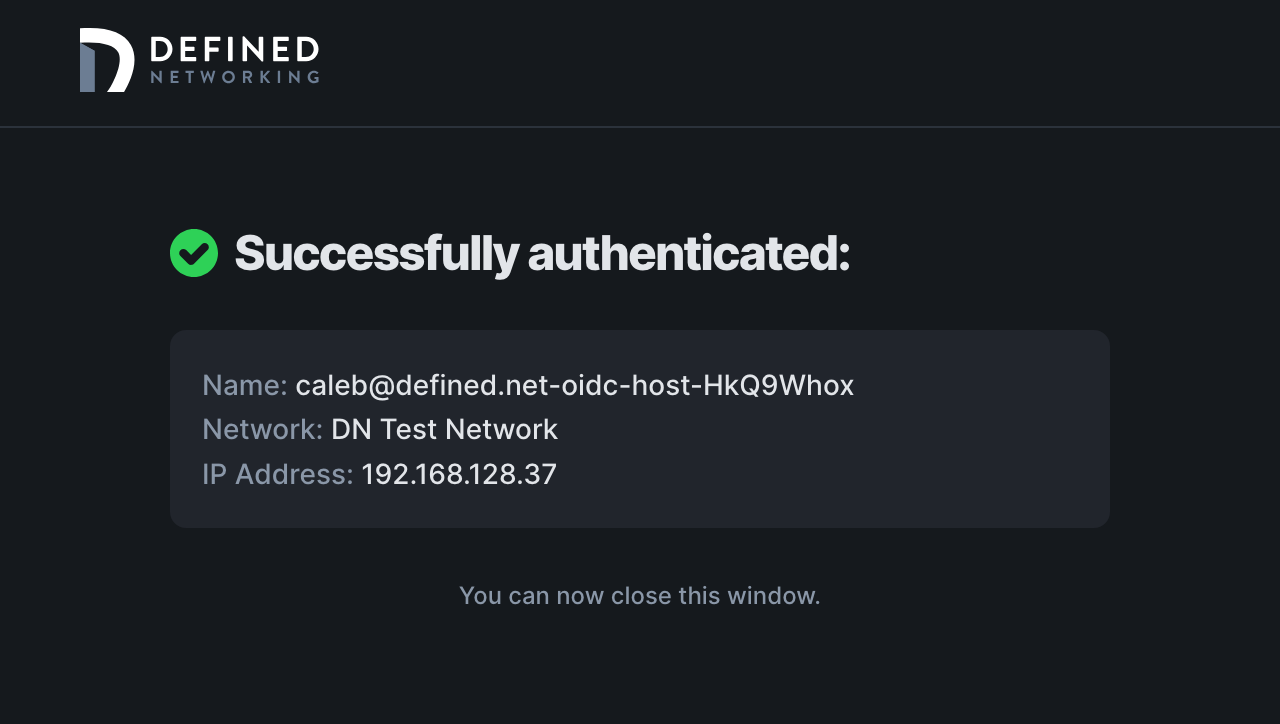
To verify your setup, find the Sign-on URL listed at the top of the page, paste it into your browser and complete the sign-in. After landing back in your Defined Networking account you will be able to see the authentication in your logs, just like any other authentication!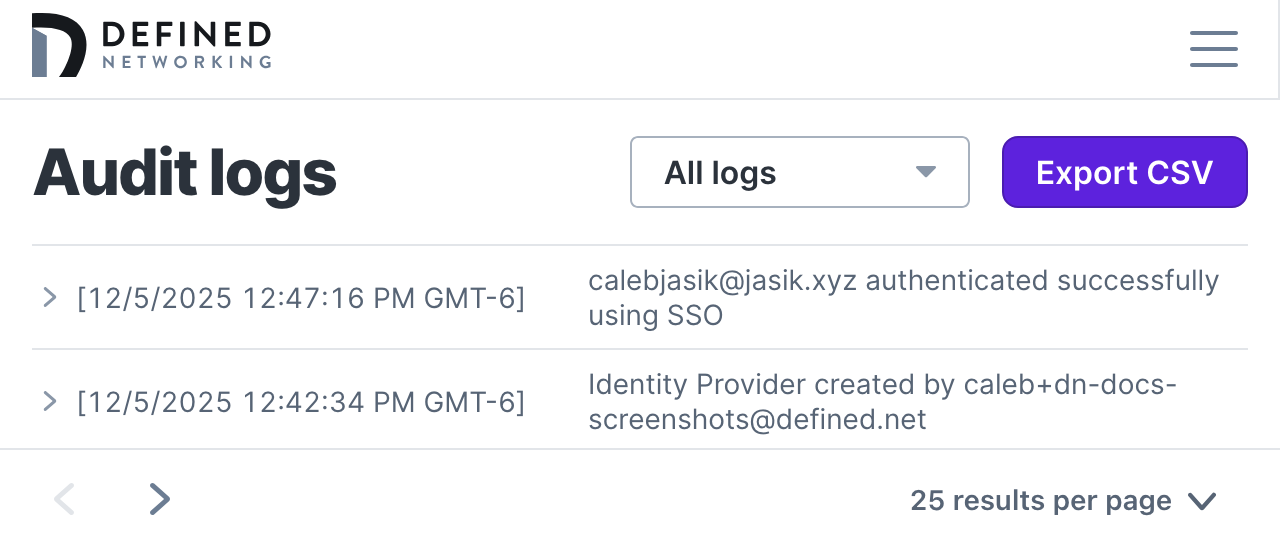
Once your application is created you’ll need to find three pieces of information from within your identity provider and copy them into the configuration page of your Defined Networking admin panel: Client ID, Client Secret, and the Issuer URL.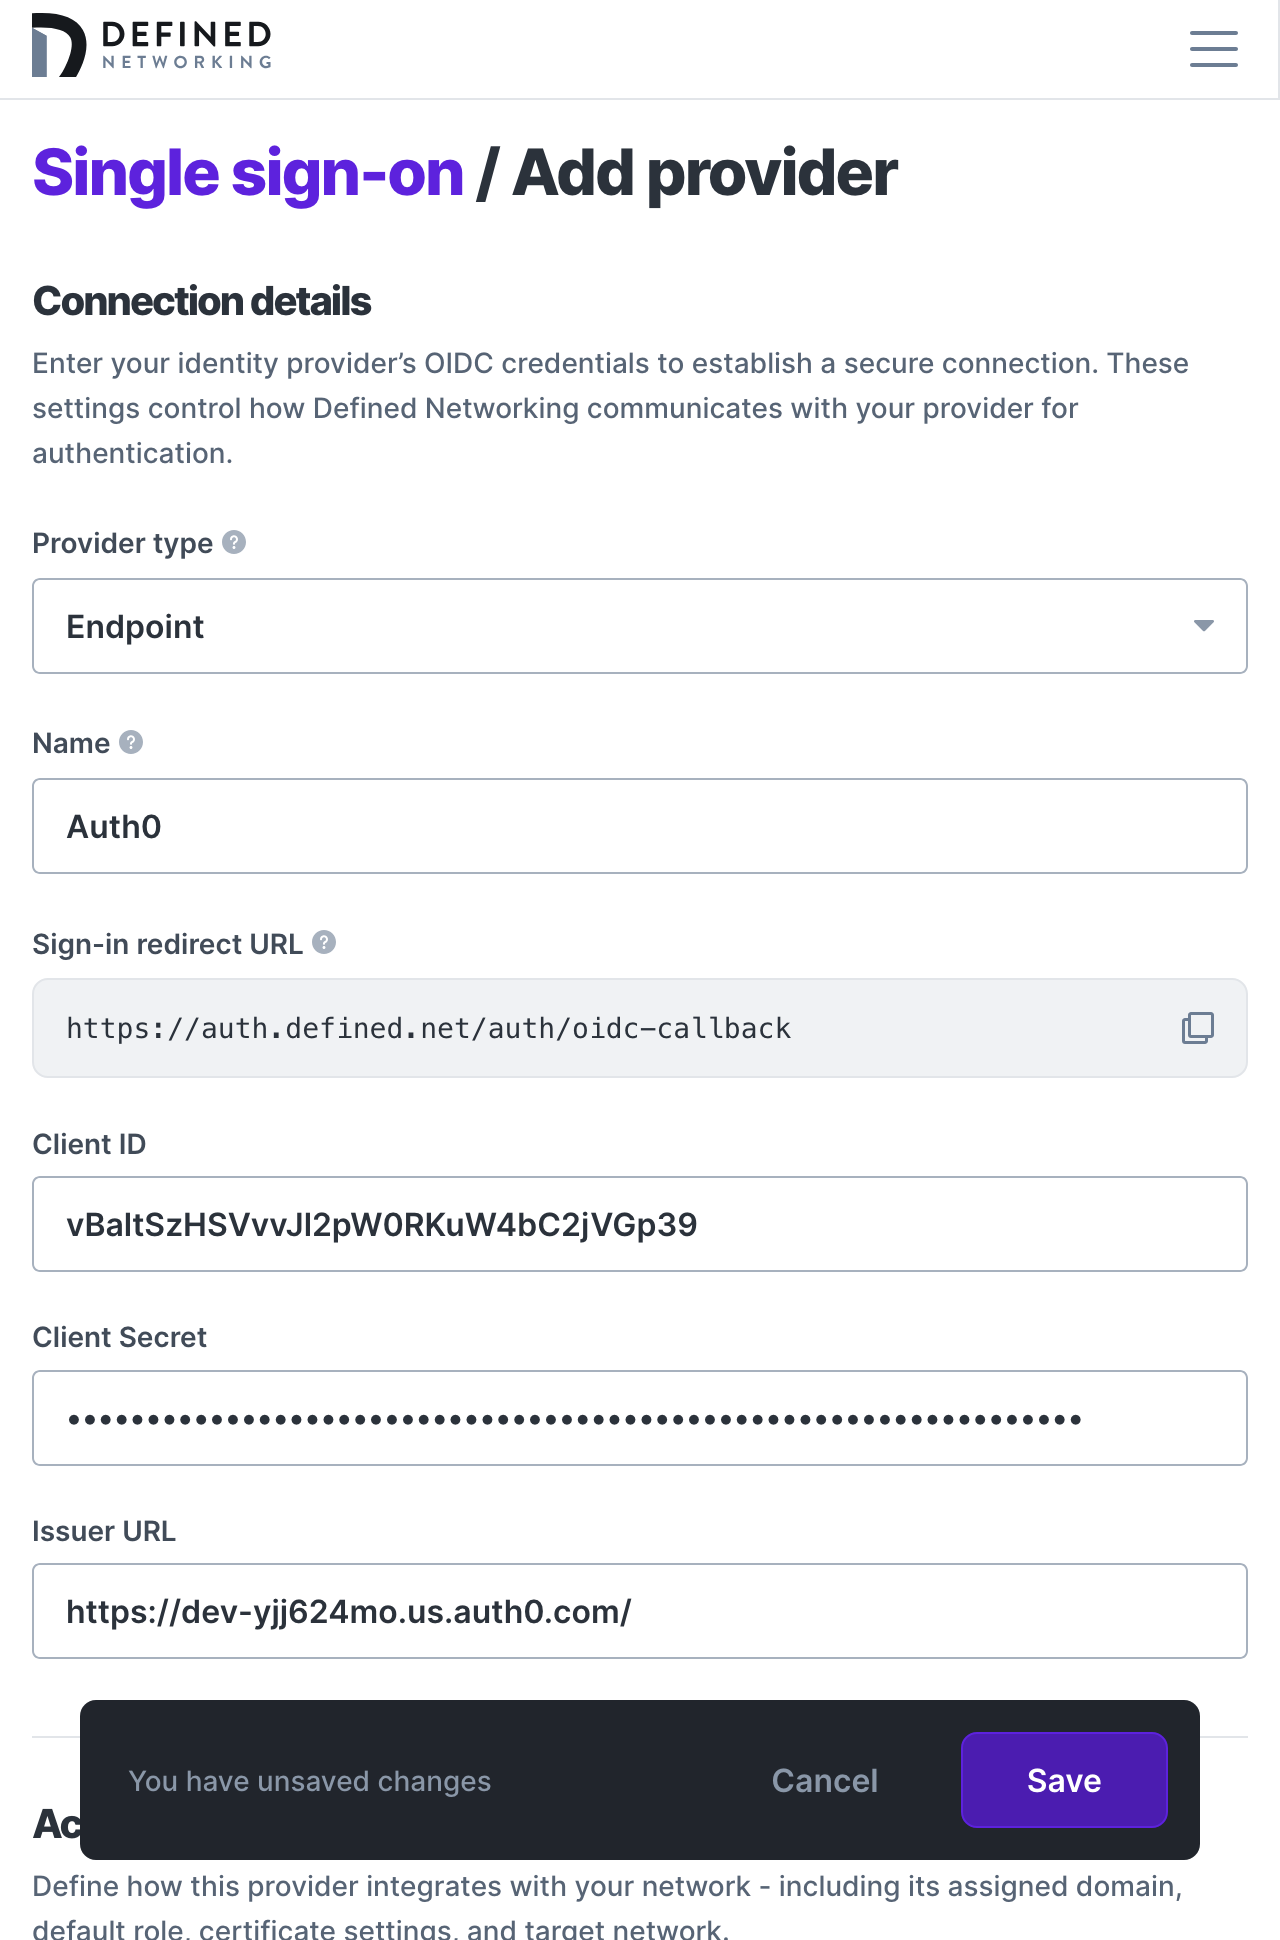
Scroll down and add the domain name for the email addresses allowed to auth with your IDP. Select a network if you have more than one, and choose a role to assign or create a new one for endpoint devices. You can also choose to adjust the amount of time that users will stay logged in, we've chosen a default of 16 hours to allow for a full workday of access.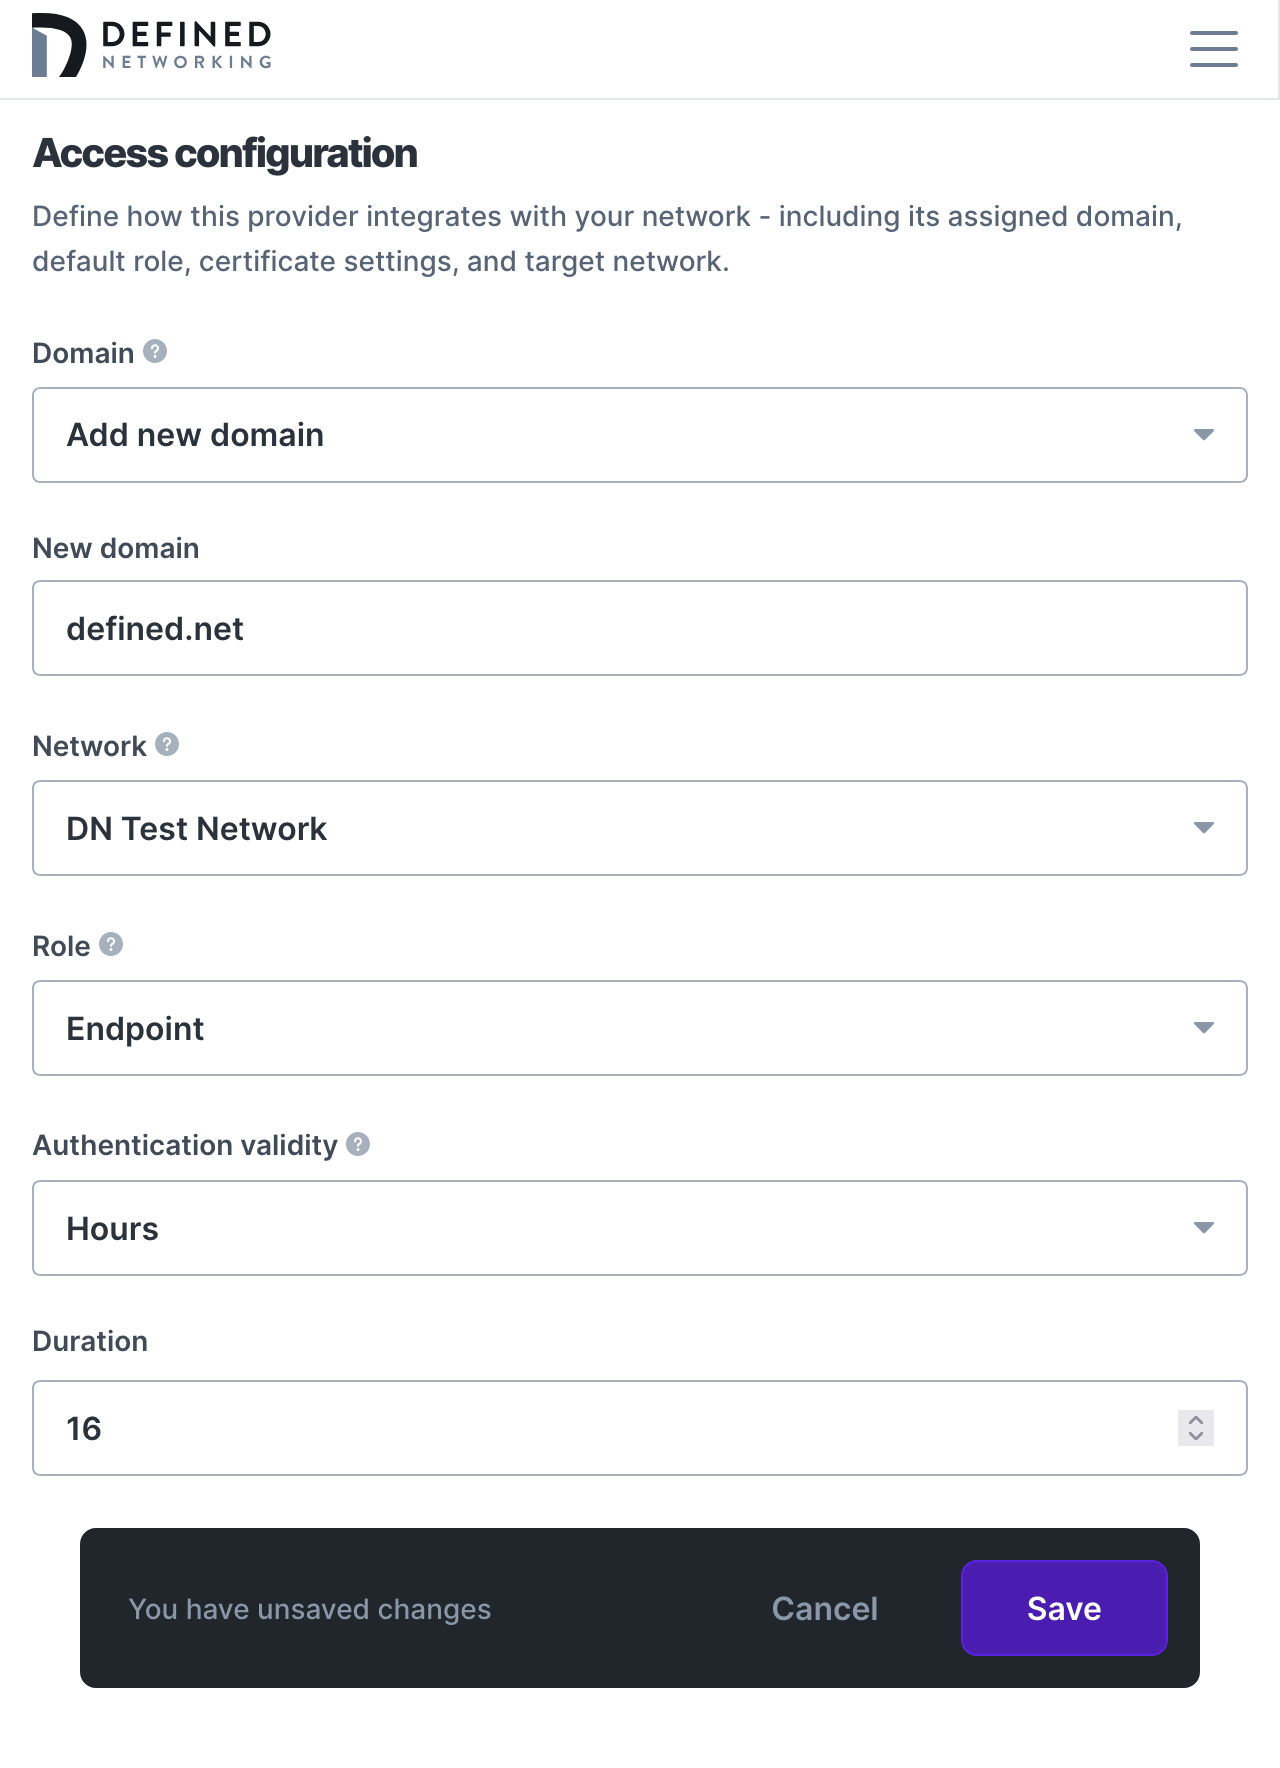

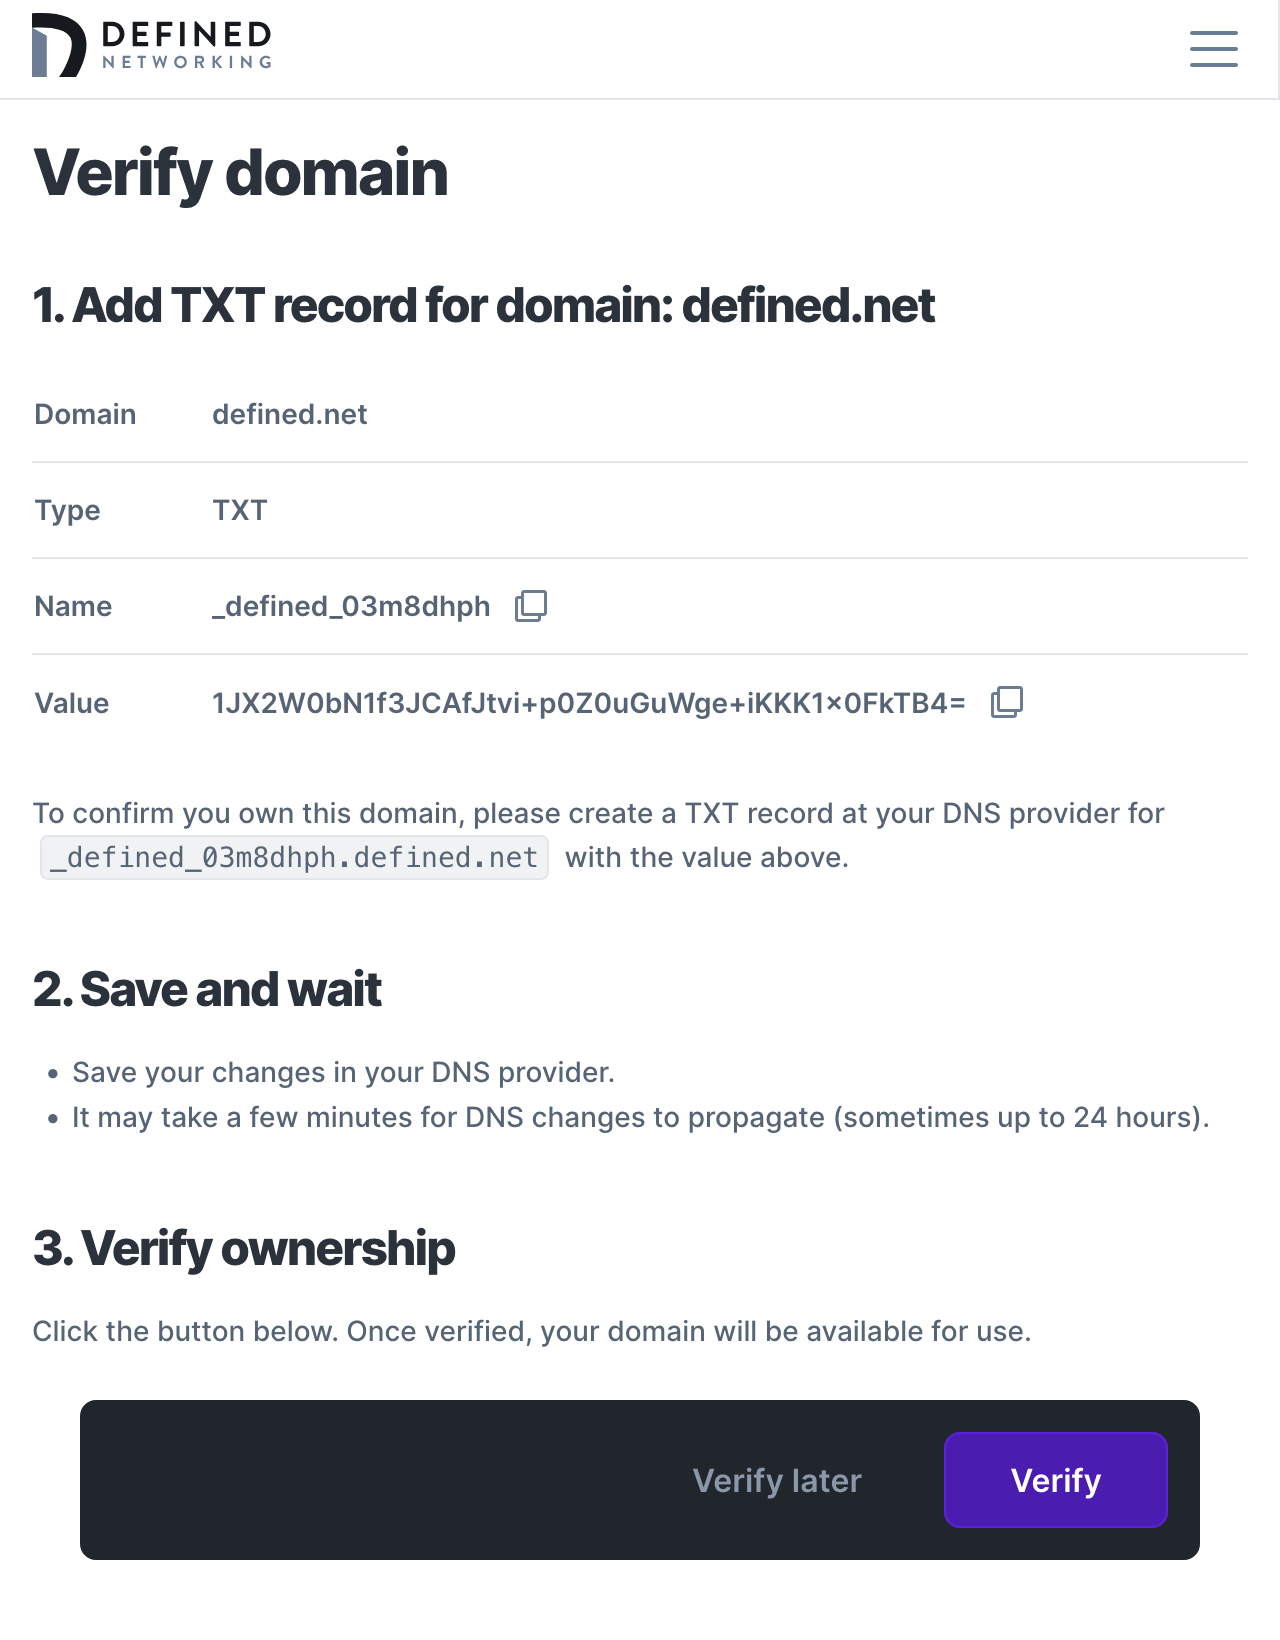
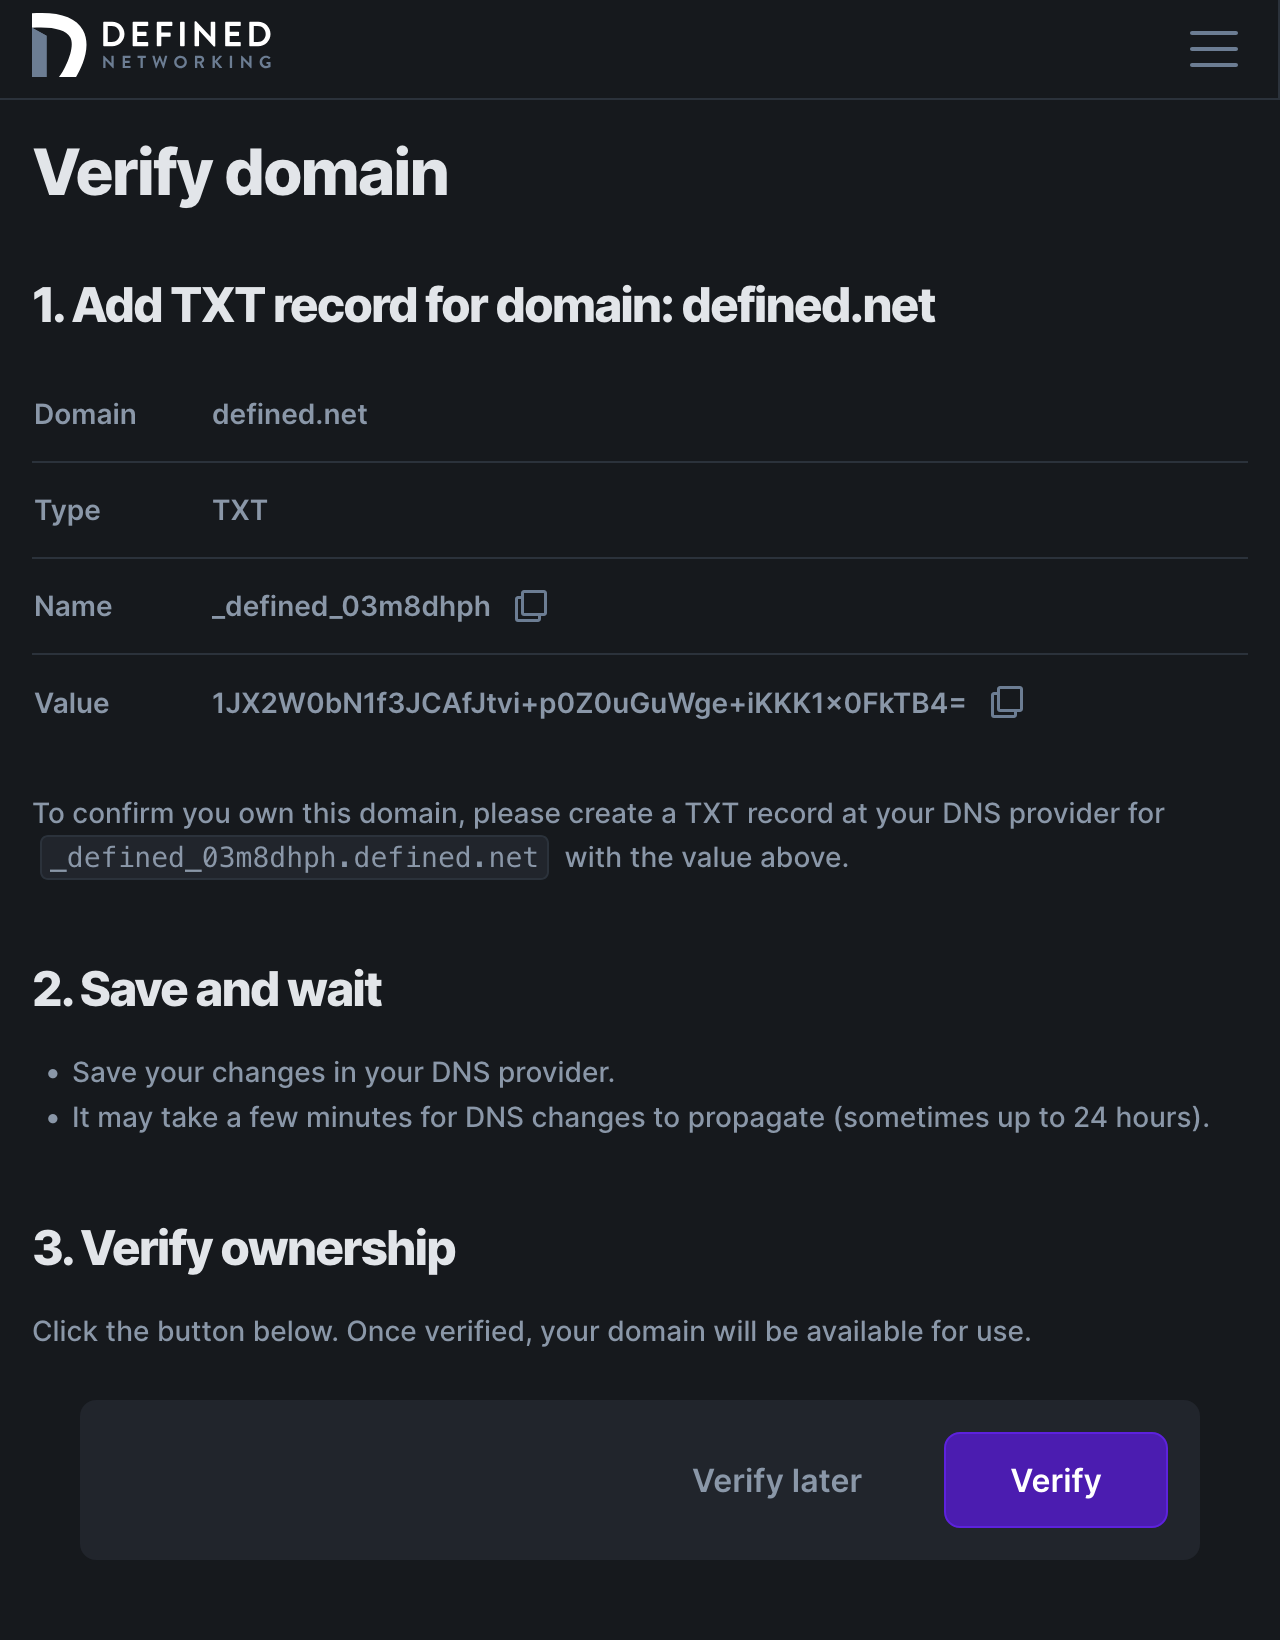
Click “Save” and we'll continue to domain verification. In your DNS provider, create a new TXT record with a name and value that matches the values provided. Then click “Verify” to validate your changes. It may take anywhere from 15 minutes to 24 hours for your DNS changes to propagate to us, so feel free to leave this page and come back later. You can always click “Verify later” to continue setup later.
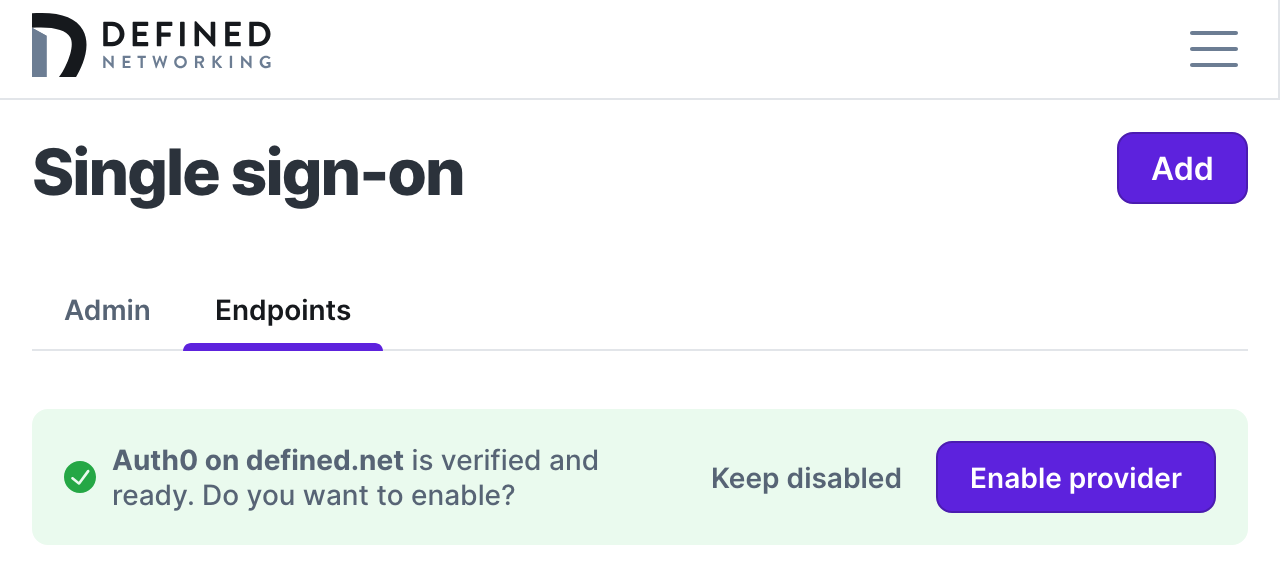
Now click “Verify” and you'll be put on the main page with the ability to enable your endpoint SSO after your domain was verified!

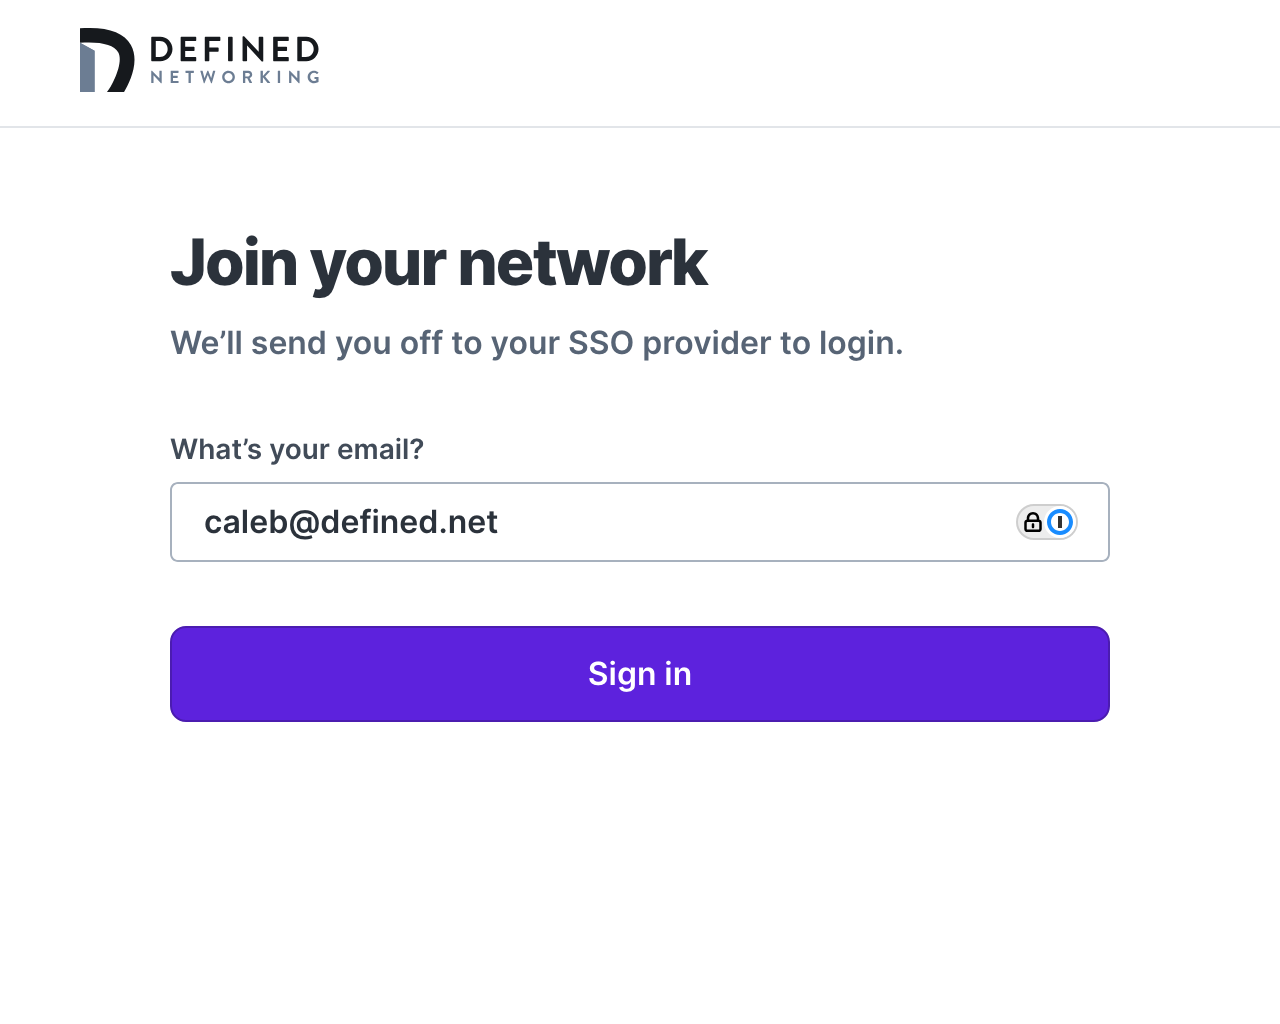
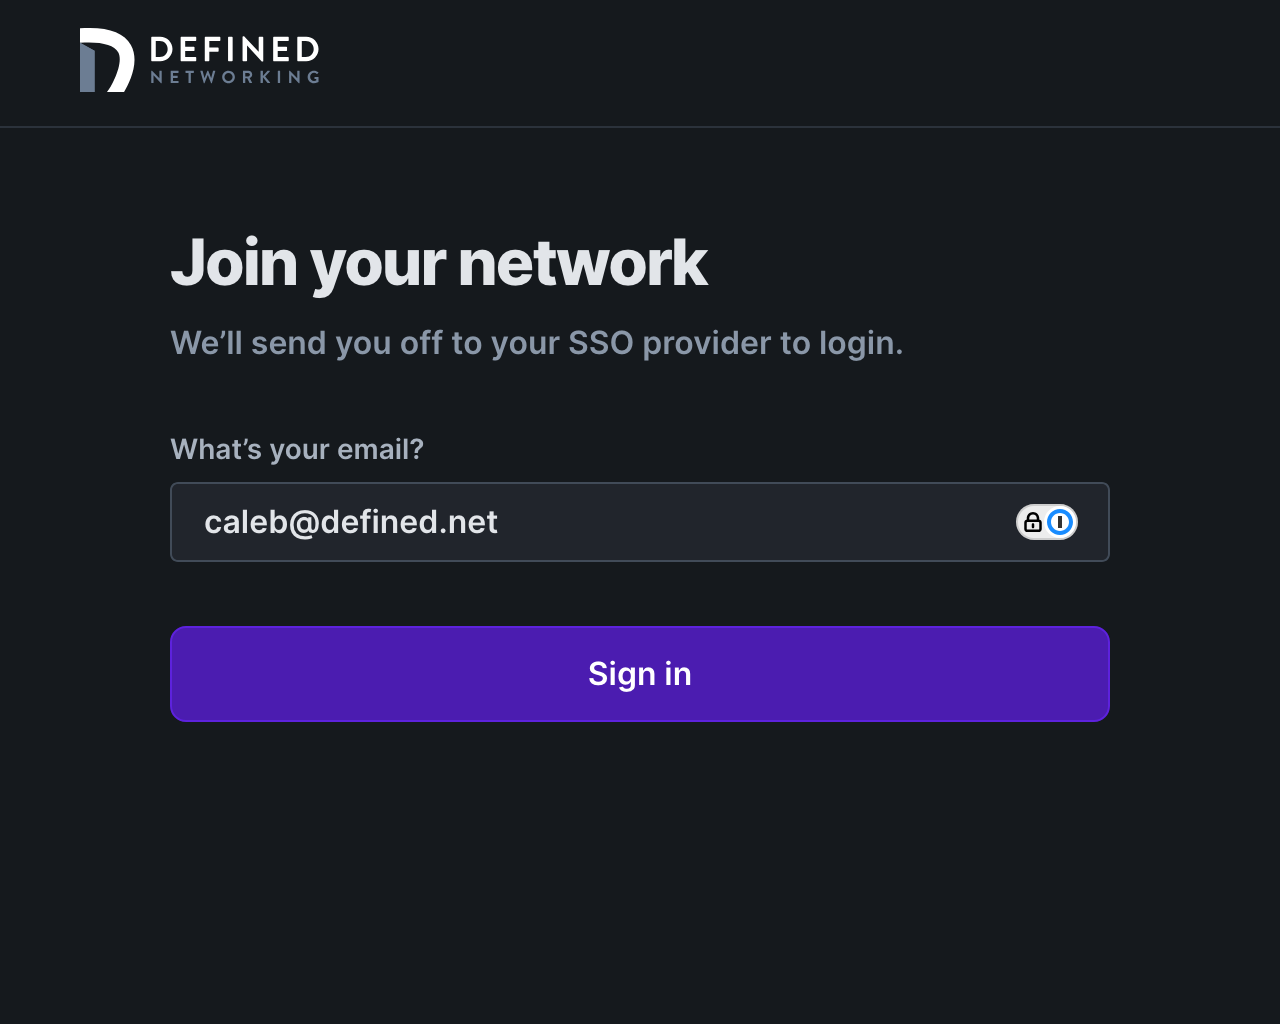
To verify your setup, open DNClient Desktop, click “Join network”, and then "Authenticate with email" in the window that pops open. In the browser window that opens, enter your email address you will use to authenticate with your IDP. We'll redirect you to login, and after you get a successful login screen, you should see the host details in the context menu for DNClient Desktop, and a new host that contains your email address in the host name in the admin panel.
Congratulations on configuring SSO for your Managed Nebula network!
Identity provider-specific instructions
Google Workspaces
Setting up OIDC for Google Workspaces is not intuitive and runs the risk of accidentally opening your Defined Networking account to anyone with a Google email address, so we will address it here in detail.
-
Create a new project in your Google Developers Console, after logging in as an administrator.
-
Open the Credentials page in the Google API Console and choose the project you just created in the upper left corner (if not already selected).
-
Click the "Configure consent screen" button, then "Get started".
- Enter any app name you like, for instance, "Defined Networking SSO". You may also need to provide an email address for your SSO users to contact if they have trouble logging in.
- IMPORTANT: Choose "Internal" as the audience, which will limit login to only those users in your organization.

- Finish setting up the consent screen and save.
-
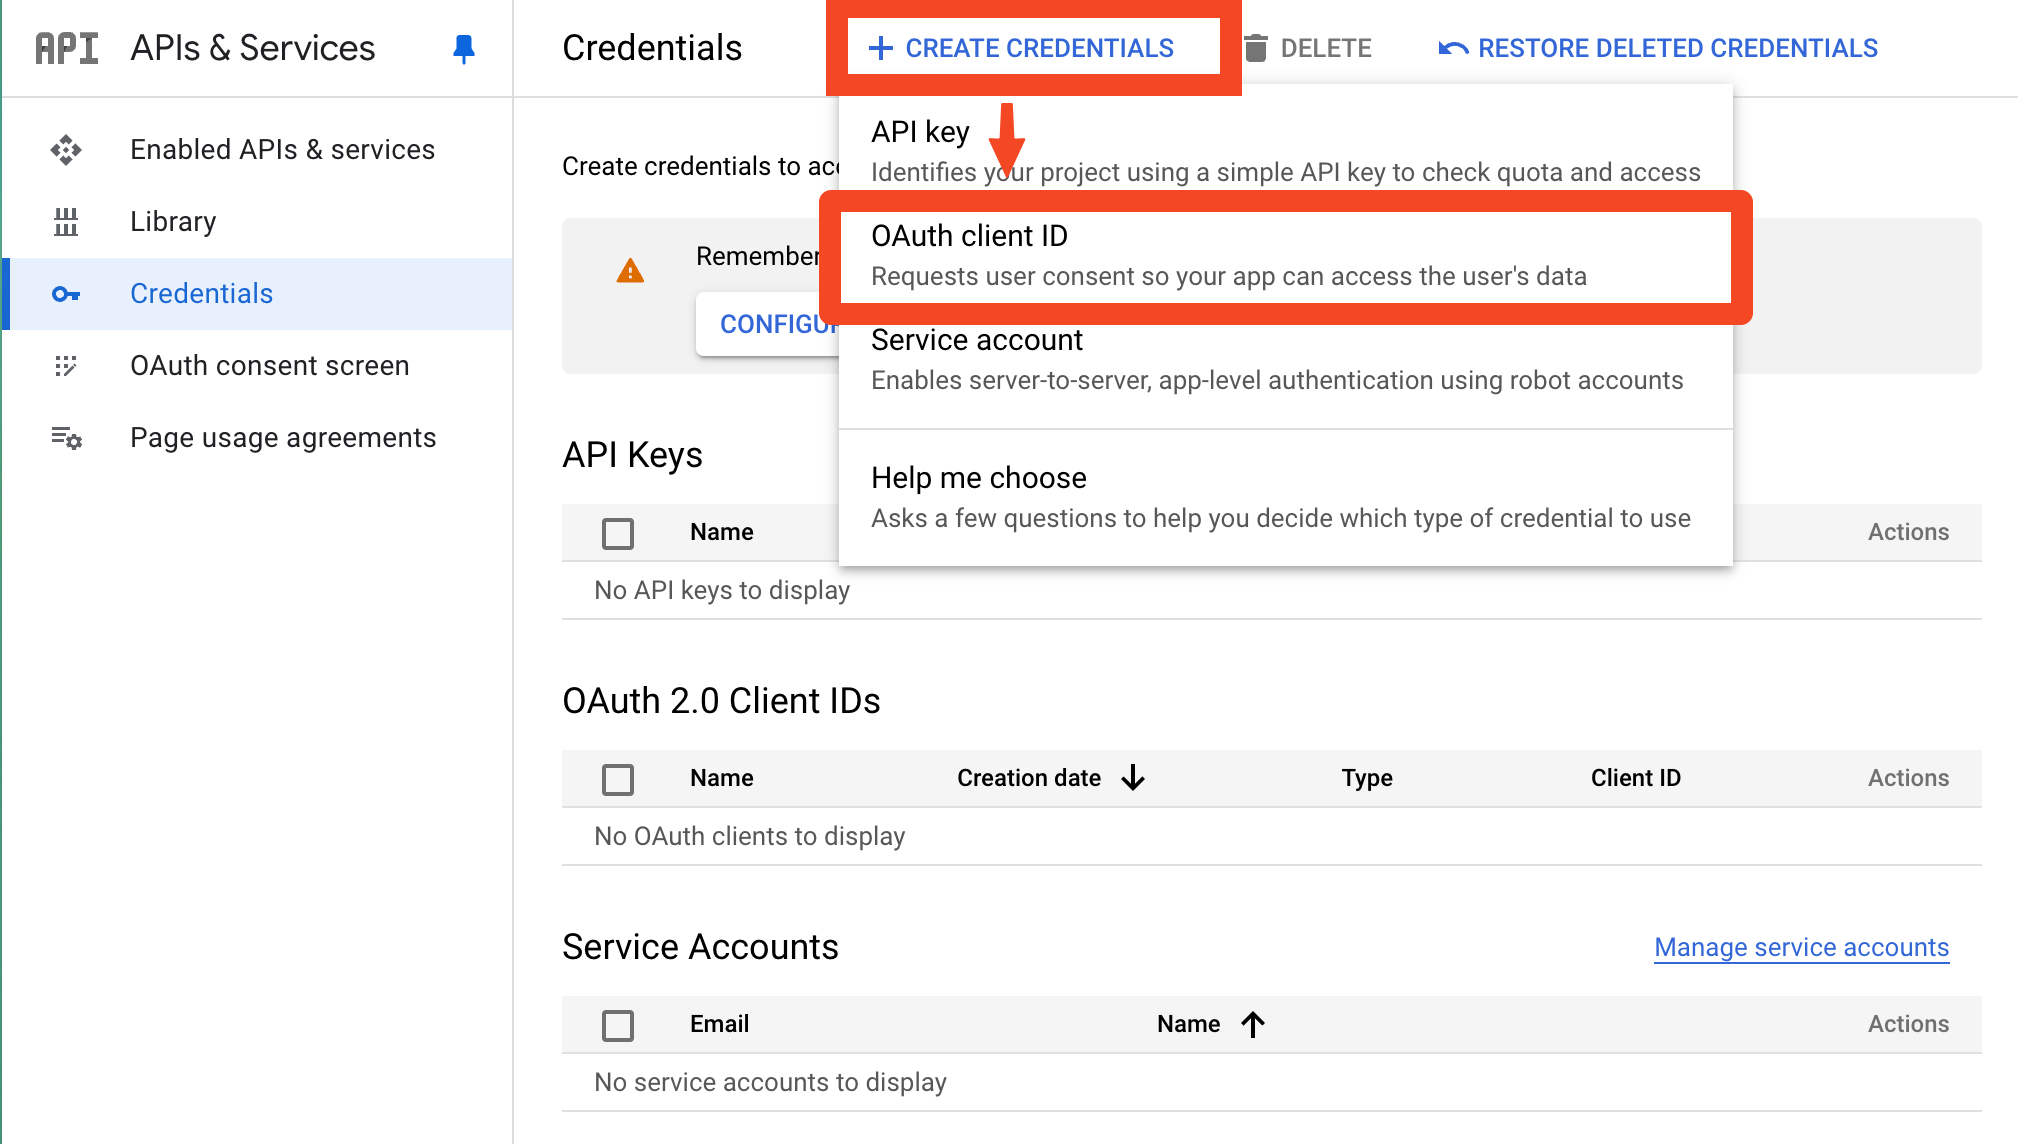
Return to the Credentials page and click the "+ Create Credentials" button, and choose "OAuth client ID" from the dropdown.
-
Pick "Web application" and give it a name like "Defined Networking Admin".
-
Underneath "Authorized redirect URIs", click the "+ Add URI" button and enter
https://admin.defined.net/auth/oidc-callback -
Click the "Create" button
-
You will be shown a Client ID and a Client secret. These should be entered in their respective fields in the SSO setup page of the Managed Nebula admin panel, along with the Issuer URL of
https://accounts.google.com. -
Finally, save the Managed Nebula SSO configuration. You should now be able to log in to the admin panel using the organization-specific Sign-on URL shown on the page. Visit that link in a private browser window to test it out.
As always, feel free to contact us if you have any difficulty or questions.